Headsails, 150, 130 what’s it mean?

Image

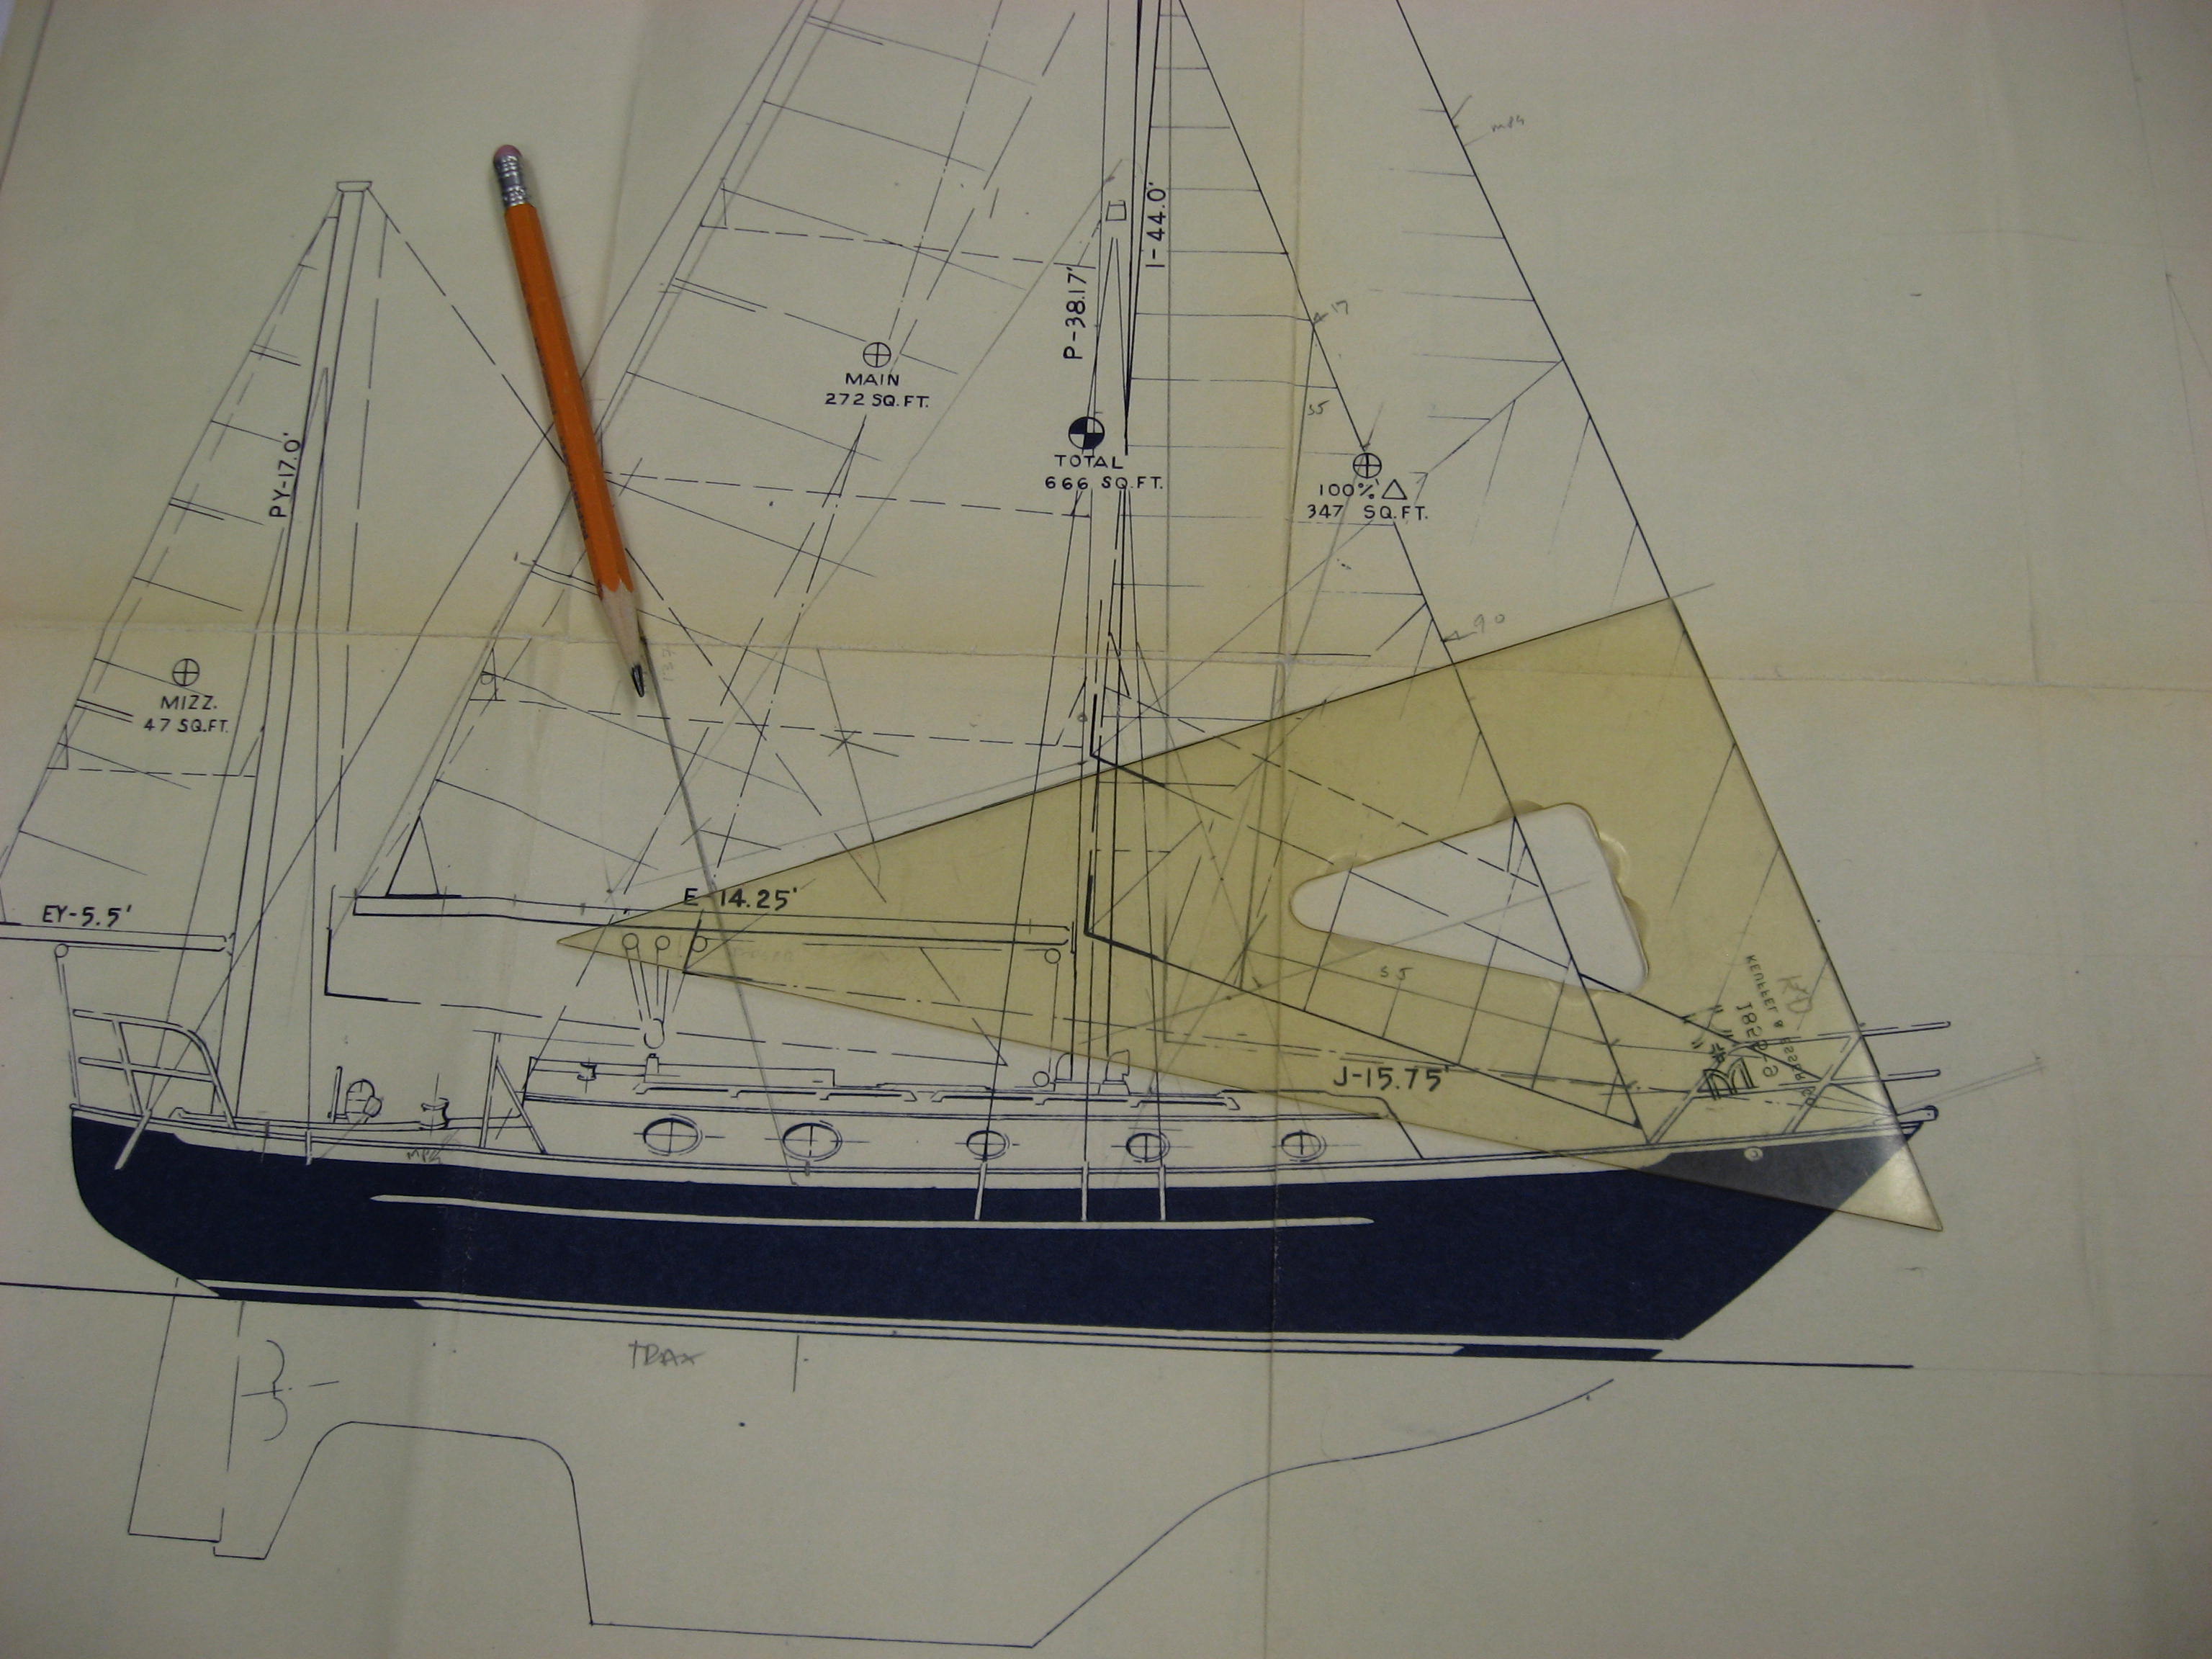
One of the most quoted yet least understood phrases used in discussions about headsails, their size, is the “LP”. Customers and prospects alike use phrases like 130, 150 or 100 regularly. But when I inquire as to their understanding of the number, it is rare for the average weekend sailor to get it defined correctly. It is actually very simple. The initials L.P. stand for Luff Perpendicular, usually written as LP. This is a dimension, but not an edge, of the triangle that is a headsail. Its definition is:

“A line drawn at right angles to the luff and that passes through the clew of the sail.”

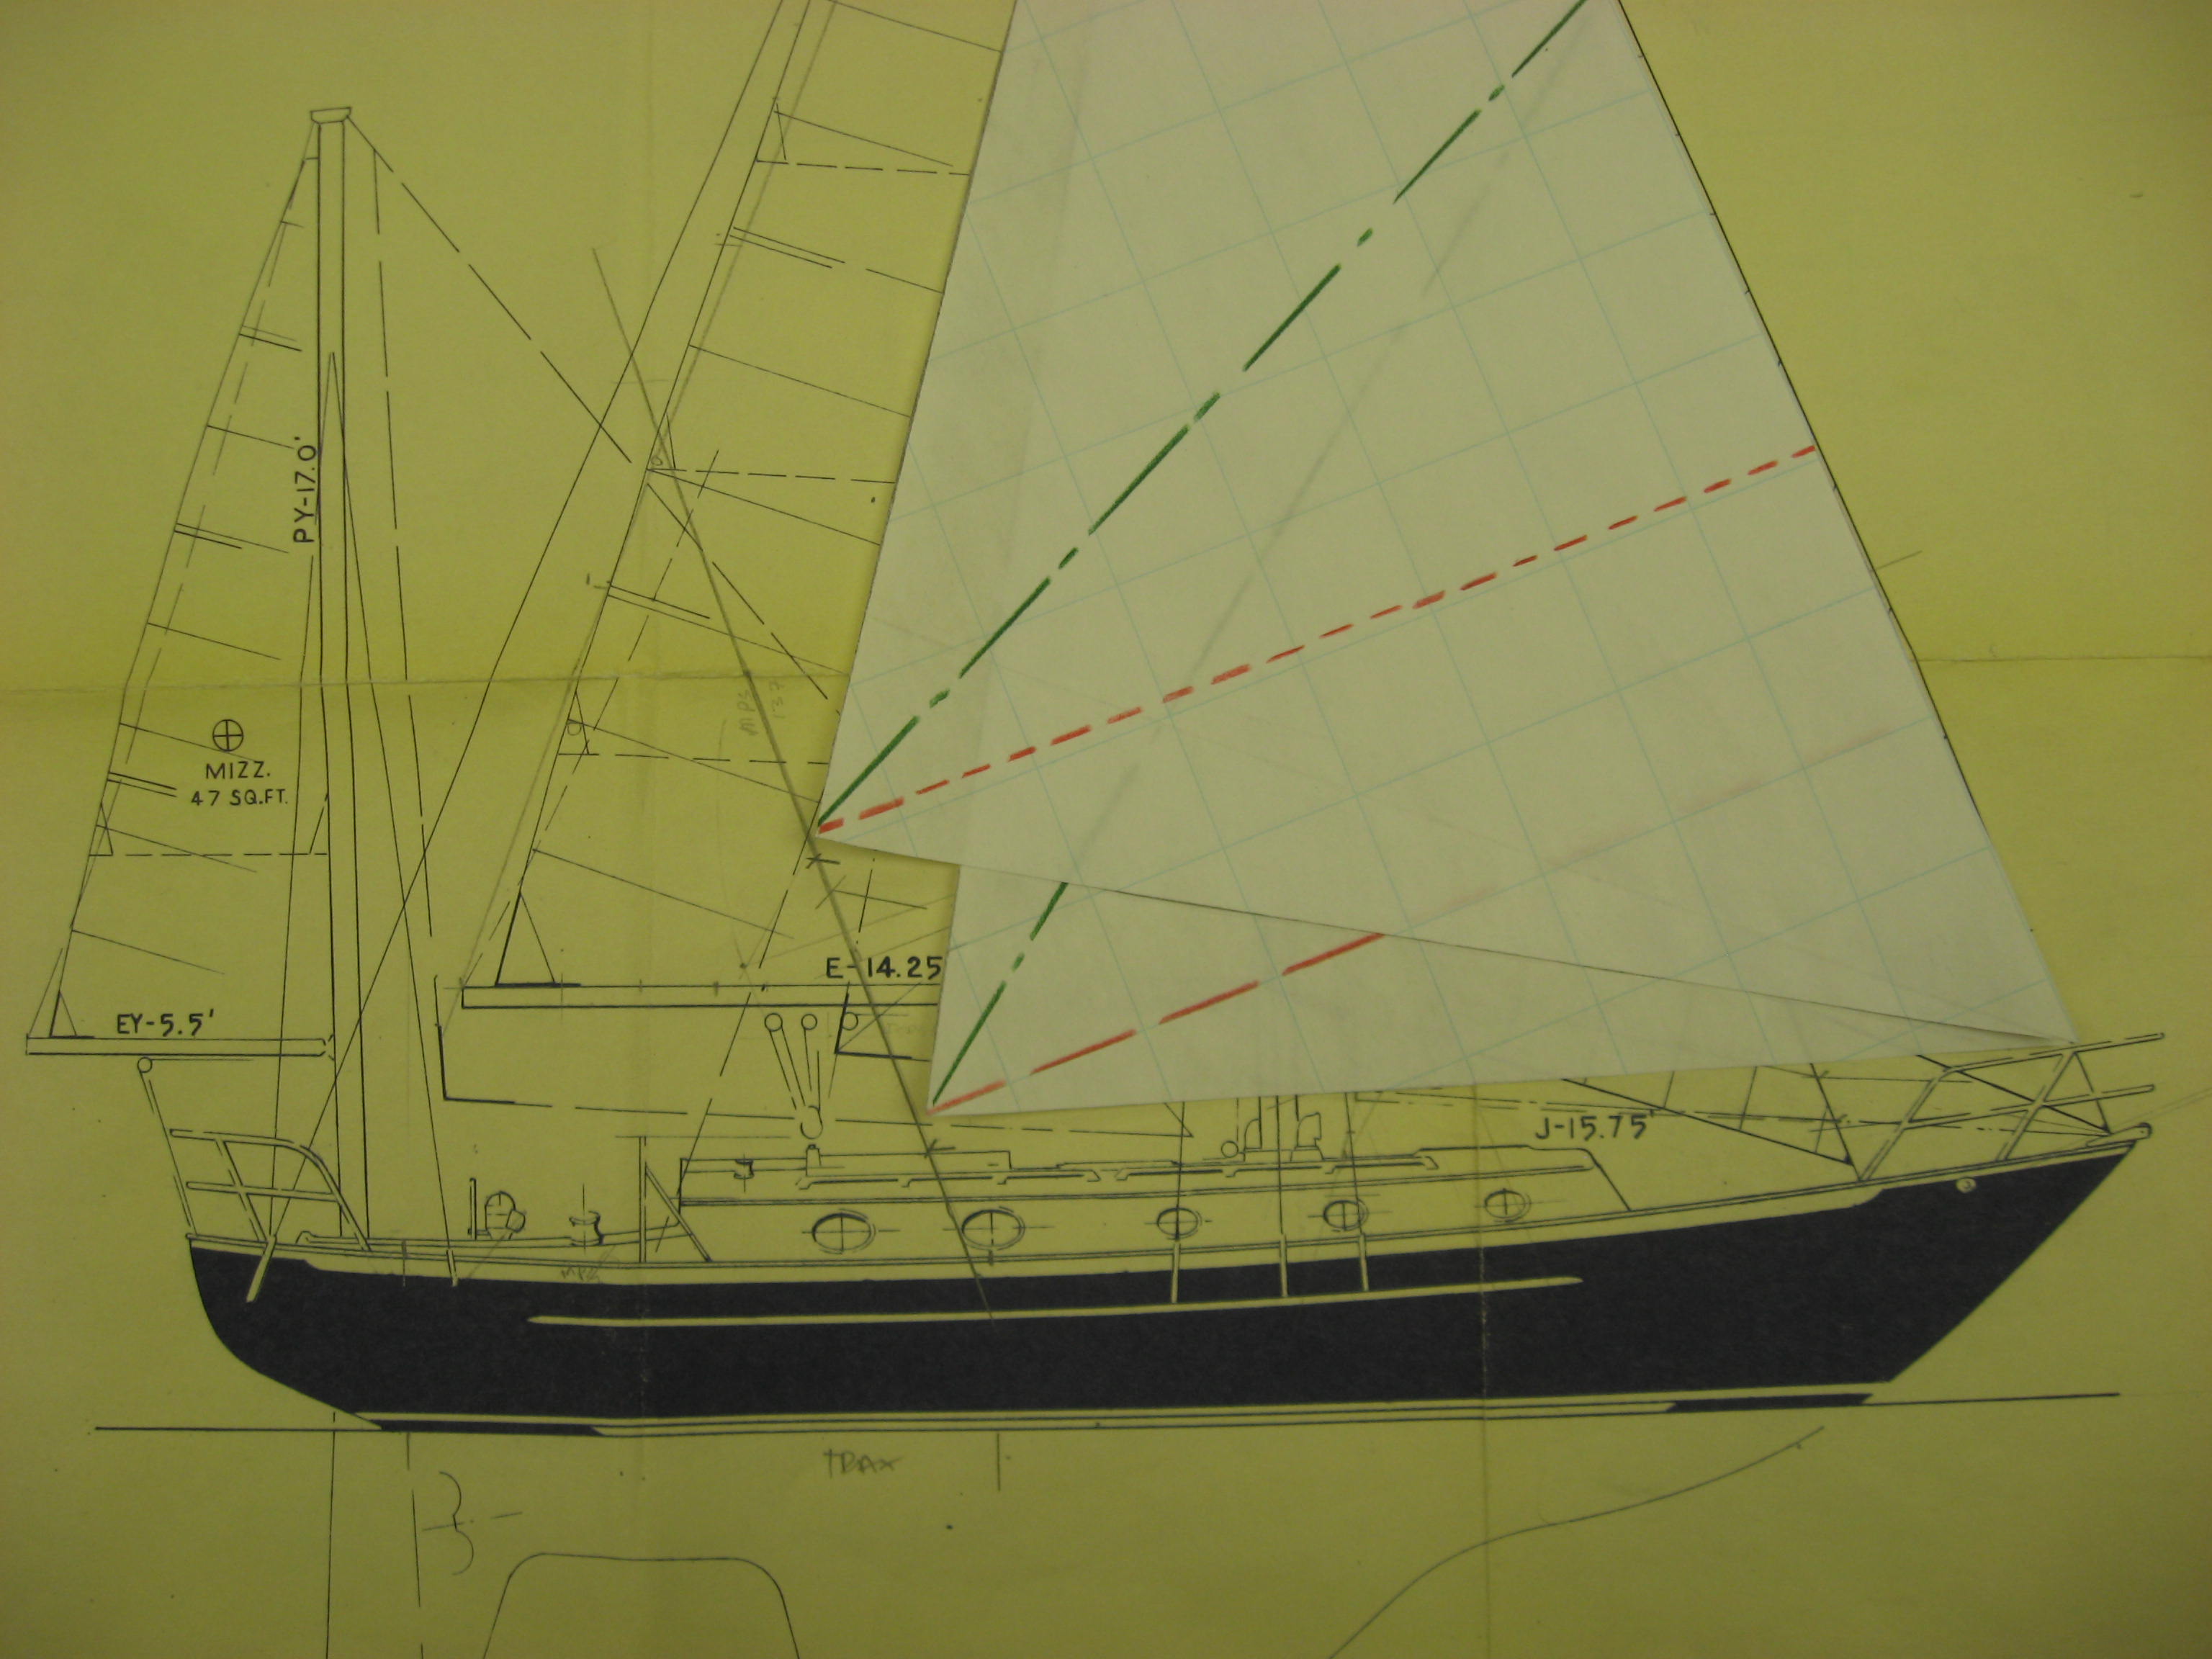
The LP is drawn from the luff or the sail and passes through the clew. In this image, the line , parallels to the luff is indicated by the pencil. THe distance between the clew and the LP is "x" The percentage of LOP is then x/J

The LP is drawn from the luff of the sail and passes through the clew.  The distance between the clew and the LP is “x” and the percentage of LP is then x/J.

The “size” of a headsail is determined by taking the LP length  and dividing this number by the boat’s “J” The J dimension is, for the purposes of this discussion, is the distance from “the forward face of the mast at the deck to the intersection of the deck and the head stay pin at the stem head”. The J dimension and the LP are inseparably connected.

The LP number, this 150, 120 percent etc., is the length of the LP dimension divided by the boats “J”.  So for example if the boat’s “J” is 10 feet and the LP dimension on a sail is 13 feet, the sail has an LP of 130%.

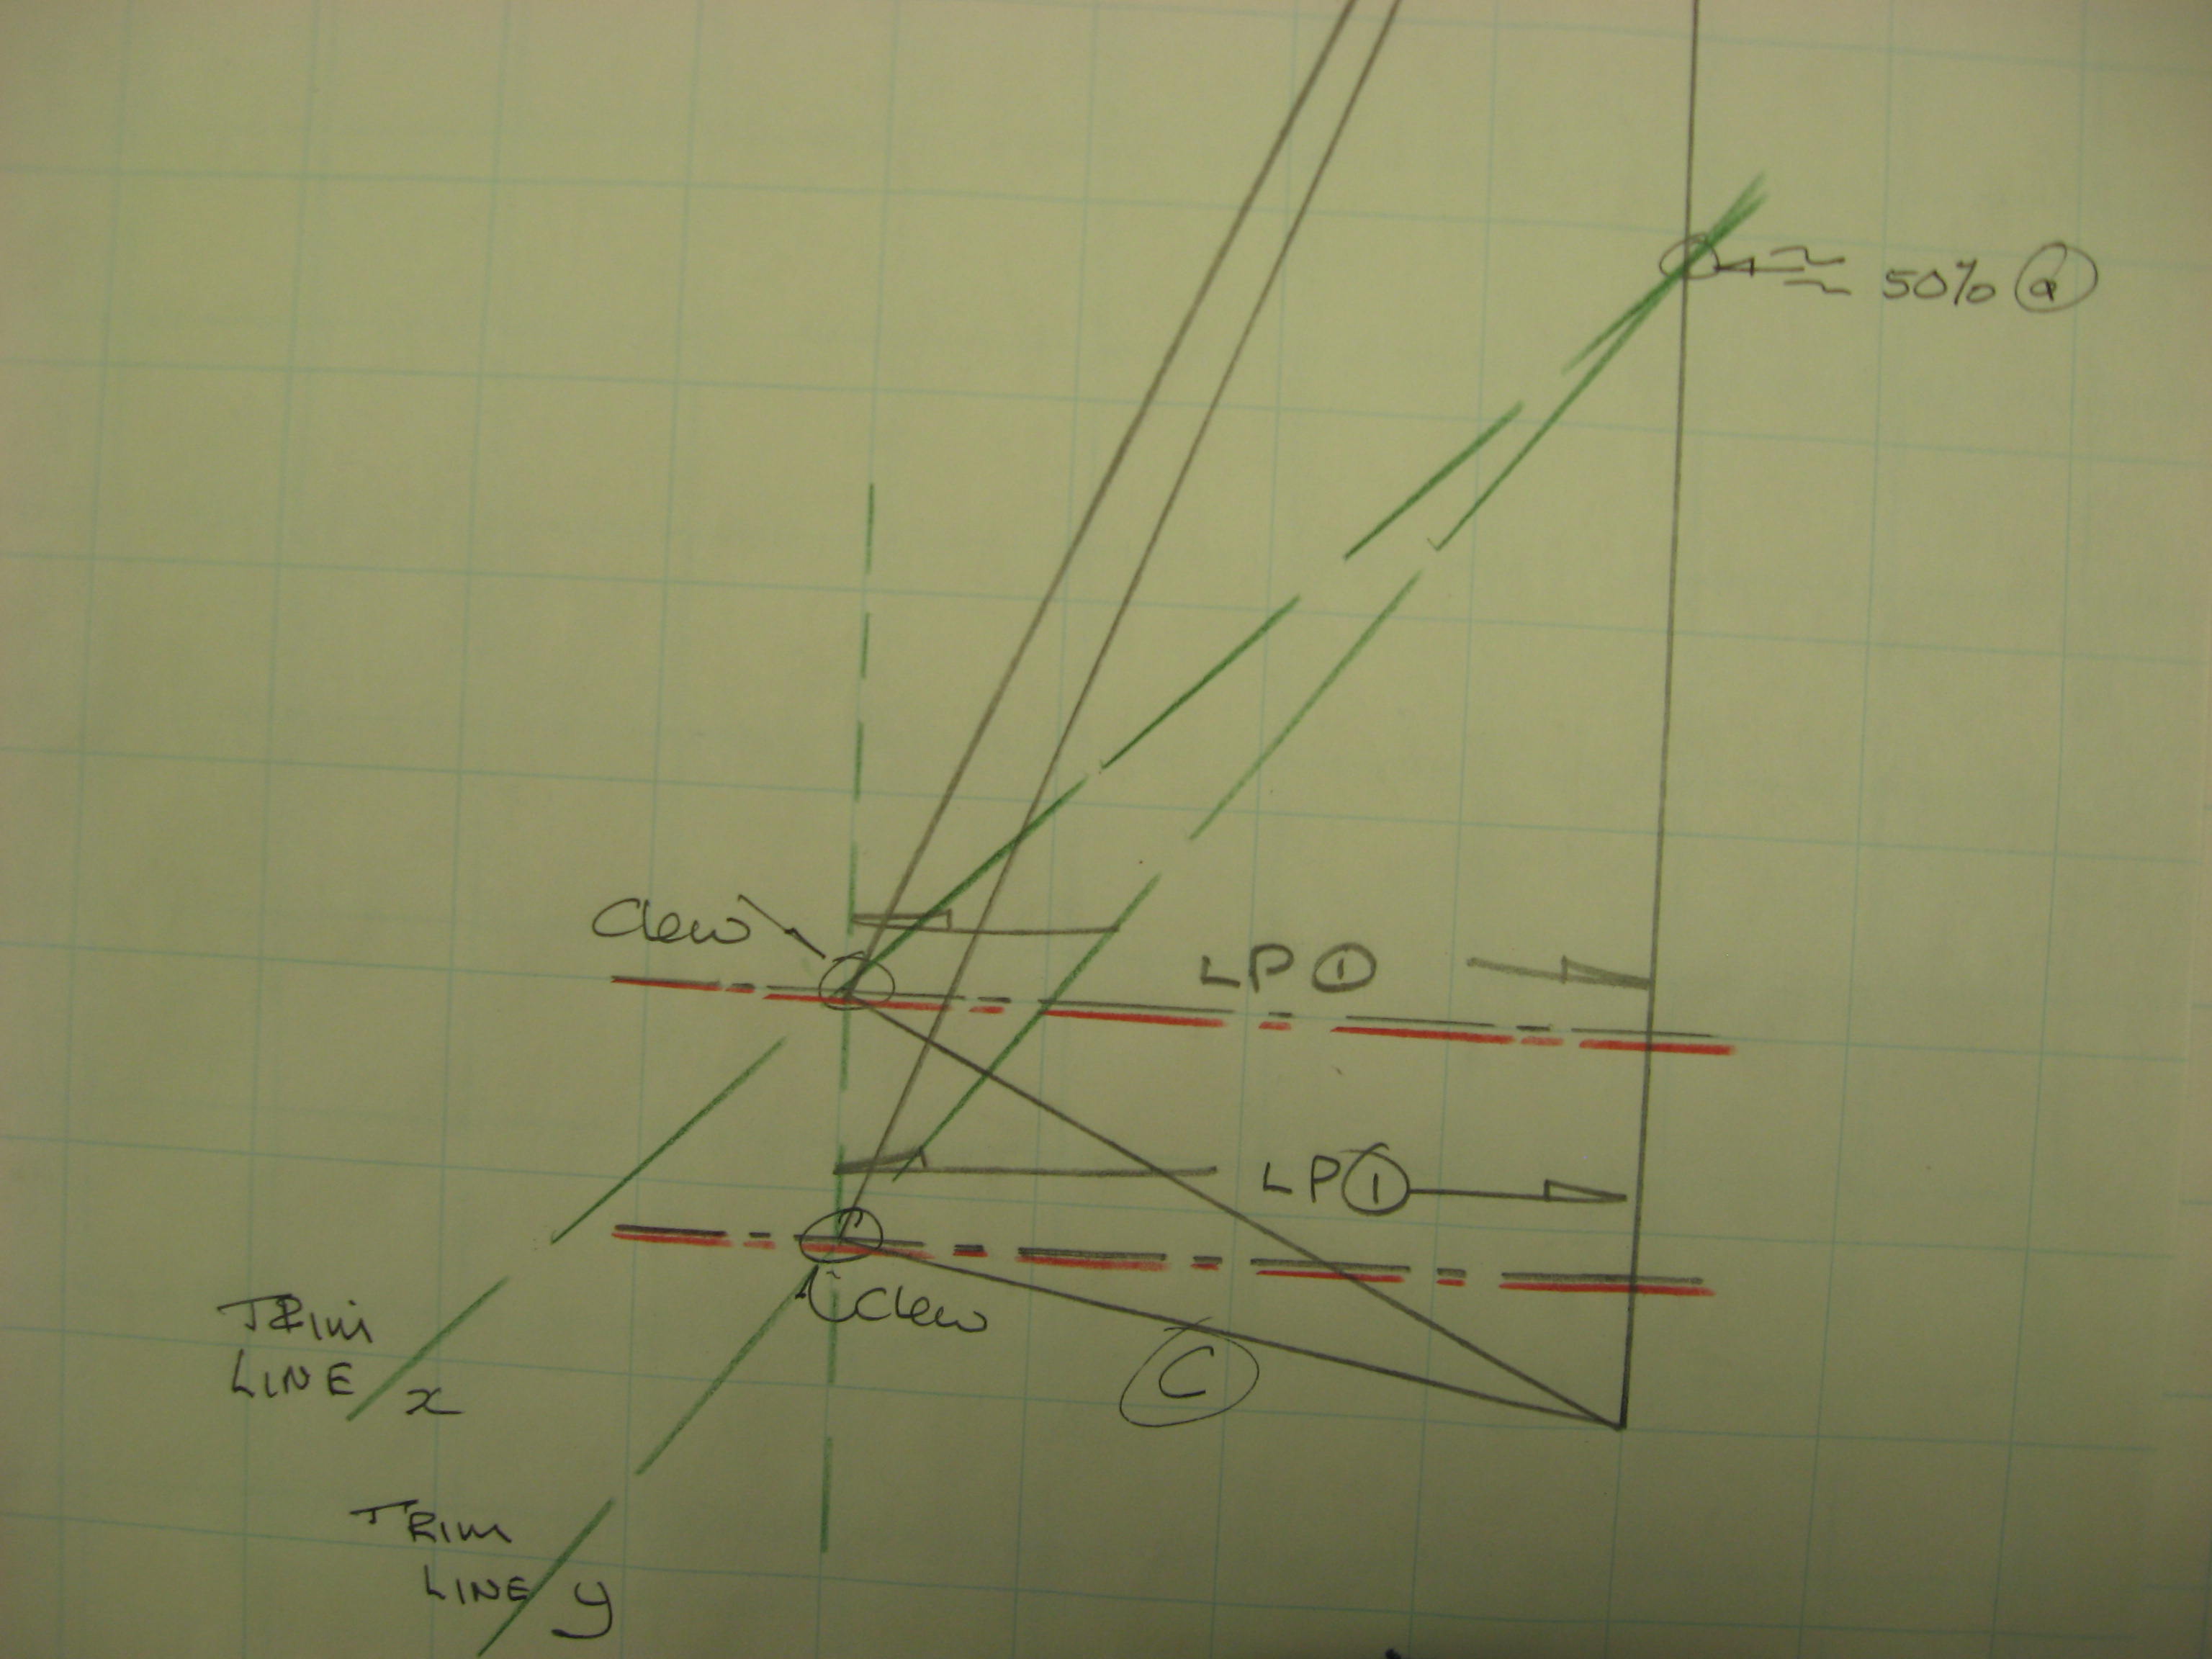
Two sails, for the same boat can have the same LP yet have different clew heights

Two sails, for the same boat can have the same LP yet have different clew heights

In the image above, there are two sets of dashed liners. the red dash lines are the LP length.The green l one, long with short dashed between is the trim line. That is the axis along which the sail will want to sheet.  It is worthwhile noting too that the LP and the height of the clew of the sail are connected only by the fact that both a low clewed sail and a high clewed sail can both have the same LP.

I often am asked about all the missing area at the bottom of the sail, with respect to a high-clewed sail. There is no area missing if the sail has the desired LP. It is merely that the clew is high rather than low. The area of a genoa is arrived at by the formulae: LP x Luff length x 0.5. A moment’s reflection will indicate that the length of the foot, the most common answer to my question “what is the LP?” is incorrect.

The clew height is a function of where the sail is proposed to sheet AND the LP for the sail. And these are a  function of the purpose and use of the sail.

The clew height is a function of where the sail is proposed to sheet AND the LP for the sail. And these are a function of the purpose and use of the sail.

The length of the foot of the sail is a function of the LP and the clew height.

In the move image/sketch there are two LP lines the red dashed lines. They are the same length. You can see that there are however two clew positions. The clew positions are a function of the “trim” line, basically where on the deck the sail will sheet.

So, the height of the clew is governed by several variables but is driven by firstly what sort of sail it is, for what boat, for what use, where, and then so where the sail needs to sheet. This will be discussed in another post.

Full Length Battens-3: Square Head mainsails


The Square Head Mainsail–on to advantage side of the equation:

The Square Head mainsail is the default style for the Class 40 short handed offshore race boats.

The Square Head mainsail is the default style for the Class 40 short handed offshore race boats. Don Miller Photography image

The previous few essays have focused on the limiting issues surrounding full length battens including, for the vast majority of the normal boats that most of us sail, the backstay.

Briefly I have proposed that:

  • There is not really solid empirical evidence that one sail with FLB is faster than the SAME sail with leech battens on the same class of boat and assuming that both boats are prepared to be as identical as possible.
  • The Cost of FLB may outweigh the Value a lot of the time
  • I will get to the “sail handling” aspect of FLB further along in the series. This area is in fact one of the areas that does offer increased value for the owner via ease of handling the sail: Hoisting lowering reefing.

For now I am going to concentrate on the most obvious advantage and a much lesser known aspect of full battens in general and the Square Top mainsail in particular.

In my experience virtually all discussions with sailors regarding sail shape is one sided, in that it revolves around the sail’s shape and so the implied concept is aerodynamic lift. I cannot immediately recall any discussion where the other side of the lift equation is even mentioned let alone discussed: DRAG.

Drag is everywhere on a sail boat:

Someone with more time on their hands than me could calculate the amount of drag on this boat

Someone with more time on their hands than me could calculate the amount of drag on this boat

The actual hull topsides

Cabin profile

Rigging

The sail’s surface

The width of the roller furler or furled headsail when sailing with a staysail

The furling drum

The anchor

Rails, life lines stanchions

The dinghy stowed on the bow or in Davits

Cruising boats carry lots of kit and it is all drag.

Cruising boats carry lots of kit and it is all drag.

Halyards

Dodger

Life raft on the cabin top

Bimini

People standing up- This is why most good race boats have the guys all sitting together in breeze or laying low in light air.

Radar either tower astern or on mast

Radar reflectors…..You get the picture.

What is missing from this list?

It is one of the reasons why the square head sail has emerged over the past few years.

We have discussed the usual limiting factor for the size of the roach on most boats is the backstay, closely followed by adherence to a handicap racing rule.

Enter the “open” class boats, in particular the solo offshore race boats. This cohort encompasses the Mini 650 class, the older open 40’s and the much more successful, as a class, Class 40’s, the open 50 and 60 foot mono-hulls and their multi-hulled cousins and in some parts of the world open class skiffs like the Aussie 18 footers.

None of these classes (I am not 100% certain about the 18’s) have any restrictions of sail size or shape, only number and type depending on the individual class and the race.

If Bigger (more area) is Better, so the square top sail is born.

The one element missing in this discussion so far is the mast.

The mast, the square top sail and full length battens are all interconnected.

 The Twitter version:

The mast is drag

The square top sail minimizes that drag

The ST cannot work without full length battens

ESPECIALLY in this case, the FLB need a low friction track because of the great compression generated by the ST sail.

The NPR version:

Because it is sticking up in the air, the mast is 100% drag, at least for the purposes of this essay-Ignore the wing masts and wing sails please.

Over the span (the fore and aft width of the sail-the girth.) the drag from the mast is reduced because the air is smoothed out by flowing across the sail.

As the sail ascends into the air on 99% of boats it gets narrower, again almost universally due to tradition as manifest in the backstay.

This image gives a good visual of the issue at hand-Namely the top 3-4 feet of mainisail-on a 40 footer-is not contributing to reducing the drag from the mast.

This image gives a good visual of the issue at hand-Namely the top 3-4 feet of mainsail-on a 40 footer-is not contributing to reducing the drag from the mast.

At a point that varies for all sorts of reasons this reduction in drag is reduced. The drag from the mast starts to increase.

The point is that usually within a few feet of the top of the spar and for a rule of thumb it can be where the girth of the sail is less than about 4 or 5 times the local for and aft length of the mast, the amount of drag over comes the amount of lift generated by the sail.

For instance, let’s say the mast is 6 inches fore and aft. 4 or 5 times 6 inches is 24-30 inches. So in this example the drag starts to increase, dramatically, at that point on the sail where the girth is less than 24-30 inches wide fore and aft because there is not enough girth in the sail to smooth out the turbulence created by the wind hitting the mast.

This image shows the ration of the mast for and aft length to the width (girth) of the sail as the sail approaches the mast head. 4 or 5 to 1 puts the equal girth n this main at a little lower than half the distance between the mail head and the top batten. I enlarged the image and used a metric rule against the screen to determine this.

This beam on image shows the ratio of the mast’s fore and aft length to the width (girth) of the sail. This is obviously a conventional mainsail and was built to comply with local racing handicaps. As on almost all conventional yachts, as the sail approaches the mast head the position of the girth on the sail diminishes. On this Sabre’s main the girth equal to 4-5 times the masts span is a little lower than half the distance between the mainsail head and the top batten. Functionally then the (mast) drag starts to increase dramatically somewhere above the top batten is. I enlarged the image and used a metric rule against the screen to determine this.

Enter the Square Head sail. This sail profile minimizes the drag from the spar as well as being much more sail area.

I do not have many images close up of the relationship between the mast width and the sail girth as for the one of the Sabre above, but I think you get the idea.

I do not have many close up images of the relationship between the mast width and the sail girth as for the one of the Sabre above this image, but I think you get the idea. This image courtesy of Don Miller.

BUT

It is functionally impractical for any boat with a backstay. Unless of course you want to lower the mainsail every time you tack which may sound like a pain but again find out what the customer is trying to do with his boat sail goals plans etc. I did do two offshore cruising boat sails that were exactly that big roach that would not clear the standing backstay. In one case, the image below, it was a bit difficult to get through in light air although he reefed in about 14 knots of wind, so the roach was easier to deal with the first reef in. I did another offshore cruising mainsail where the owner specified that he would sail with the first reef in if lots of tacking was going to be involved. The roach in this sail was even more aggressive than the first one.

This is the roach profile of the first boat I mentioned in the paragraph aobove.

This is the roach profile of the first boat I mentioned in the paragraph above. Many thanks to the owner for providing the image. www.mccubbin.ca/boat


This particular boat was built with two configurations-One with this large roach and NO backstay at all for coastal cruising in and around New England. The spar was of course so designed. And a smaller main WITH backstay for going in the ocean. This is one way to do it...

This particular boat that I did the working sails for was built with two configurations-One with this large roach and NO backstay at all for coastal cruising in and around New England. The two light lines you see on the sail are more conventional runners for headstay tension, but are not really required to keep the rig in the boat. The spar was of course so designed. And a smaller main WITH backstay for going in the ocean. This is one way to do it. Boat was a custom Bruce King design.

For boats with such sails, very large roach OR square head, enter the twin topmast running backstays, generally referred to as “the runners”.

As the name implies, they are running backstays that attach to the masthead and are adjusted by a two or three part purchase led to a winch.

This image gives a bit of an idea on the twin running backstays idea. Yes, this is a race boat, a single handed forty footer from the 2009 O.S.T.A.R

This image gives a bit of an idea on the twin running backstays idea. Yes, this is a race boat, a single handed forty footer from the 2009 O.S.T.A.R. The two padeyes with blocks on the transom are part of the three part purchase this boat has. The blue cordage crossing forward of the starboard stern rail is the last fall prior going to the winch through a clutch at the very edge of the image. The pair of blocks adjacent to the base of radar plinth are for the mainsheet.

Upon contemplation it will be seen that this is not something to be undertaken lightly. Many things need to be contemplated, not the least of which, in no particular order are:

Boat & Deck hardware lay out

Mast strength

Standing rigging configuration

The degree of sweep of the spreaders

The skill of the operators and

Their willingness to put up with this added task when tacking

All these factors contribute to the reason why most “cruising” boats do not have square head sails.

Next up running backstays, batten compression and hardware for the battens.

Our first sail late in the afternoon. Scott Bradford assisting and checking the spar.

This is my mini-650 on her first sail late in the afternoon in August 1995. Scott Bradford assisting and checking the spar. This was the first 5 minutes of sailing after her launch. At the time this roach profile was considered to be huge. If you look at the luff you will see the luff sliders I used-NOT ball-bearing at all, but the best available option on the day. I was more interested in keeping the sail on the boat during handling.


Full Length Battens: 2b. In mast furling

A reader on LinkedIn posted a response-comment-observation regarding FLB and conventional battens  with respect to in-mast furling so I will add this essay as a small side bar. My apologies I do not have many pictures for this subject, so you will have to read it, not look at it…

The question posed by this fellow is this:

And then there is the roller furling main! New experience for me as I have always sailed a traditional main (with battens). Very difficult to get used to looking at my main with the foot not fixed to the boom. My sail does have battens but the one nearest the head had to be removed to allow for the sail to be completely furled within the mast. I have been told that battens are not really needed in the furling main but started showing up because there was a “demand” for them. i like to convenience, especially when single handling, but………..would appreciate comments.

First a bit of background/History:

Most of us know that the original in-mast furling was invented and brought to market by Ted Hood, sometime in maybe the early 1970’s. They were unique at the time, had the Hood Cache and were almost the default spar on a long list of various sized Little Harbor yachts and then later other yachts particularly bigger ones, up to 80 footers which were big then.

Compared to the current crop of in mast furling spars, the Hood spars were really easy to work with from a sailmaker’s perspective. Not the least because they were designed by a sailmaker rather than a mast maker. There are two primary reasons related to this ease: The cavity into which the sail rolled was large.  Second, the slot through which the sail passed was wide, perhaps an inch or more. Boat for boat both these items were larger than the same parts on spars today.

Between the time of the Hood Spars introduction and the early/mid 1980’s Hood was the 800 Lb Gorilla: There was Hood Sailmakers and Hood Yacht Systems with the latter incorporating the Sto-Away masts and later on an in-boom furling arrangement  for a time plus the Hood Sea Furl furler, another virtual monopoly-No Harken, Profurl, Schaefer, Facnor, Furlex. There were a couple of older makes of furling (not reefing) head stays, one by Hyde and another by Stearns but they were not designed for using the headsail reefed. There was a particular part of the Hood Sea Furl Systems that made this viable. Regardless, if you wanted an in mast furling spar you went to Ted.

But things change. Hood sailmakers was sold in 1986, which is when I went to work for the new owner but Ted kept Hood Yacht Systems and brought it with him from Marblehead/Little harbor to Melville in Portsmouth RI.

Over time other mast makers began copying the Hood Spar, but of course they needed to be among other things, cheaper than the original (Hood Spar) in order to get a foot in the door. Anyway we now fast forward to the 21’st. C. Hood Yacht Spars was sold to the UK distributor of Hood Spars who sold it to another UK spar company who eventually went broke. Hood Yacht SYSTEMS, largely the furler’s, remains in business based in Florida and is a division of POMPANETTE. Roughly parallel with this progression many spar makers who used to do production aluminum spars have switched over to carbon and so today there are three remaining heavy weights in the production aluminum spar (In–mast furling) business:

Z spars, Charleston Spars/SparCraft both French and Selden, Swedish.

And on the edges of the In-mast terrain there are, or used to be, a couple of products you can bolt on to the back of the existing spar and some folks have taken a normal headsail furler and attached that to their spar with custom parts.

With respect to the sentence in the fellows remarks above, on “demand”, sailmakers (and cloth guys too) are forever trying to do something that will set them apart from other sailmakers. Battens, full and leech, for in-mast furling sails is a classic example of this. I am pretty sure that a Hood Franchise in Sweden invented both the batten idea and the necessary mechanics and sail designs to make it all work. Hood in the US marketed them as Vertech Mainsails and promoted, as does every one, the idea of more roach as opposed to the standard battenless sto-main with leech hollow, like a headsail.

Very broadly speaking, as viewed from my perch at Hood Sails for 15 years, there has been since the 1980’s an increase in people coming to sailing who did not grow up with it and so have a different seamanship background than say my generation who was sailing from age naught. Thus people buying boats (as well as a lot of others) were attracted to the idea of doing everything from the cockpit, so the in-mast furler’s, are now more common again than for a while. Without doubt the ability to “get the sail out and be sailing in one minute” or variations on same are pitch’s that do not quite fill the air at boat shows but is close.

Remember though there are two primary differences between the present in-mast spars and the original Hood Spars and they are the internal diameter of the cavity-Where the sail rolls up and the width of the slot through which the sail enters and leaves this cavity.

For all sorts of reasons the newer masts are smaller on the inside and the slot is much narrower than a Hood spar. Since the customer has a specific boat with a specific mast sailmakers are obliged to come up with ways of making their sails fit what the owner has, at a price they can sell them for while making money and having them work with sufficient success that the owner can use it, maybe enjoy it and so may return for other sails.

So, to the sails:

There are three flavors of in-mast furling mainsails: No battens, partial battens and full length battens. The latter are inserted vertically into the sail from the foot. These battens are usually in sections so they can be connected in some way. The ones we used at Hood, screwed together with custom fabricated terminals. The length of the sections, at least in the US, is determined by the maximum length UPS will carry so they can be shipped economically compared to shipping”regular” of FLB by truck.

With regard to sails, we know that the corners of a sail are reinforced with layers of fabric, the so called corner patches. The bigger the sail the larger, in area, are the patches. They are also thicker-more layers of material laid into the corner. This latter issue has a direct impact on the process of getting the sail in and out of the spar. The short answer is that for the current range of production spars the patches need to be thinner than they should be. This has a direct impact on the life, the shape retention life, of a sail because the corners distribute the loads into the body of the sail, less distribution surface, more load.

This thickness issues plays out with battens too. Let me first mention a couple of points about battens. As a general rule a batten’s length ought to be long enough so that 1/3 is “outside” the straight line between head and clew and 2/3 are inside. So the “inner” 2/3 is holding the outer third in place. This gets to be more critical the larger the roach-Hence full length battens in the first place.

This batten length calculus is relatively easy to meet in a conventional mainsail. It becomes a bit trickier with an in-mast sail. This is because when the batten is vertical, the batten needs to be a lot longer overall, in order to meet the desired ratio of batten inside versus outside the straight line. When the batten is longer it needs to be stiffer to achieve the desired effect. Given a same material, say polyester fiberglass, a pretty common material for battens, then a stiffer batten is thicker than a batten doing the same job on a conventional sail which will be shorter.

Still with me?

Then there is the batten pocket: It adds thickness to the sail. Typically the batten pocket is a couple of layers of material of the same weight as the sail’s cloth.  The pocket has a pleat in it so the there is volume inside the pocket to accept the batten and there is some kind of mechanism to keep the batten in the sail. Velcro is a favorite these days as are folded over flaps with lashings as well. This construction is often as thick, or thicker, than the corners AND it is on the leech so all the battens, all four or five of them must be able to roll inside the mast….

All of the above is of course at reasonable hazard of chafe. The pockets where they go in and out of the slot. The sail skin itself is liable to chafe when being rolled in or out in any condition apart from head to wind. The chafe issue applies to all flavors of in-mast furling sails: plain or with battens. On the full battens, where the connections are, they are a tad wider than the neighboring batten material so when the sail is passing the edges of the slot, there is chafe at each of the perhaps dozen or so connections.

Re-read the remark in the original question above where the owner had to have the top batten removed so the sail would get into the spar. This means I hope that the attending sailmaker had to re-fair the leech too otherwise the “local roach” at that batten would either wave around in the wind or be pulled into a curl by the leech line. Any way I digress…

Now connect the particulars of a sail so designed and built with the newer masts with smaller cavities and narrow slots. The end result is that sailmakers need to make the sails “thinner” in order to fit into the spar. Plus the batten’s are thicker and there is added thickness for the batten pocket assembly.On more than one occasion a prospect was unable to purchase a battened in-mast sail for his boat, at least from us, because when I looked into the particulars of the mast he had and the boat (so I could spec. the sail appropriately) comparing the width of the slot to the thickness of the battens and related structure, there was barely enough wiggle room and this was without the sail skin or the pockets.  I can recall one spar I was looking at, from one of three makers cited above and the slot was quoted as being only 16 mm wide, perhaps 9/16″. The battens, the pocket and sail was close to 12 or 13 mm.

The same problems or issues occur too with full length vertical battens only there is the additional complication of having to install the battens in the sail with the sail fully unrolled. Think about this for a minute…Would you willingly unroll (or hoist) your mainsail at the dock in the marina and let it flap around for the time it took to get the battens in? Perhaps not. This drill is required though with the full length battens in order to get the batten (s) into the sail. For instance on a Little Harbor 46 footer with in fact a Hood Spar, so it was actually pretty easy to operate the sail once the battens were in the sail, it would take me 45 minutes to an hour to assemble the battens get the sail into the spar and the battens into the sail. And it could only be done either on a calm morning or with only a light air wafting across the boat from the direction in which the bow was pointed.

All of this would make one think that the in mast furling system is not possible to manufacture and sell which is patented not the case. Rather I am presenting some of the issues that go on behind the curtain. For the sail these are:

Thinner or lighter base material, smaller patching both in area and in total weight in the patch and thinner battens and/ or pockets.

So, I hope this has offered some food for thought as well as a bit of a glance around “behind the curtain” into what goes on in the minds of, and discussions of, sail makers, their reps and designers.

I’ll get back to “regular” full length battens-soon.
Full length Battens-2a: Girths


Here is a bit more detail concerning the girths mentioned in Full Length Battens:-1.

As noted in Full Battens:-1, the Girth is the distance across a sail from the “same” points the luff and leech.

A quick glossary:

Girths: the distance across a sail from a POINT on the luff to the corresponding POINT the leech.

Point: the spot on the luff and leech of a sail corresponding to one of the following: 25, 50, 75 or 875. percent up from the foot. You need two  points to get a girth

Girths are universally described as: (Reading up from the foot of the sail)

MGL–Mainsail Girth Lower: The girth at the bottom 25% POINTS

MGM–Mainsail Girth Middle–the width at the 50% POINTS

MGU–Mid Girth Upper–the girth at the 75% POINTS

MGT–Mainsail Girth Top–the girth at 87.5% POINTS

The most common way to start measuring  the girths on your mainsail is to lay it out flat on the ground.

Lay the sail out flat on the ground.

Lay the sail out flat on the ground.

This exercise works better with two or three people, in fact for race boat programs, modest ones where not every one knows everything….. it is a nice little team building exercise for the winter. You can measure all of the sails so every one on board has an idea of what sizes the sails are. In this case though I used a screw driver pushed through the cunningham eye into the grass.

Secure the tack with, in this case, a screwdriver pressed into the soil.

Secure the tack with, in this case, a screwdriver pressed into the soil.

Take the head of the sail and fold it down to the tack. Jiggle the luff so that the top and bottom of the sail are straight like folding a sheet or towel and make a mark where the fold is. This is the MGM luff POINT

Fold the sail so the head comes down to where the tack is.

Fold the sail so the head comes down to where the tack is.

Make sure the two corners, the head and tack and then the head and clew are even.

The corners of the head and the tack need to be overlapped on top of each other.

The corners of the head and the tack need to be overlapped on top of each other.

Mark the fold in the sail with a pencil, a regular #2 is fine.

Make a pencil mark on the sail under the fold.

Make a pencil mark on the sail under the fold.

If you merely want the MGM, fold the head over to the clew, straighten out the leech and mark where the fold is on the leech.

Next take the head over to the clew and lign the corners up as for the tack.

Next take the head over to the clew and line up the corners as for the tack.

At this point, you can if you wish unfold the sail and lay a tape across the sail between the luff point and the leech point. You now have the Mainsail Mid Girth, MGM or 50% girth usually spoken as  “the mid girth.” As a practical matter when measuring sails it is better to mark all the points along one edge first then do all the corresponding points on the other edge.

The MGM is measured from the mid point luff to mid point leech.

The MGM is measured from the mid point luff to mid point leech.

To get the 3/4 and .875 girths, fold the head back to the MGM point as shown below.The picture below shows the 75% girth position on the leech. When you measure the 75% girth point(s) on the luff and leech you can measure across the sail and you now have your 75% girth or MGU, Mainsail Upper Girth.

With the sail folded in its original half, fold the head back so that the head meets the MGM fold. This determines the 3/4 girth, MGU

With the sail folded in its original half, fold the head back so that the head meets the MGM fold. This determines the 3/4 girth, MGU


By continuing to fold the sail back and forth, you can also get the .875% girth too, as necessary

Fold the sail back one more time to  get the .875% girth too, as necessary

From the 75% fold, fold the head back one more time to get the .875% point, as necessary. If you do the same drill with first the tack and then the clew folded to the half way fold you will get the dimension for the MGL, Mainsail Girth Lower.

It takes all of 15-20 minutes, to do this from pulling the sail out of the bag to getting it back into the bag and recording the dimensions but this does depend on the size of the sail, where you are doing it and how many people are involved.

Remember that to meet MOST racing rating rules the girths must meet the lengths equal to the percentage of the foot as outlined in Full Battens-2 Scroll down about half way.

Sailmakers use all of  this information regardless of what kind of mainsail they are designing. For cruising boats, you and the sailmaker need this information in order to make the sail so it does not overlap the backstay too much UNLESS this is something you have discussed with them.[ See here: Scroll down to the bottom two images]. It is necessary too for in boom mainsails because these booms are very precise on how much roach a sail can have-Too much and it will not roll properly. The roller booms come with a 30 (or so)  page manual for the sailmakers. With the advent of battens for in-mast sails girths come into play too. For race sails, even for Wednesday night racing, of course you want the sail to be legal.

If you are taking the measurements off the boat yourself one thing they may ask for is the distance from the gooseneck, aft and parallel with the boom, to the backstay.  In other words the position on the backstay where the boom would intersect the backstay ( if it was that long) If this distance does not have its own check box in the measuring form, make a note in the “comments” section of the form. These dimensions give the sail designer a triangle that outlines the area in which the sail might fit, unless you have come to terms with them for something else-Like a oversized roach. In other words a triangle with sides: Luff, the distance from head to boom/backstay intersect AND distance boom /backstay intersect. With this information the sail designer can place the backstay on the design software and so know where the girths are going to be relative to the backstay.

One last detail regarding girths….

Girths can obviously have an impact on how much ROACH a sail has, BUT remember that the sail designer needs to take into account mast bend too. Sails have shaping in the luff and on a mainsail it is generally called luff ROUND, or sometimes positive, because it protrudes forward. The opposite is hollow, or negative.

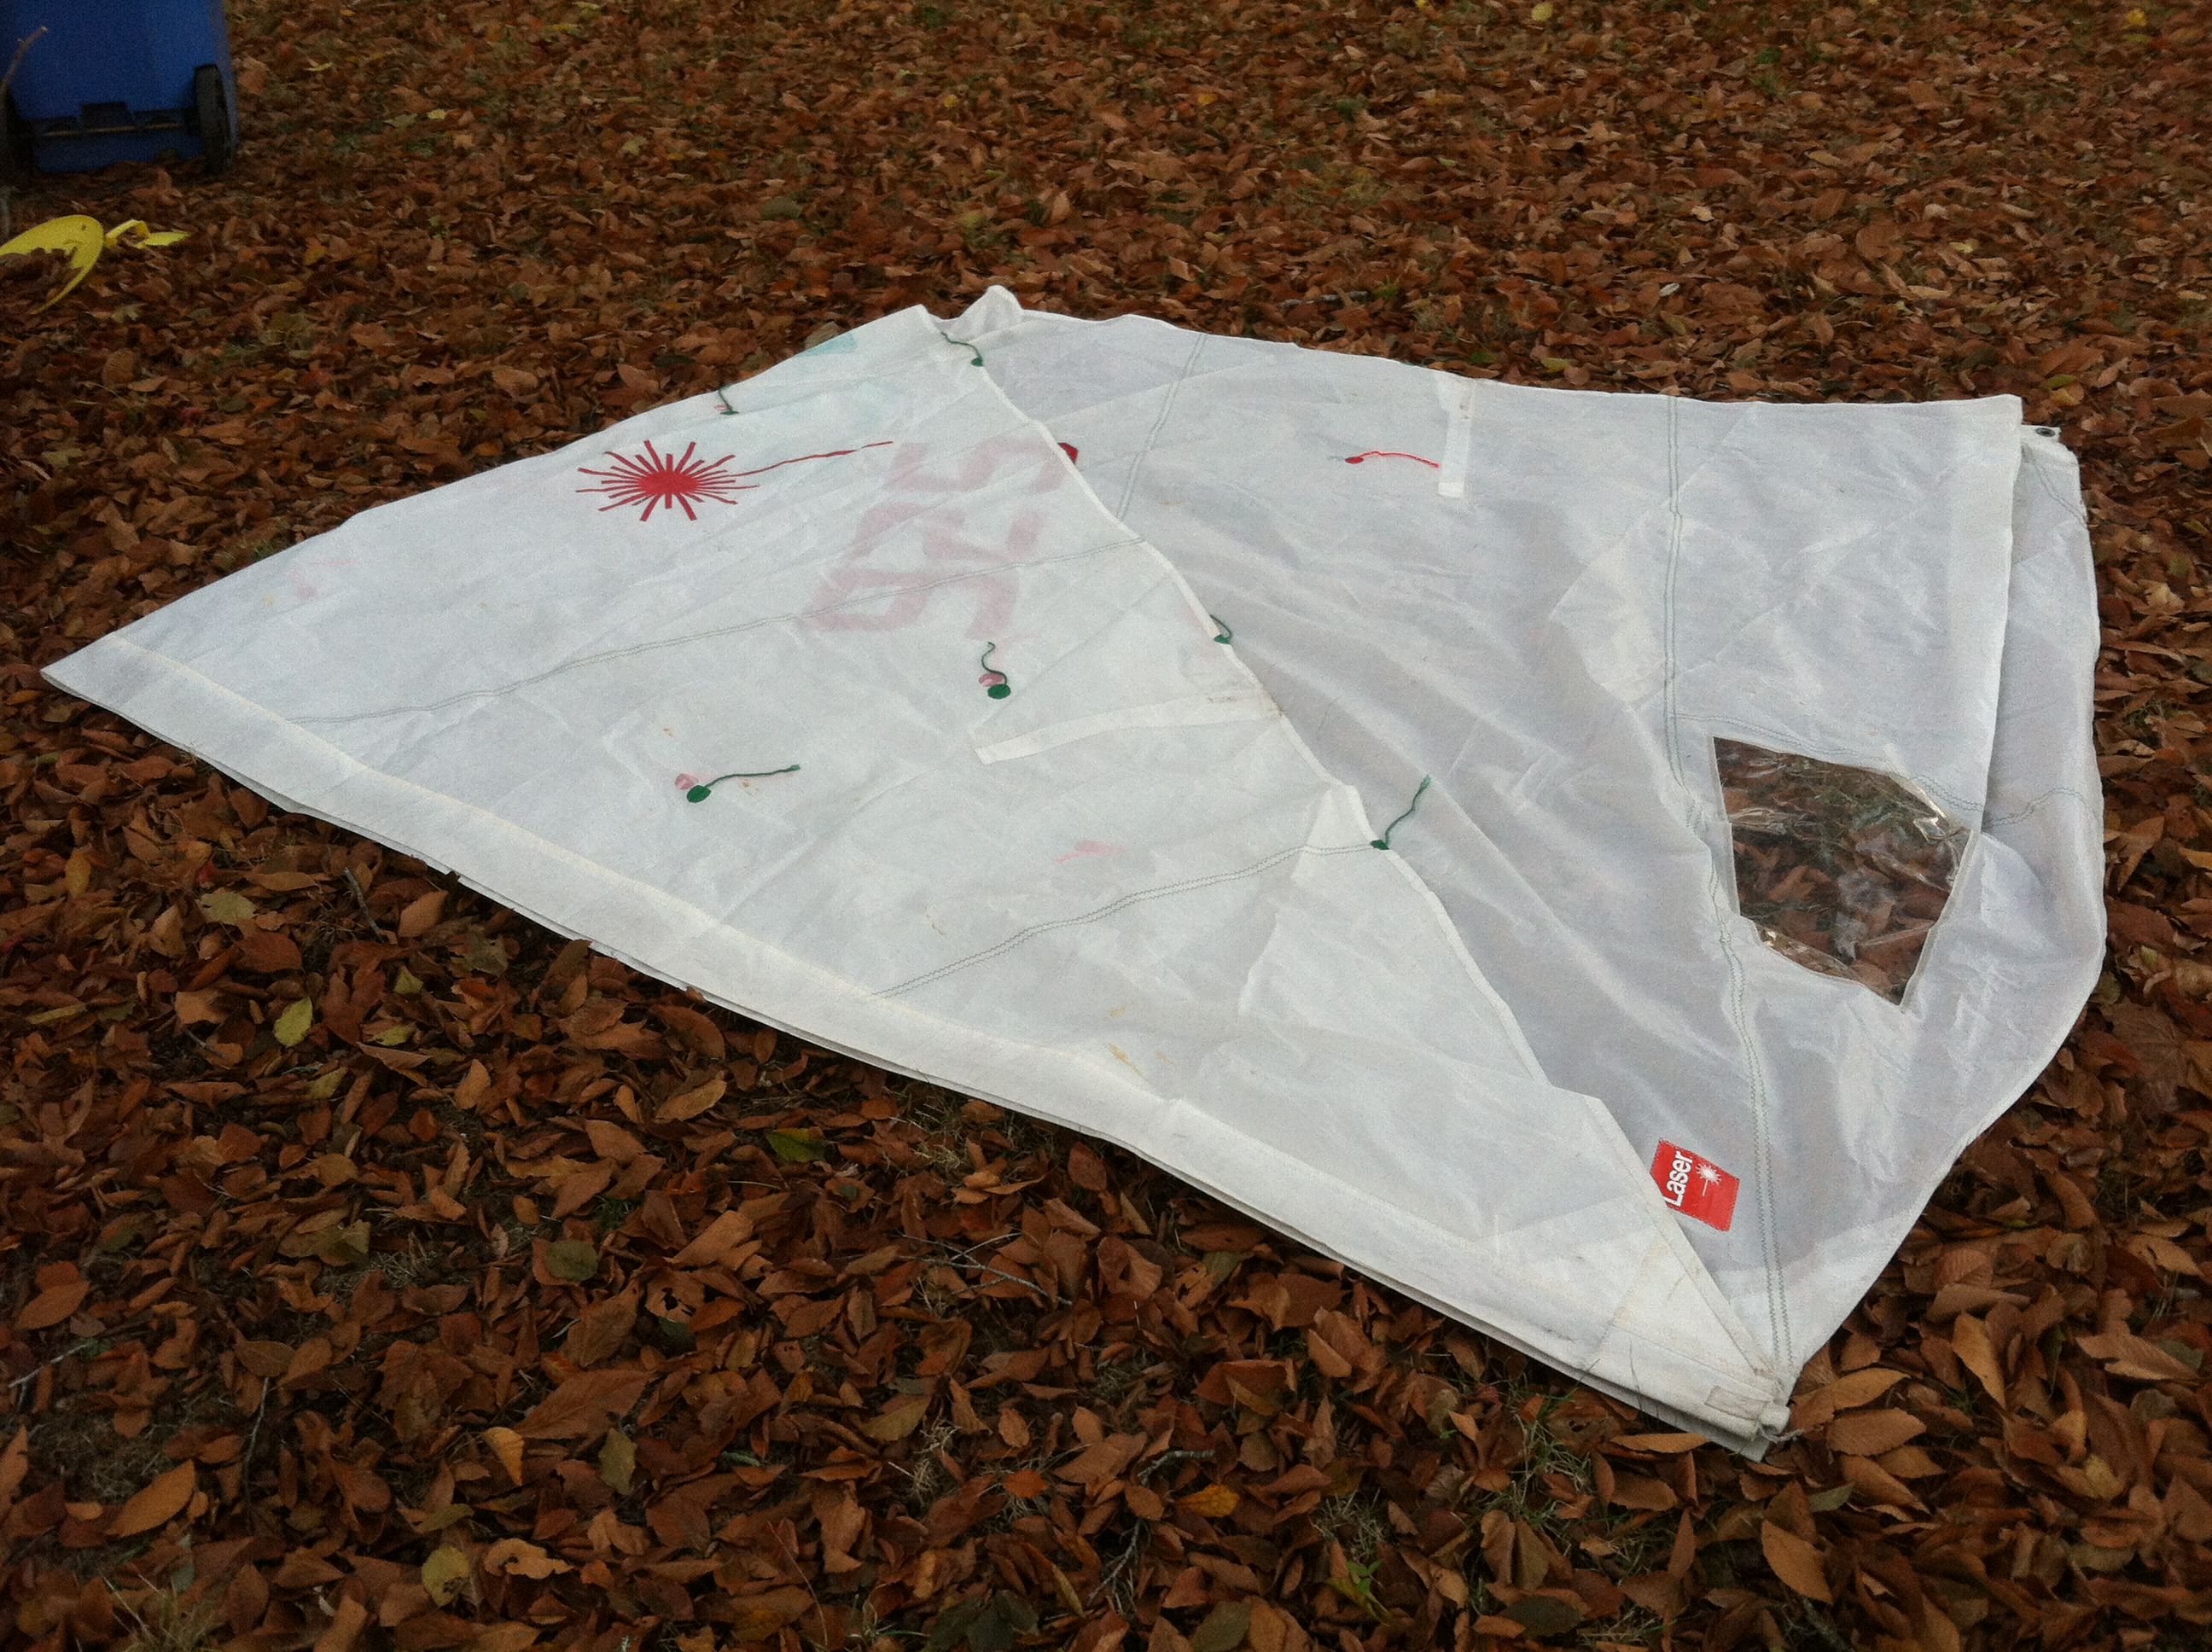
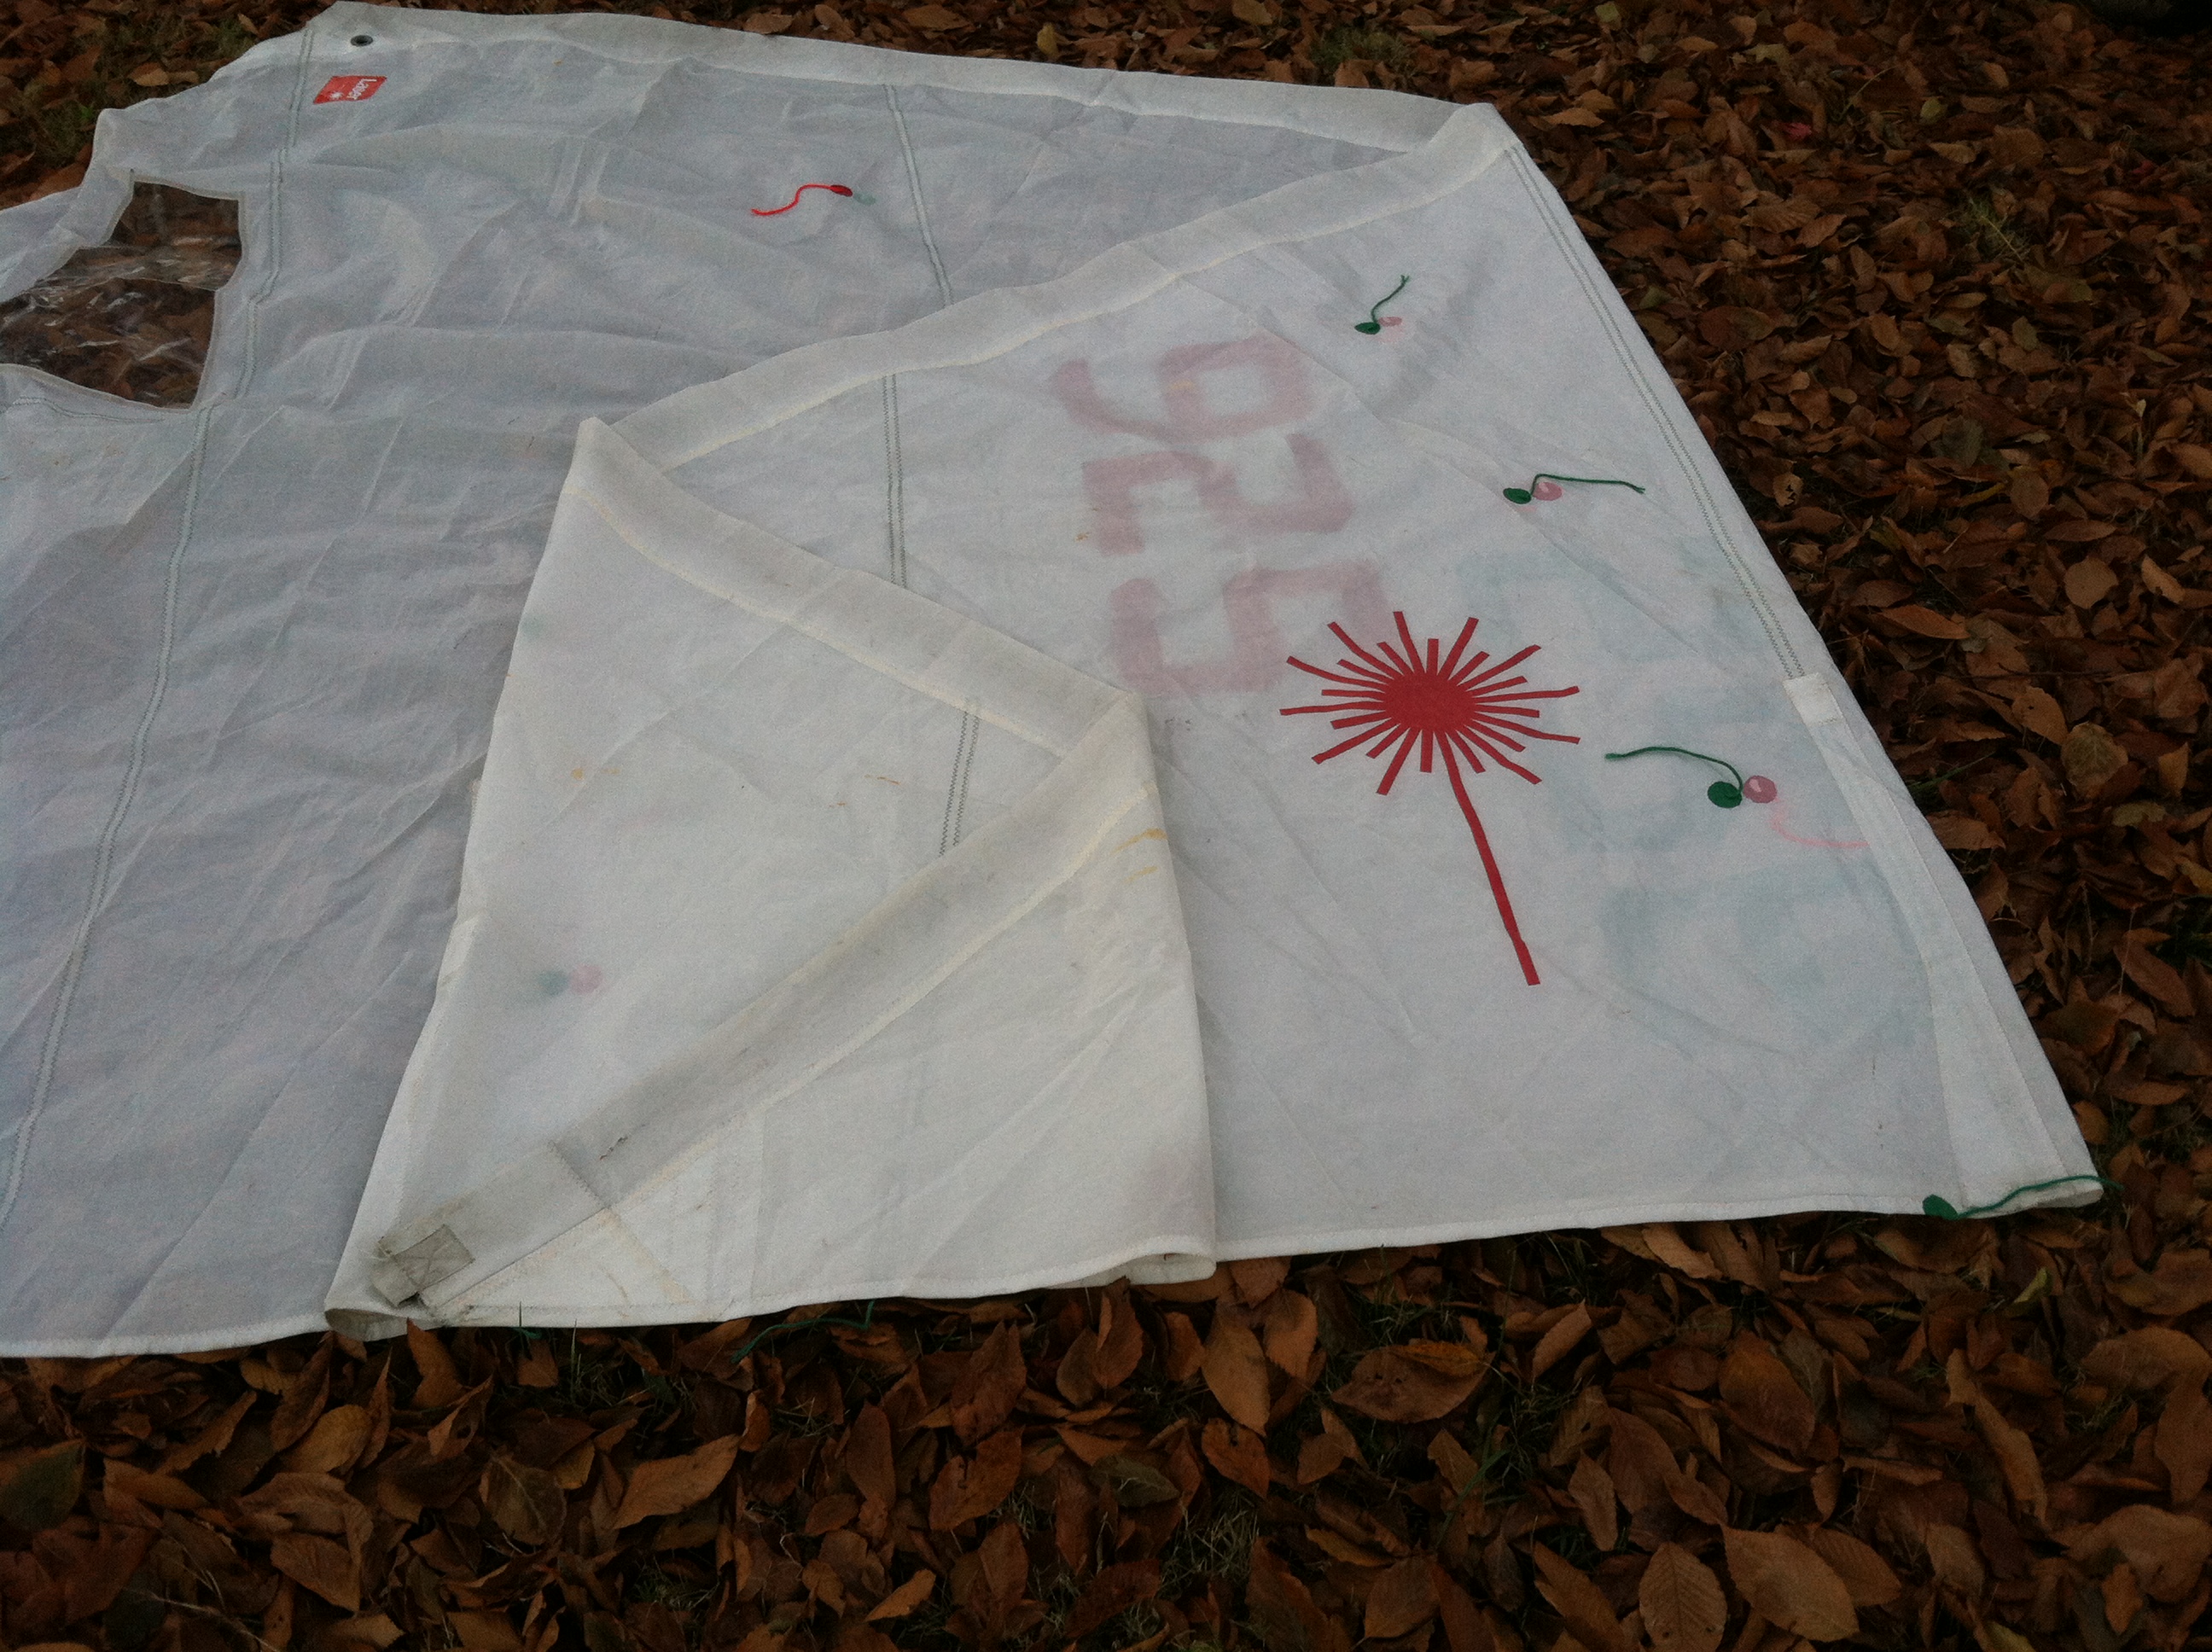
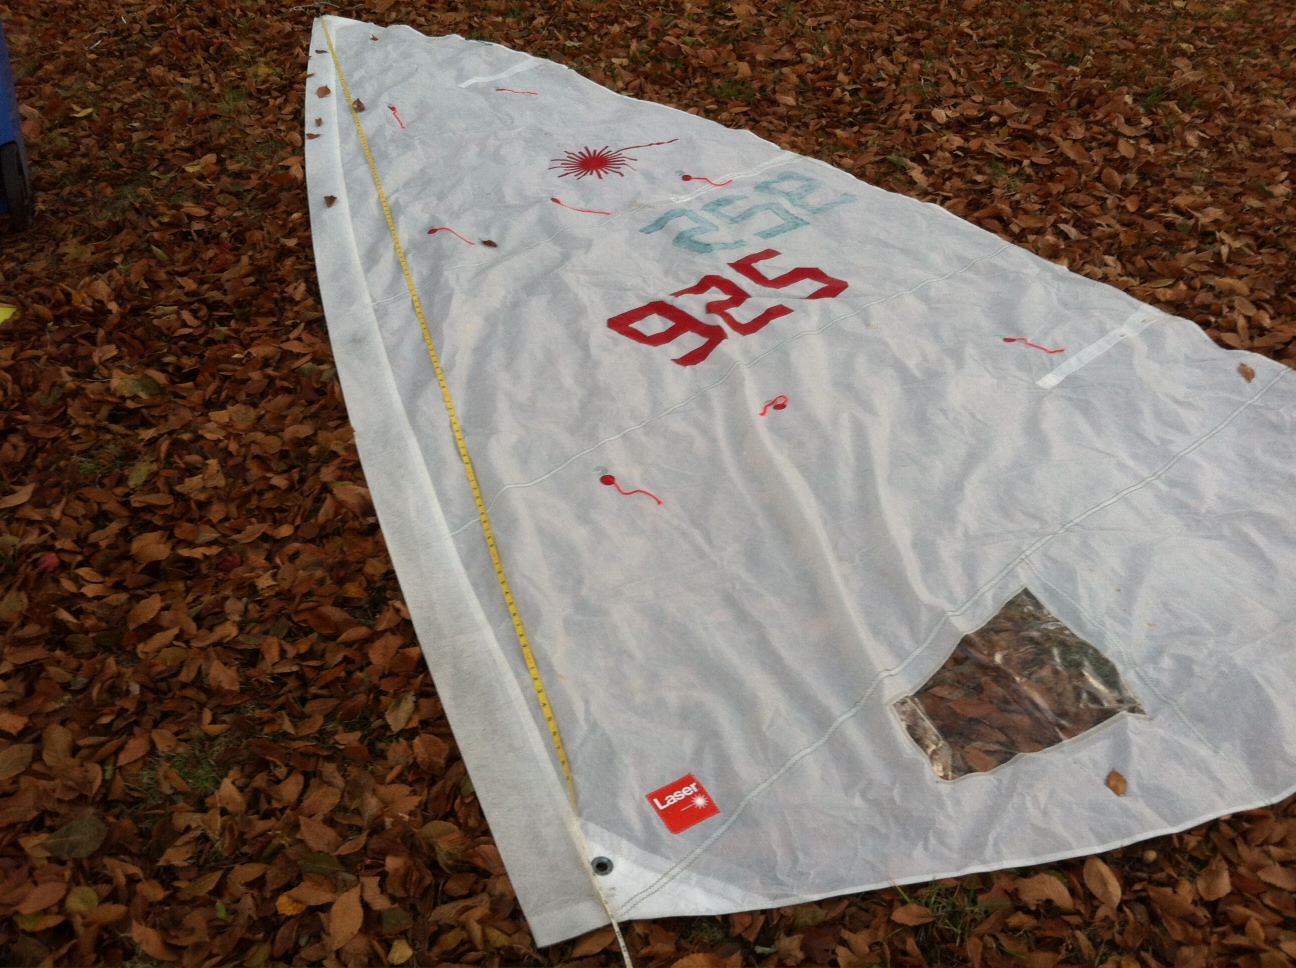
In this picture of the Laser sail, you can see the luff ROUND outside the straight line between the head and tack.

luf curve 1

The relationship between ROACH and LUFF ROUND varies depending on many things but boat type, rig type, fractional Vs. masthead, degree of mast bend on either are some of the main ones. At the end of the day, the girths are one of the variables a sailmaker uses when determining how to design a sail and they have an impact on the sails roach. And the roach has an impact on whether or not the sail needs, or requires full length battens and if so what kind of sliders and related hardware is desirable.

These measuring protocols are the same for head sails and spinnakers. Remember this when we get to Code zeros in a while.

Sails-Mainsail, measuring-E dimension

In a previous post I discussed the “P” dimension and the parameters surrounding the correct luff length; This post discusses the “E” dimension.
The “E” dimension is the second dimension (the first being “P”) that the boat’s designer uses in order to arrive at a mainsail size that he wants, in order for the boat to do what the person who commissioned the boat wants to do.

The “E” is for the purposes of 99% of the folks reading this essay, the distance from the aft face of the mast, aft along the boom, with the boom at right angles to the mast, to the inside (forward) edge of a contrasting colored band at the aft end of the boom”. For the other 1%, there are some minute variations on this definition, under the ORR rule.

Again, like the P dimension, the E is NOT the foot length of the actual sail and it is NOT the actual boom length. The reason the P and the E are not the actual sail edge length has to to do with two primary issues. One is the hardware (on the mast and boom)  by which the sail is physically attached to the spars and two, in most cases there is a deduction for stretch that sailmakers take or apply to a sail when designing it. This deduction is commonly different for each edge too.
As for the “P” let’s start with the “Black Bands.”

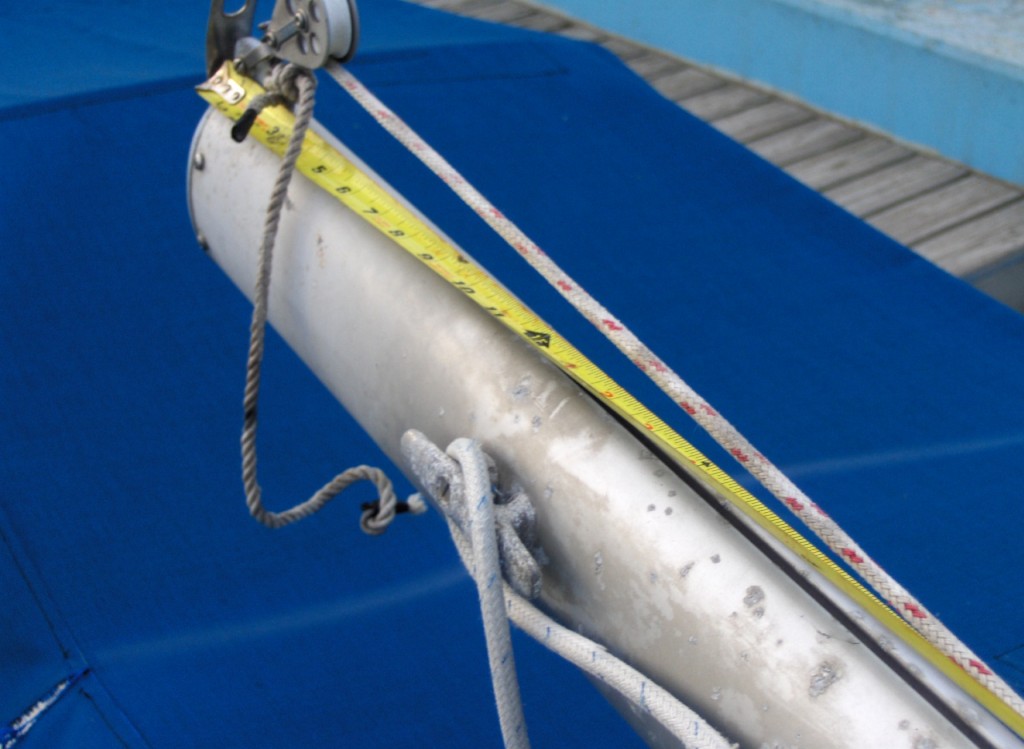
Some of these bands look like this.

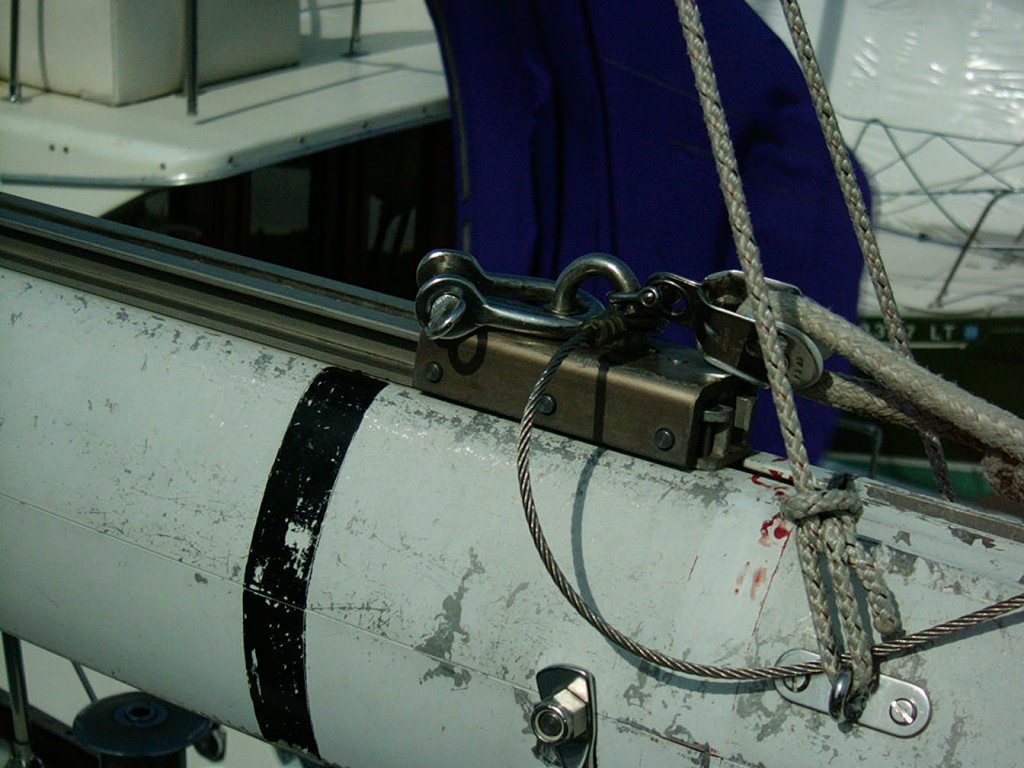
Black band on Caliber 40

Black band at the aft end of a Selden boom on a Caliber 40

And here (below) although the paint or black tape is wearing off in this picture:

Cal 36 Black band at the clew

Black band at the clew end of the boom, Cal 36

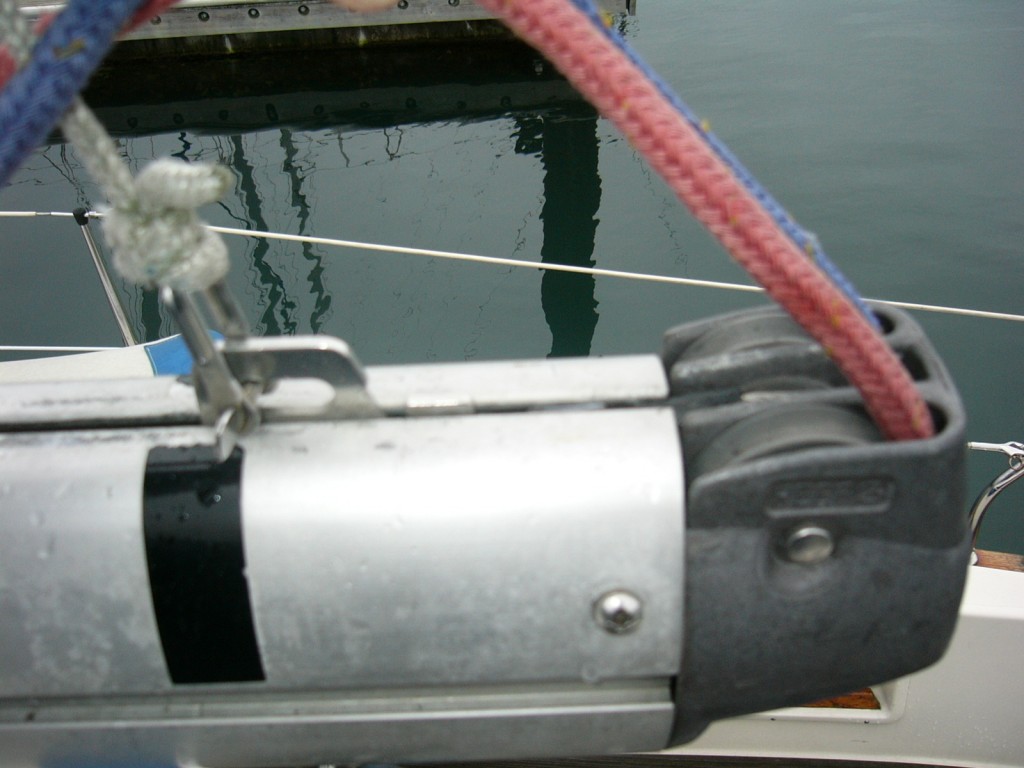
Notice too in the above picture  there is some space aft of the black band that “could” be used for sail outhaul. On the boom in the top picture the outhaul mechanism is fully extended, “two blocked”, as we might say, and the (bearing surface of the) shackle is just at the band.

And sometimes there is NO band. As here:

Sometimes there are no bands

Finding a boat without bands is pretty common, as on this Bristol 29-9

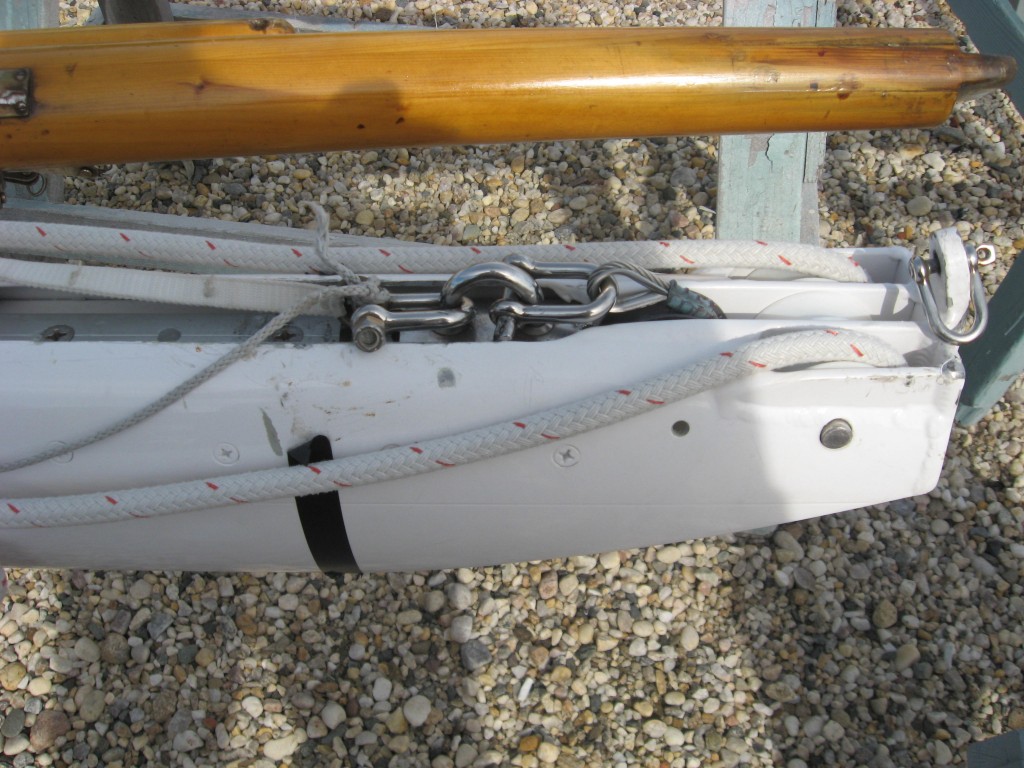
This next picture shows a detail than can be tricky:

Black band at the clew on a 30 footer

Black band at the clew on a 30 footer

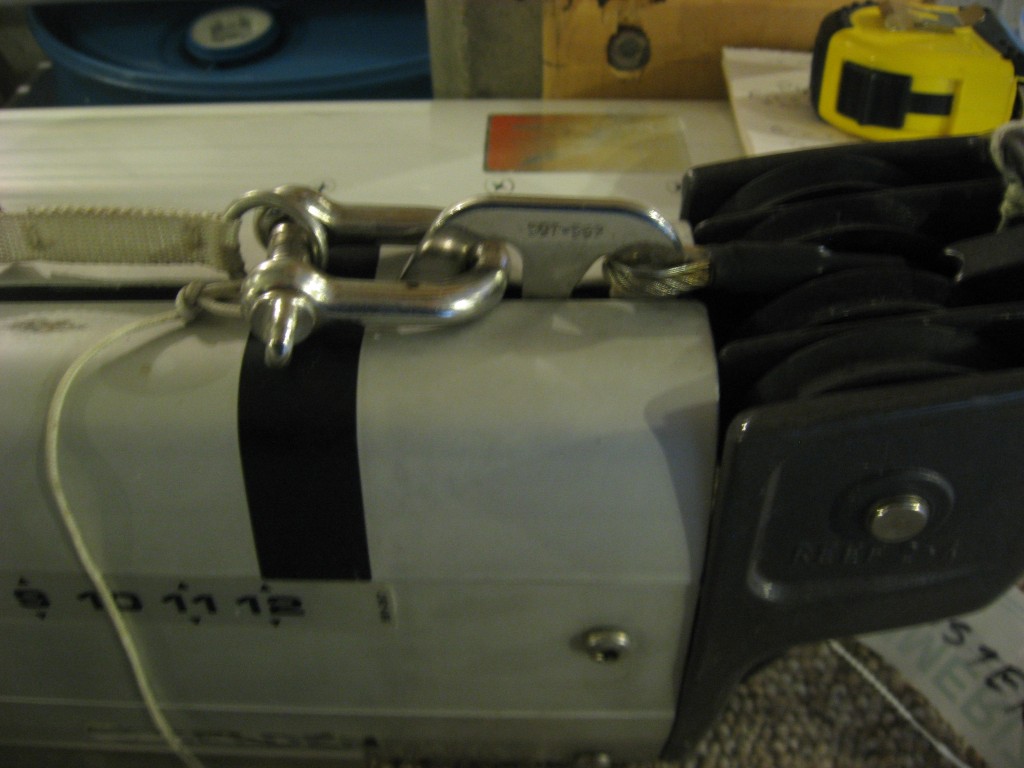
Observe (in the above picture) just aft of the stainless fitting with the halyard attached, in the boom tunnel, there are a couple of unidentifiable fittings? These are the swages connecting the outhaul wire to the outhaul fitting. There is just enough room aft of the black band to apply some more tension before the swage gets sucked into the sheaves, like is happening on the  boom shown below.

Sabre 38 clew band and outhaul  mechanism

Sabre 38 clew band and outhaul mechanism. On this boat the swage is pulled right into the sheave with the shackle at the band. See how the swage is bending?

So to recap:

The E is NOT the sail’s foot length

It is NOT how long the Boom is

It is the distance from the aft face of the mast, aft, to the forward edge of a colored band on the boom.

It is not uncommon for there to not be a colored band particularly on “cruising ” boats rigs.

I will discuss the particulars of four other sail making details in a future post.

Tack Set Back, Tack Set UP, Reef ring set back & Clew set up