
When sailing solo or double-handed, offshore cruising or racing
The ability to set sails for use in heavy weather, including storm sails, is critical for any boat venturing offshore. In the case of the Morris 36, seen below, showing a Solent sail being checked for fit, having the rigging systems AND the sails are only one category of consideration. Inspection of all the component parts, of each part of a yachts major systems (see below) and assuring their suitability to the task is critical to a safe and successful passage.
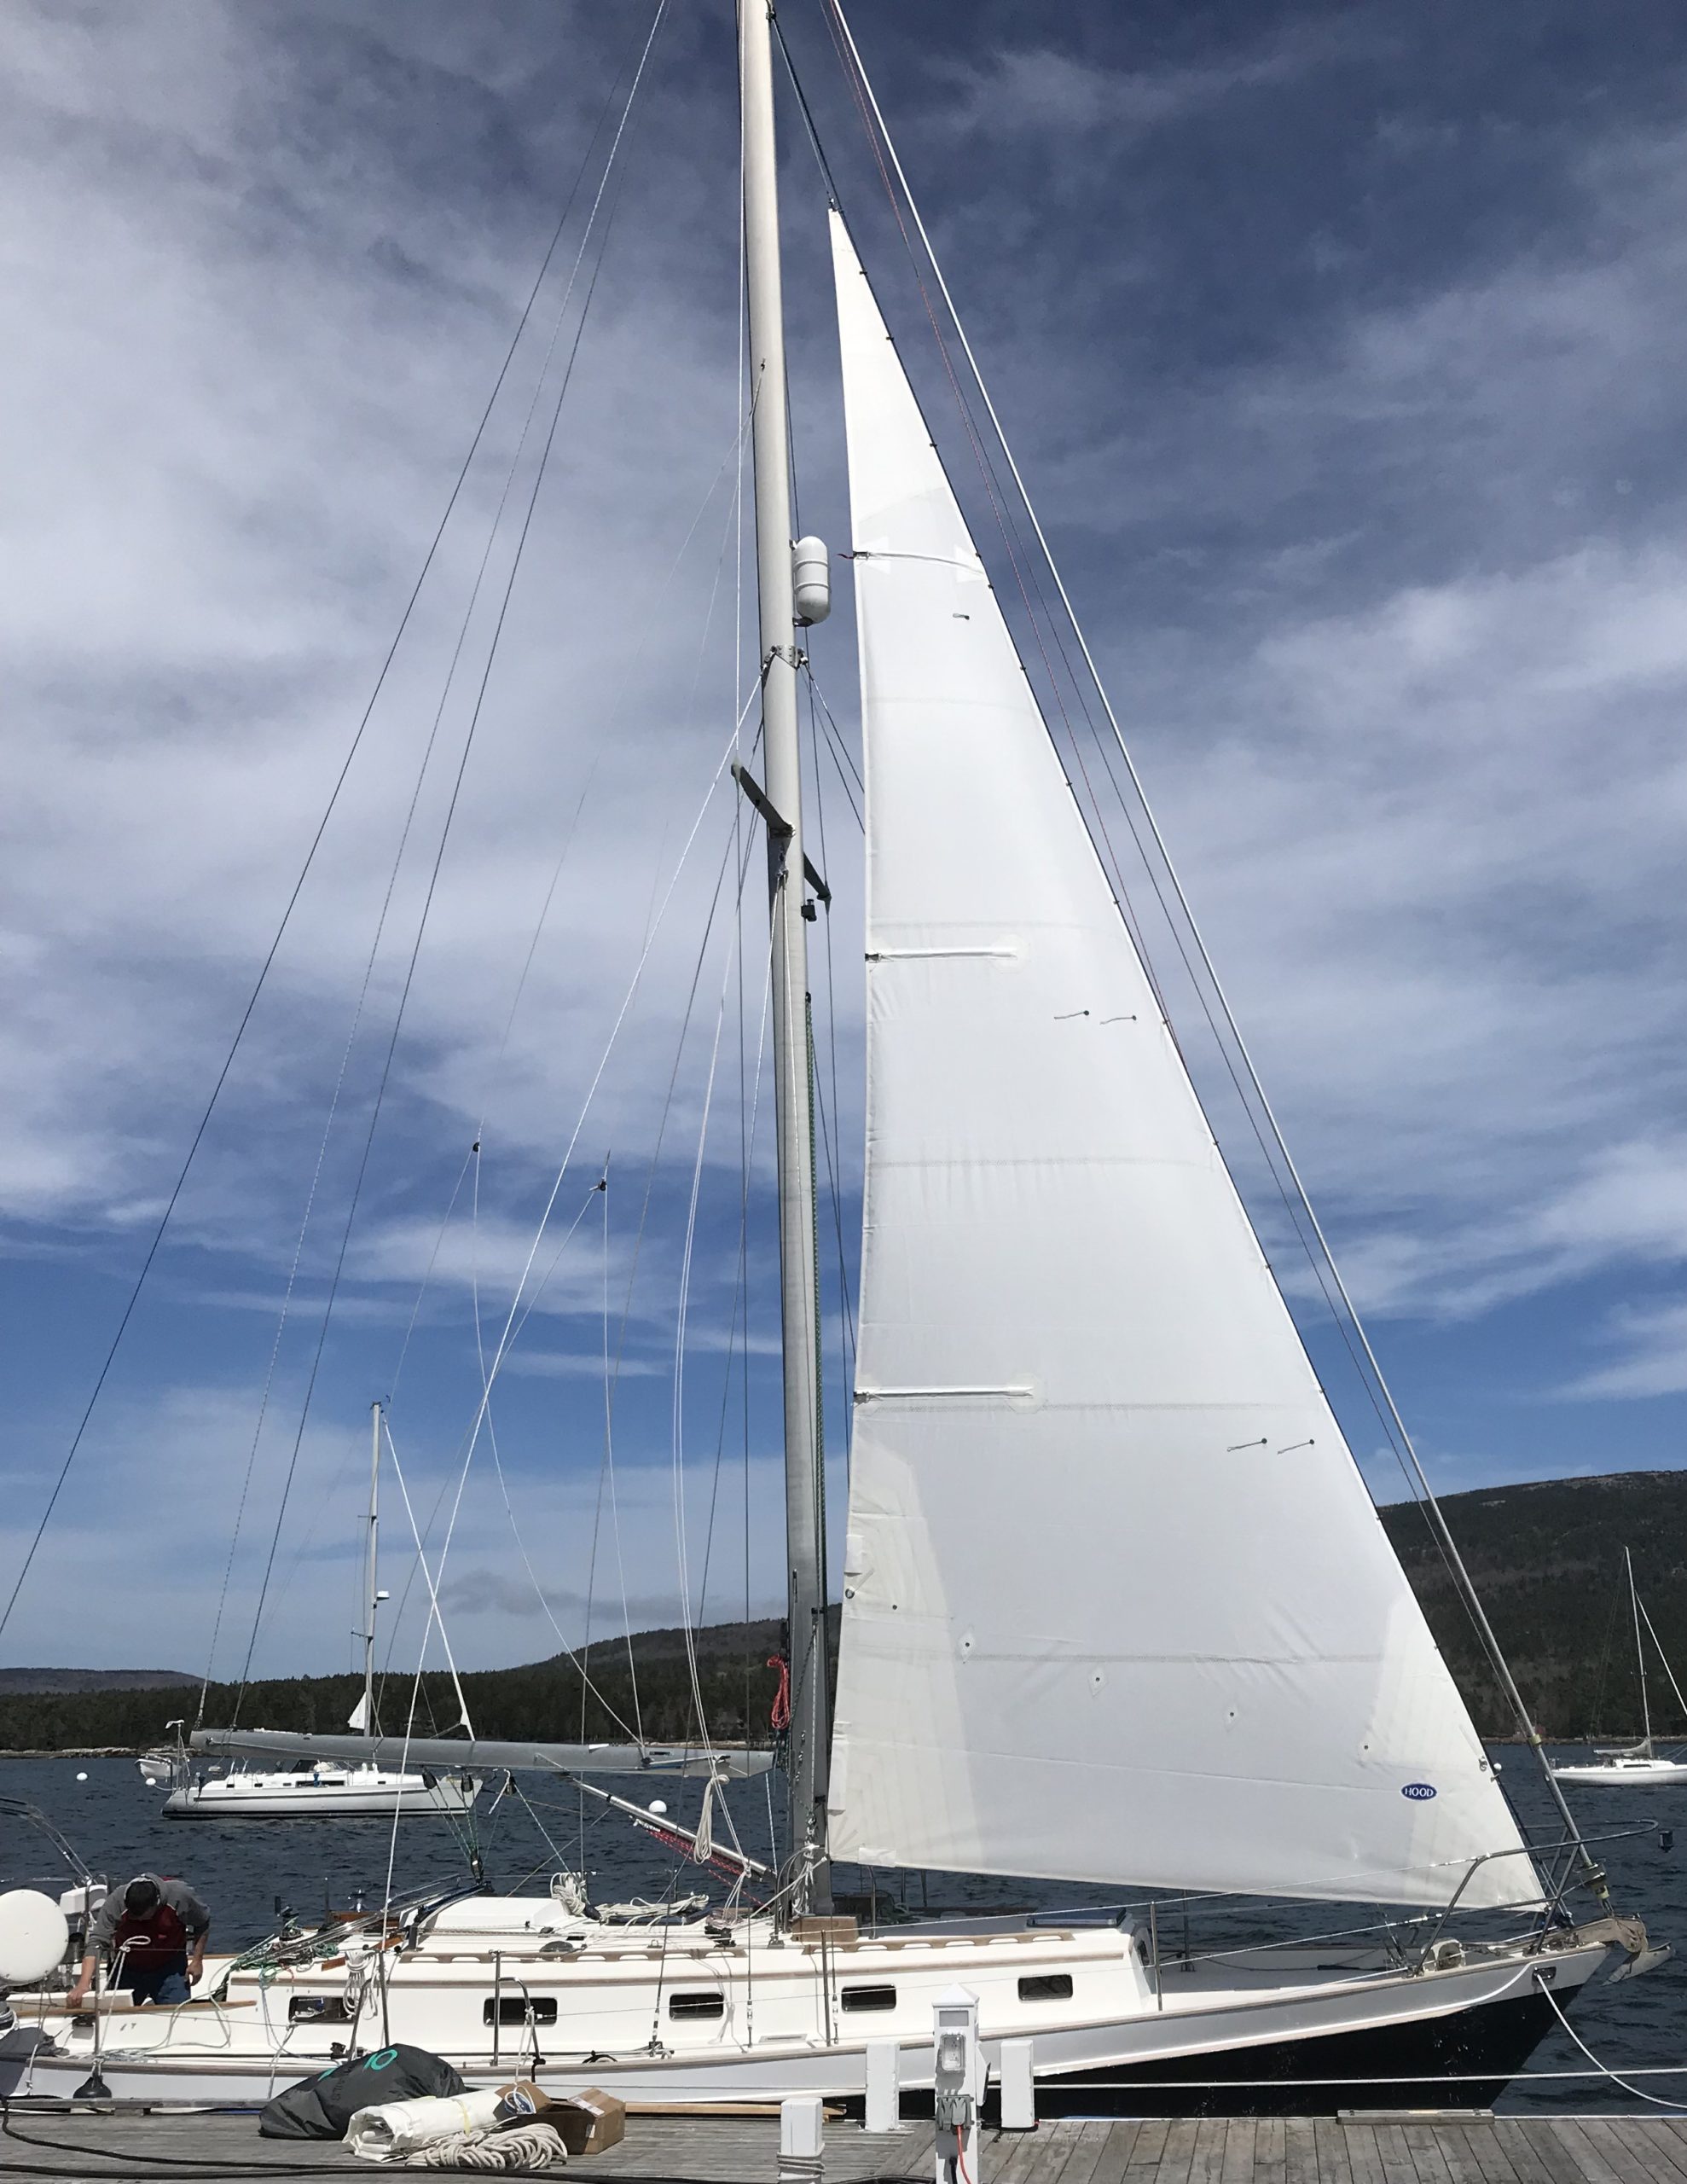
Offshore sailing, “cruising” is almost universally undertaken by couples or otherwise short-handed crews as with the Morris 36 seen above. It is my strong conviction, built on more than 60 years of sailing, that “shorthanded” is a mindset more than a numerical quantity.
For instance:
Four souls on a 50-footer are sailing short-handed, especially if IT hits the fan.
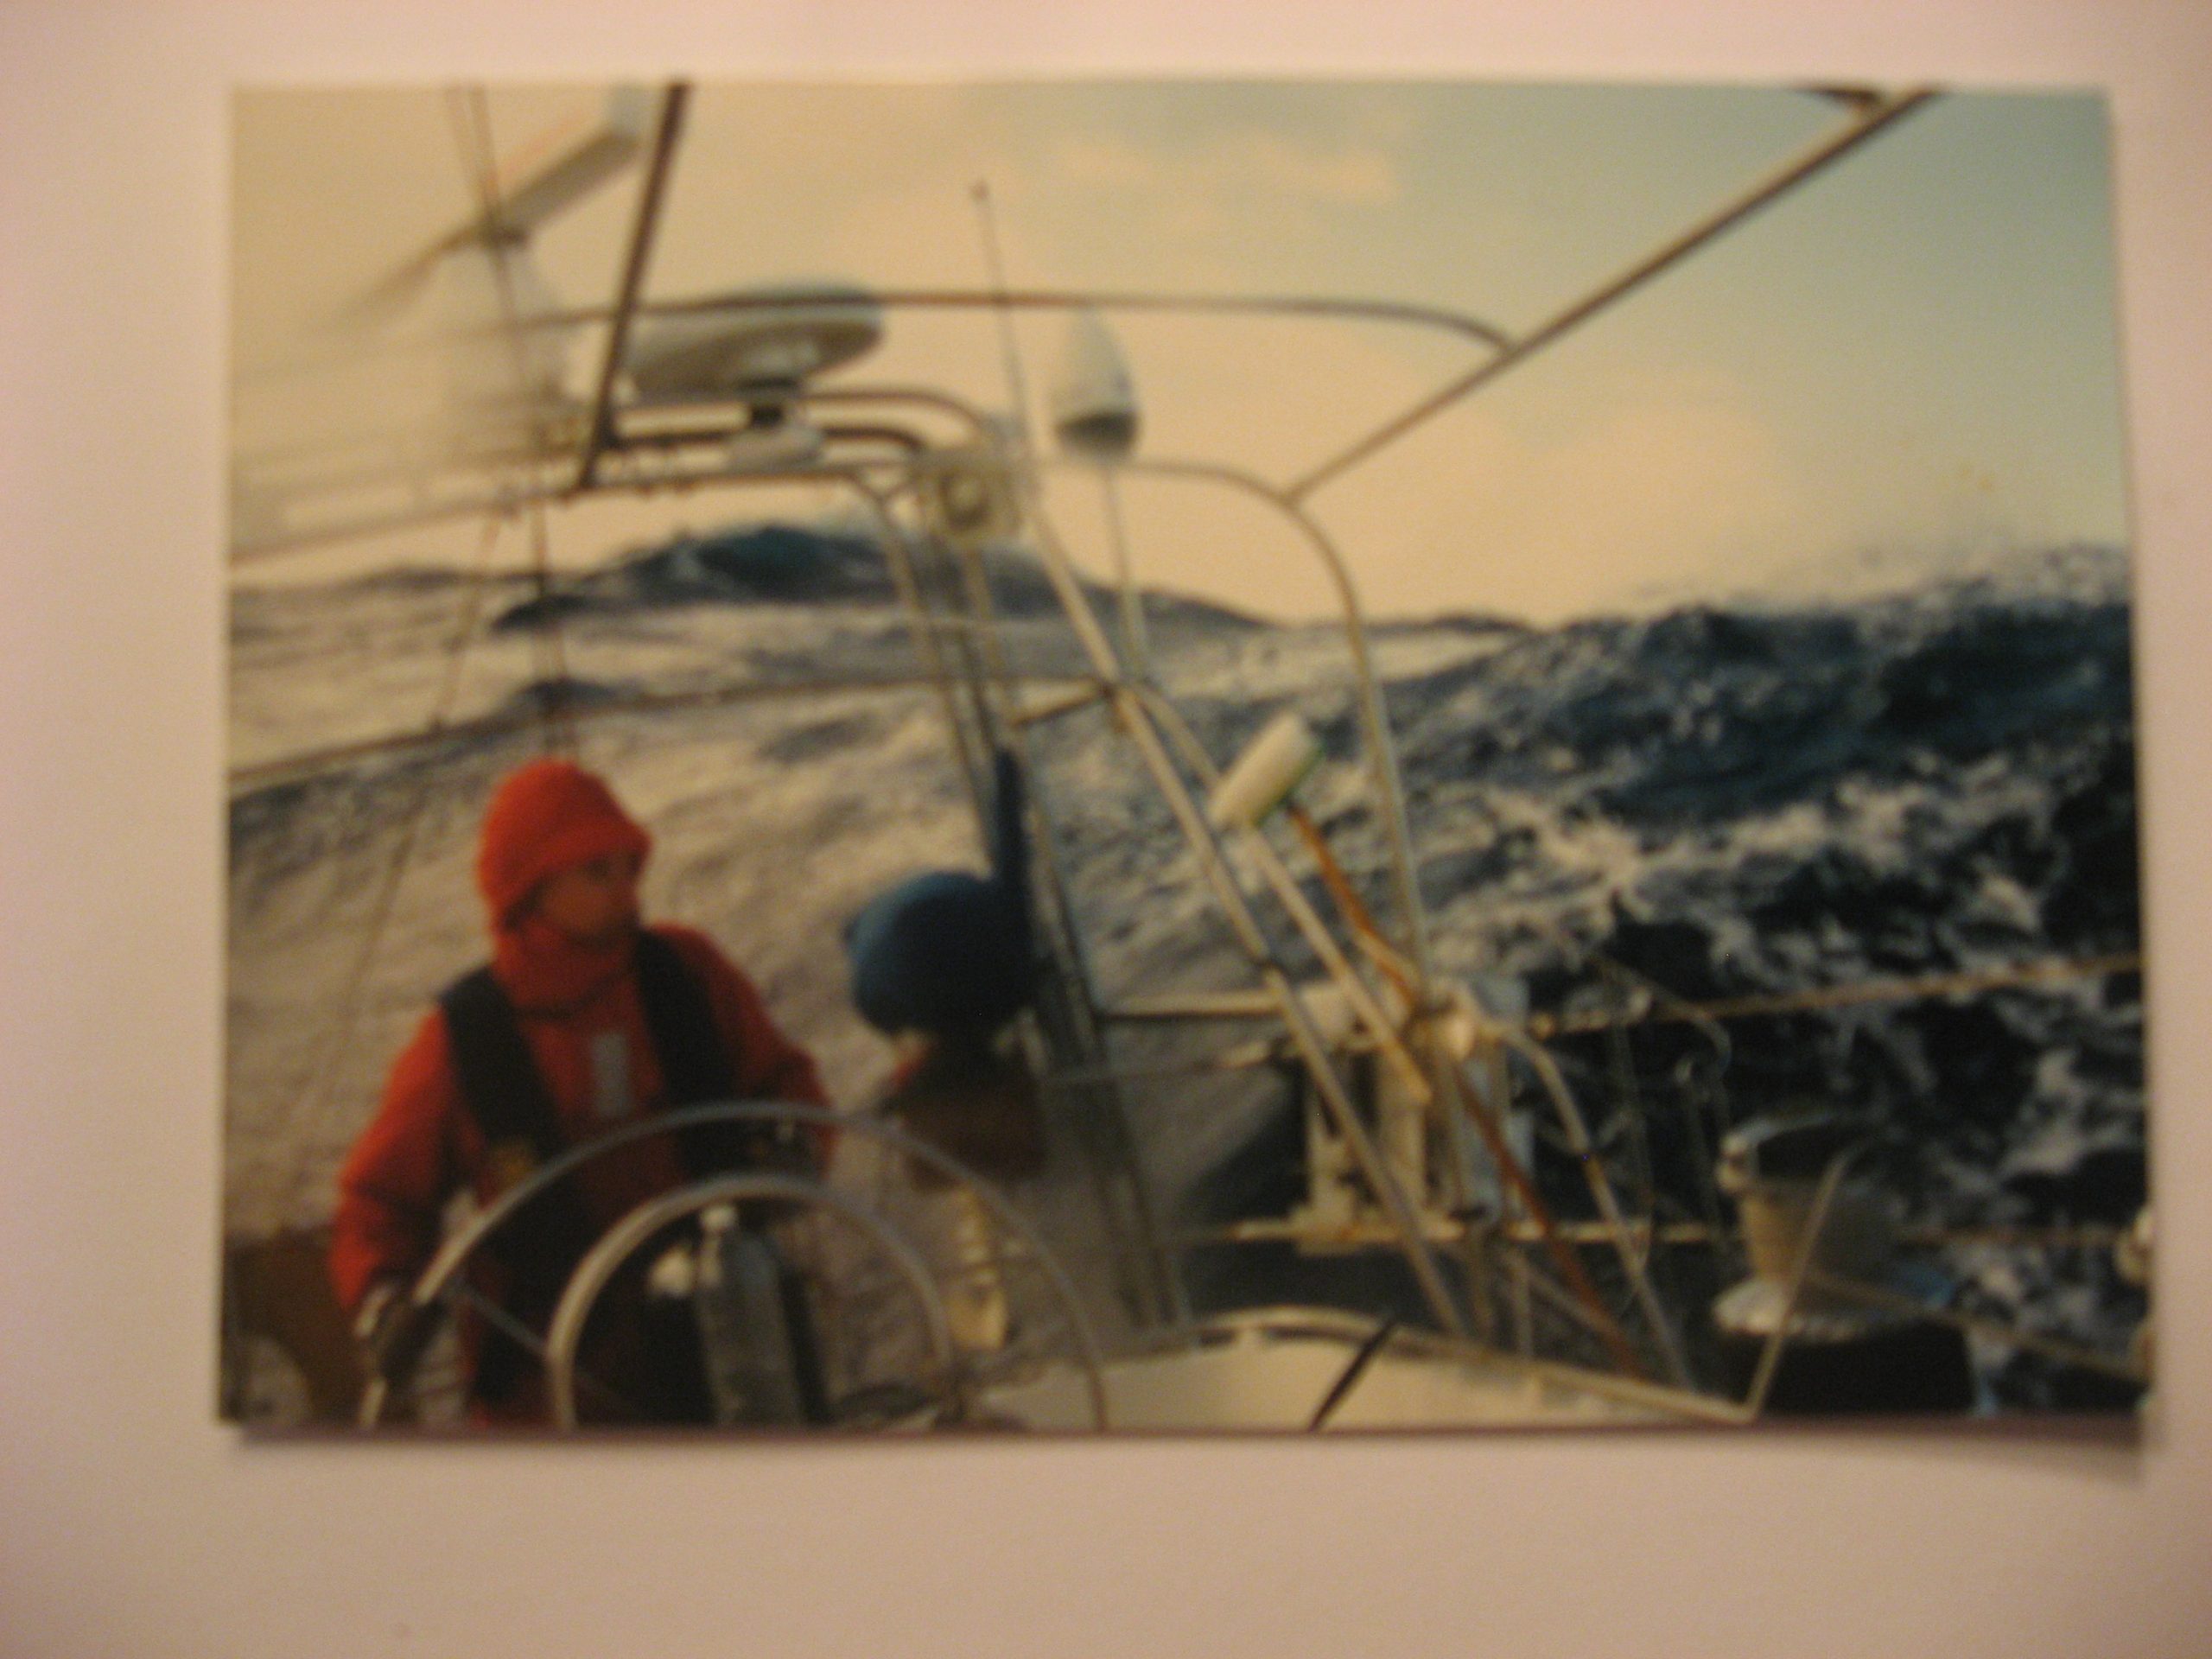
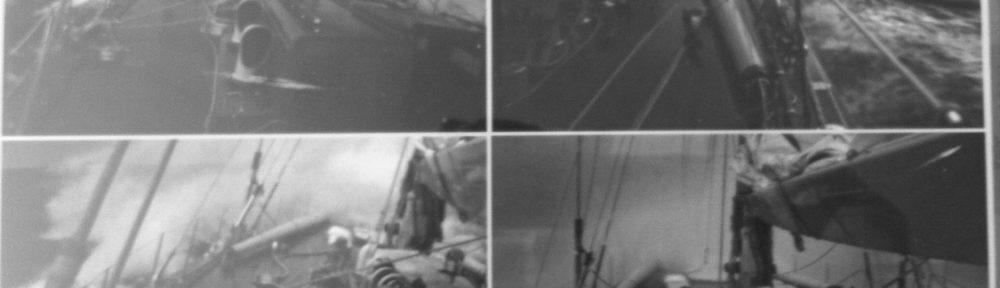
Fig. 2 Heavy weather in the north Pacific aboard a Stephens 50. I was one of four crew on this delivery. Winds over 50 knots for 12 hours, with seas to match, required we paid attention, to for instance water in the bilge and chafe on the sheets and halyards.
I sailed Transatlantic on the J-class yacht Endeavor, a 40-meter monster, with 12 souls, and I can assure you THAT passage was short-handed.
I center this discussion around the Bi-annual Bermuda 1-2 out of Newport RI. Not because it is a race, quite the opposite, rather the boats represent a cross section of what most sailors sail, and they are equipped in ways that people venturing offshore should study. In my assessment.
The Bermuda 1-2 is the oldest race of its kind in the US, is Solo, from Newport to Bermuda and Double handed return to Newport. While it is nominally a race, the Organizing Authority emphasize the goal of making a safe seamanlike passage and so the race has more of the elements of a fast cruise in Company although there is a competitive spirit and trophies. They are going to where Goslings is made after all…
By far the bulk of competitors in any given year are sailing what I think of as “normal” yachts. Broadly speaking the boats represent the pantheon of post WW2 US, European and Asian production fiberglass yachts. Owners often compete in the BDA 1-2, with family members, wives’, sons’, daughters, then take the boats on the family cruise and or the local PHRF racing in their home ports or simply return to weekend cruising.
This post and the several subsequent posts discuss the requirements one should contemplate in advance of participating in any offshore voyaging short-handed, racing or not.
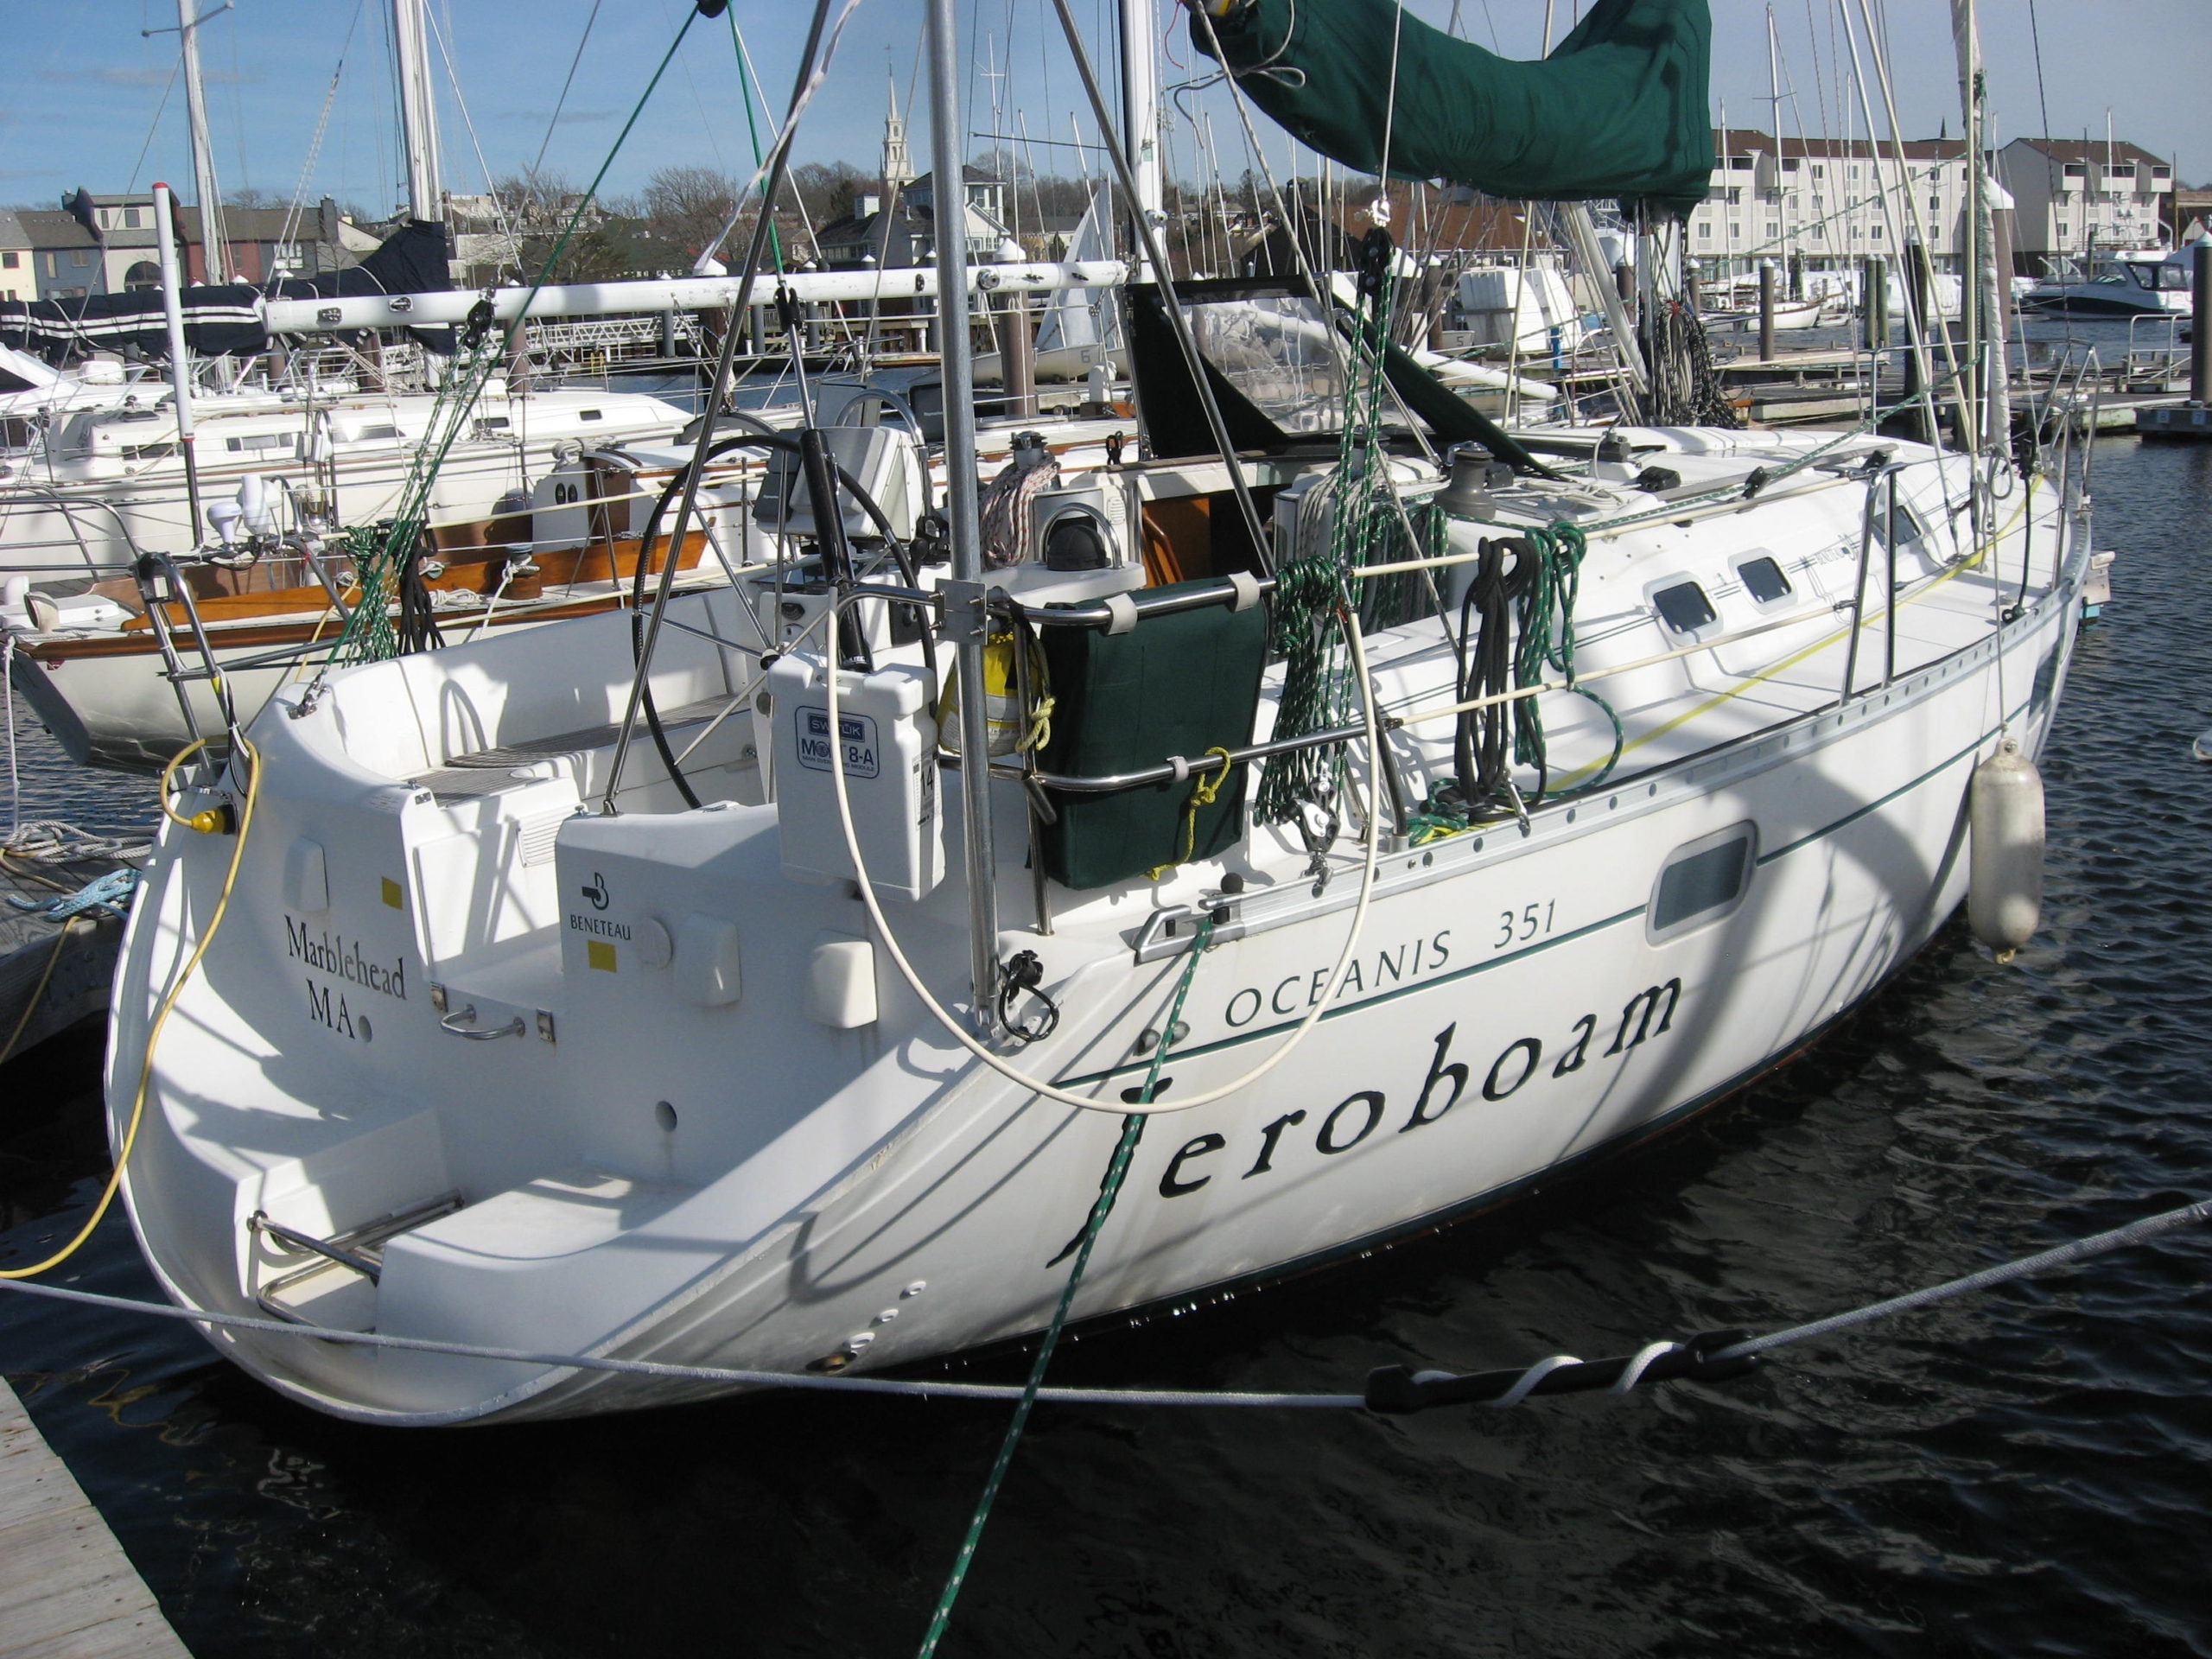
Fig. 4. This Beneteau Oceanus 351, competed in the BDA 1-2 in 2011
The Beneteau 351 shown in Fig 4. sailed not only in the Bermuda 1-2 in 2011, but in the 2013 O.S.T.A.R. The owner/skipper made his delivery passage to England solo and was very well prepared. A good thing too because west of the Azores he encountered a serious blow and sustained a mast head in the water knock down. The degree of planning and preparation he had undertaken, things like all the stray electronics-portable sat phone, laptop, cell phones, cables, in a watertight Kayak bag then tied down, for instance, allowed him to get back on track, quickly, stop in the Azores, pick a new wind wand and carry on to Plymouth.
To the body of this series:
I will be reviewing the list(s) of what I think of as critical things to think about. Note this series will not encompass weather forecasting, nor particularly performance aspects of sailing, with a couple of exceptions.
The hull; Including the deck and the hull to deck attachments and the structures basic integrity, lack of voids delamination’s etc., windows & ports and the structure supporting the keel.
The keel, rudder & steering: Including the keel attachment bolts, the rudder structure including the rudder shaft, bearings or bushings, the steering chains & cables, idlers & cogs, alignment in good clean lubed serviceable order and all clear of potential or actual chafe. And emergency steering
Spars and standing rigging: Including the spar tube, corrosion especially at the step, spreaders, and their connections to the tube, shroud connections, shrouds themselves, Chainplates and bolts, turnbuckles, sheaves, sheave pins and wiring lighting issues. Mast security to the boat.
Watertight integrity: Including the various hatches and ports around the boat, cockpit lockers, the main hatch. All these must not let water in.
Engine operations: The main part of the engine: Get the oil inspected, engine mountings, alternator reliability, axles in true, belts sound, hose clamps and hoses in good order, through hulls smooth and easy to operate and secured with double hose clamps. Wood plugs close by on a lanyard. Fuel tank security, capacity and consumption, clean fuel, shut off values for both fuel lines at tank end. shut off for the air vent at the intake end. Make sure the exhaust will not back siphon ocean water, that the Cutlass bearing is sound, no movement in the P strut, propeller is smooth and balanced, no nicks or dings in it.
Power systems: Including the 12-volt systems, cabling NOT run thru areas where bilge water can accrue, the size and cleanliness of the cables, esp. where they are connected to the engine, watertightness of the connections, security against vibrations, water proofing of the parts exposed to water, spray etc.
Sails and sail handling rigging systems: Including reefing systems, small sails, and systems to rig them, furler integrity, the systems for using spinnakers, the deck layout and sail control lines set up for easy smooth and fast thinking free adjustments
Emergency actions: There are 8 major events a sailor must be prepared to think about and act on when at sea. We will get to these in a later post. These are the events that have over the years created the long list of safety equipment offshore race boats must carry.
Husbandry- Care and feeding of the boat and crew. Amount of and cleanliness of freshwater, delivery systems, and backup system, reliability of pumps systems, plumbing for the head hoses, use of head, fresh water for flushing, vinegar for combating smells, the stove, back up stove (?), security of the propane hoses, food type, ease of preparing volume for stowage, need for reefer. Swinging table, cup holders, cups, labeled for each person.
The HULL and DECK structures
A cross section of boats entered in the Bermuda 1-2 over the past few years include:
- Sabre
- Morris Justine
- Hanse
- Freedom
- Tartan
- Alberg
- Beneteau
- C&C
- Jeanneau
- Sigma
- Pearson
- Bristol
- On the more performance end of the scale are a variety the newer, faster J-boats products and
- Class 40’s
- Mini Transat 650’s
- Quest 30’s and 33’s
- Hobie 33’S
- Olson, 29 & 30
CONSTRUCTION METHODS:
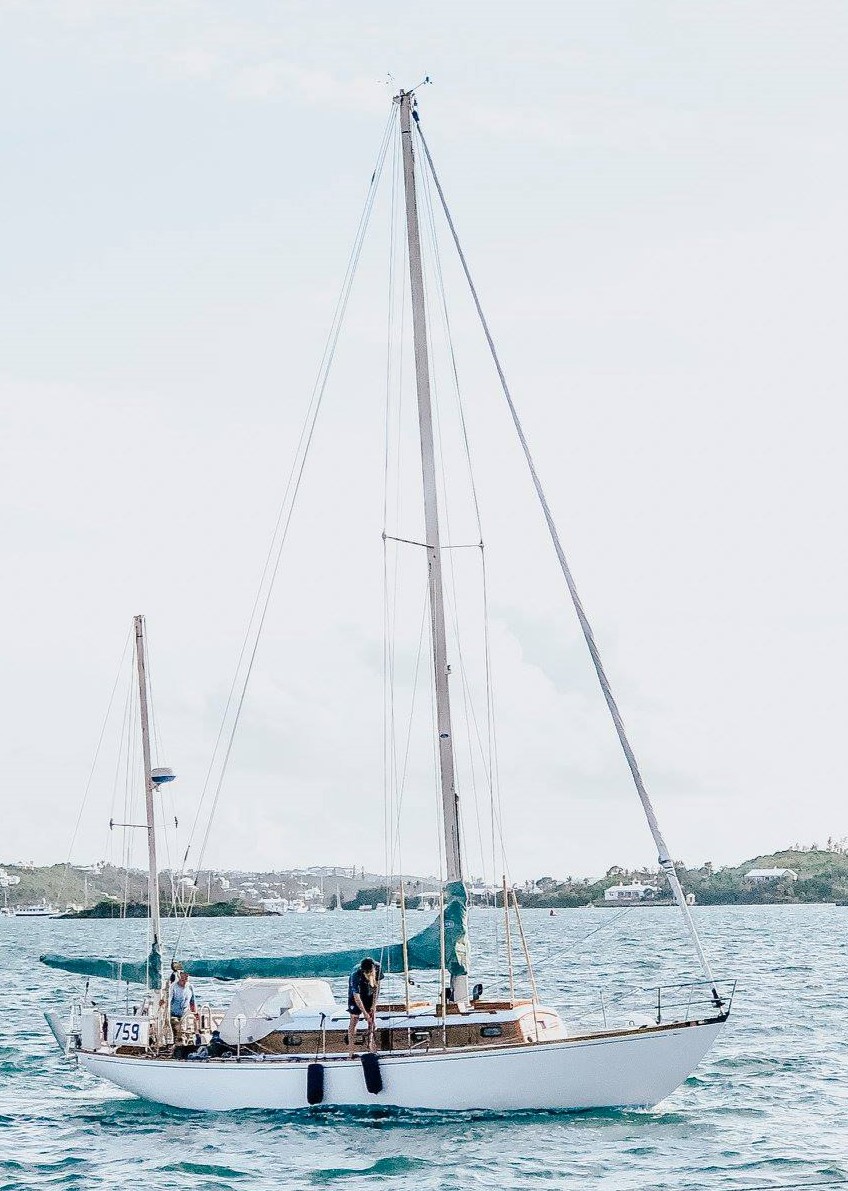
Fig 5. Conventional carvel planked timber, such as Thora, seen above. She is a 1962 Ted Hood designed Little Harbor 37, carvel planked, CB yawl motoring into Bermuda at the conclusion of the 2018 Newport to Bermuda Race. A father and son crew.
Fig. 5. shows a classically built wooden boat, that was at the time of the picture, about 56 years old. The father and son crew competed in the DH class in the Newport to Bermuda Race.
In other words, do not be dissuaded from sailing in the ocean in a wooden boat. It used to happen all the time.
There are two classes of fiberglass boat construction
SINGLE SKIN & CORED
- Single skin. Single skin is, as the name implies, all FIBERGLASS. There is no core, it is NOT a fiberglass sandwich. The old style, built like a tank method. Usually, the standard on boats built before about the late 1970’s. Older Pearson, Bristol, Ericson C&C, Ranger etc.
2. Cored Construction: A more contemporary fiberglass sandwich technique where the fiberglass skins are layered over a “core” material of some type. The most commonly used cores are a synthetic foam core: Divinycell and Airex are two brand names. Wood-Plywood and Balsa in a specialized form are used too, plywood not at all since the late 1970’s I’d guess.
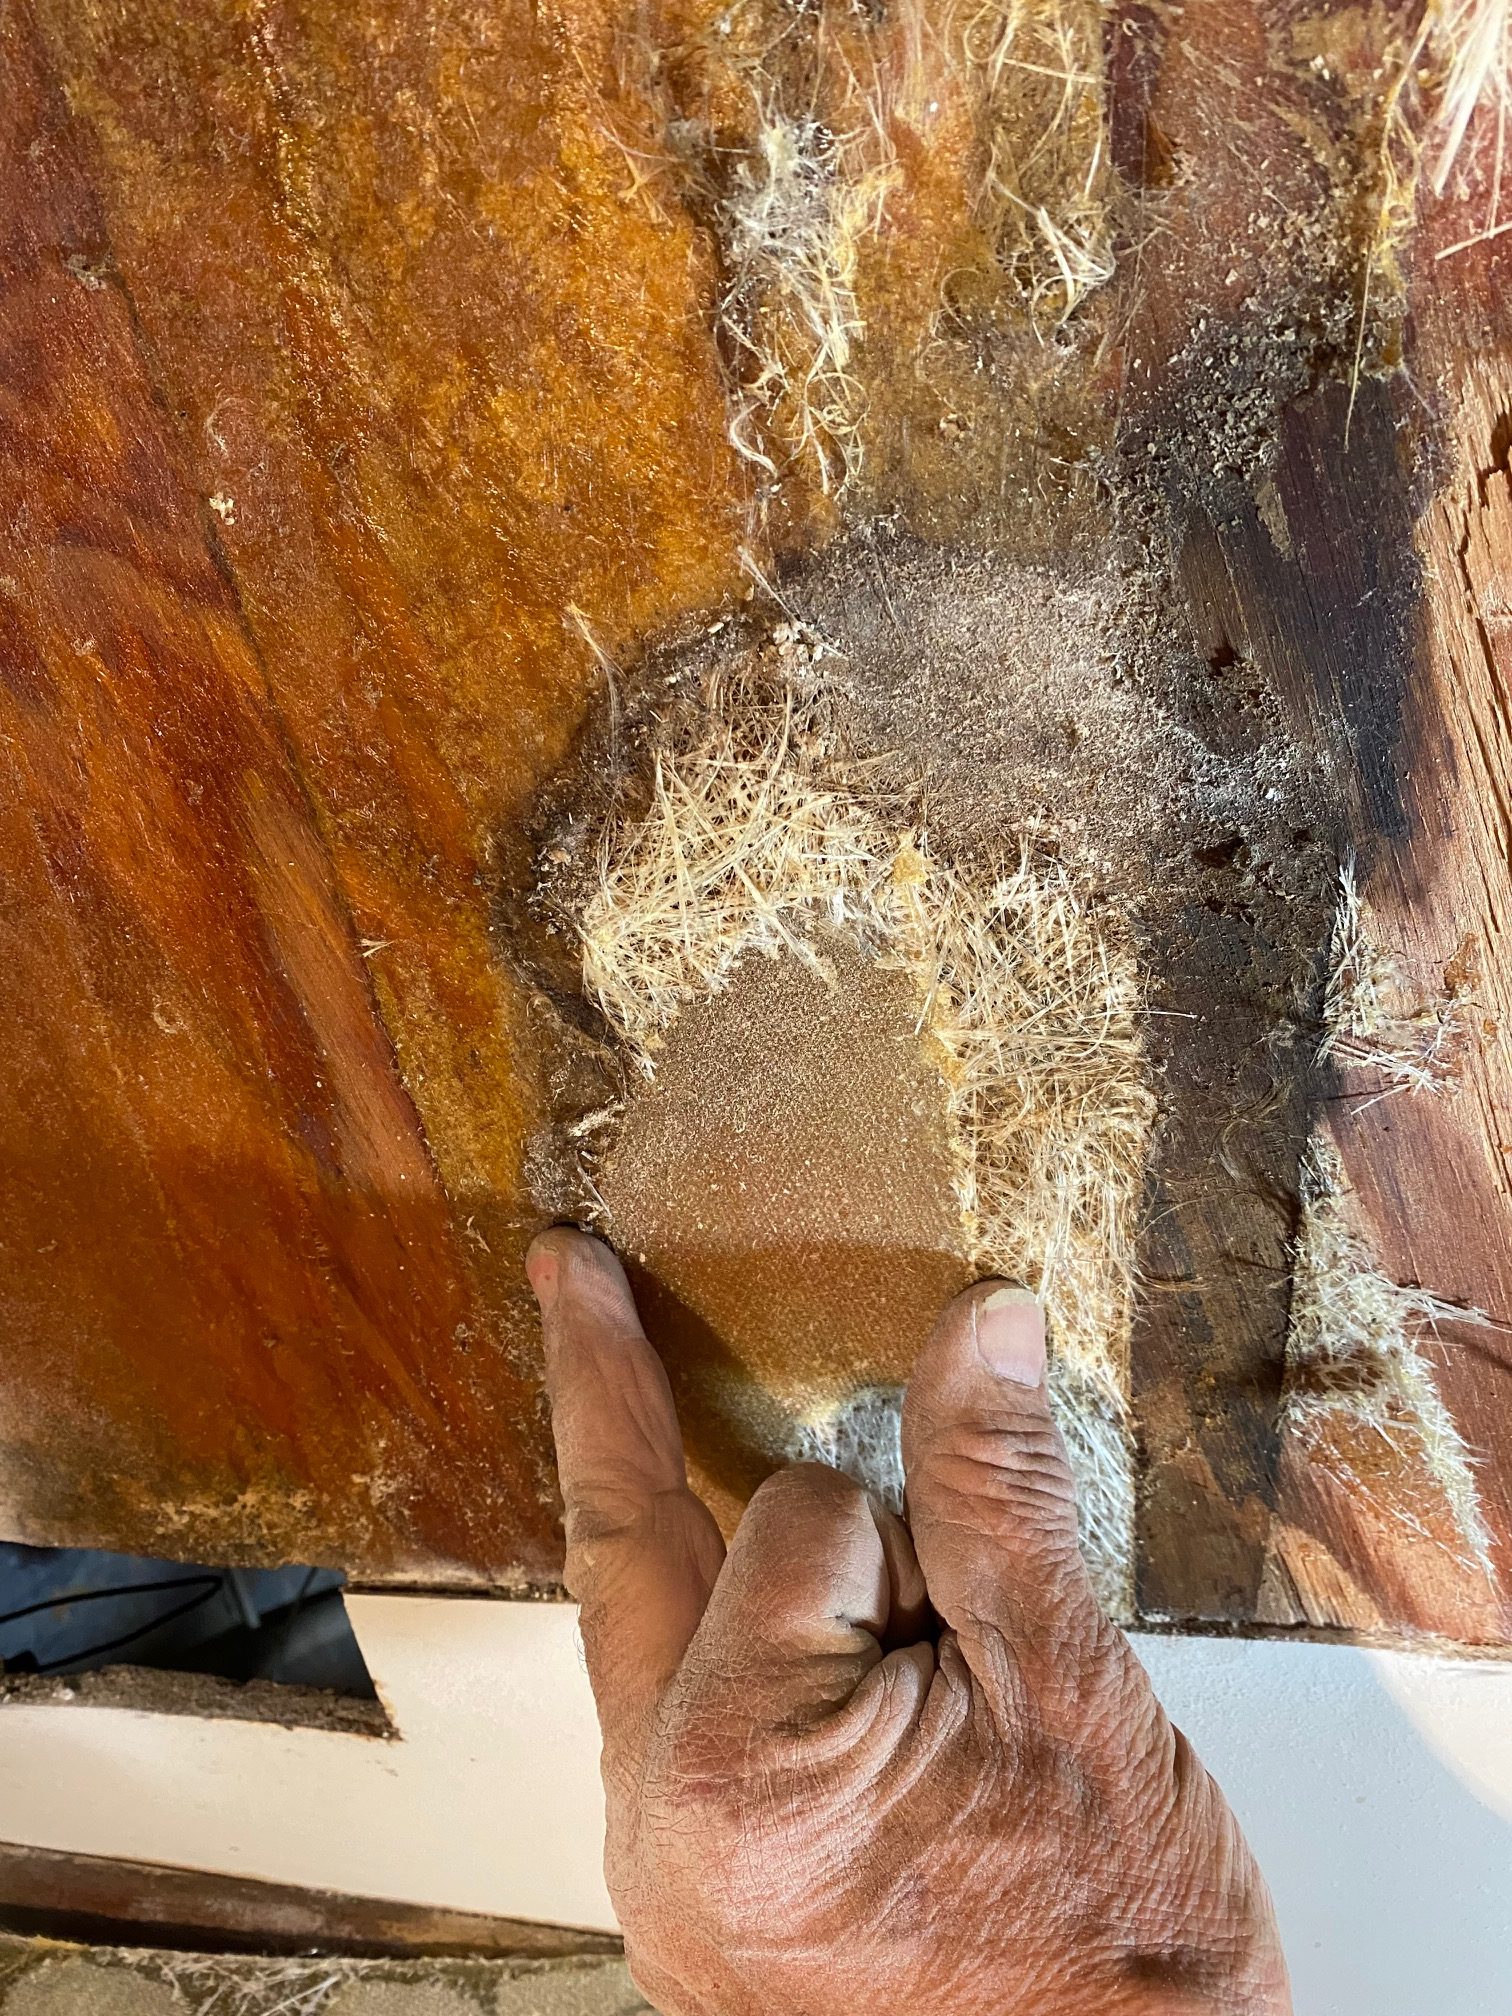
Fig 6. This picture shows the interior structure of my 1970 Ranger 33. Here I am cutting out the headliner. The plywood core can be seen, behind my hand. The dark areas are where the plywood core is water soaked. The water was coming in thru the bolted down handrails. Because of the structure technique, the bolts came thru the outside skin, the plywood core and into the headliner.
Some older boats use Plywood though use of this material as a core petered out in the 1970’s.
Cores made from Balsa wood are common, especially in the J-boats lines.
There is a material called Honeycomb, not used in production boats due to costs, costs of skilled labor needed and the more sophisticated techniques for fabricating and issues with durability-puncturing for instance, and general wear and tear. It is sound material and common in specialized race boats, just not a good value material, suitable for production for production boats.
FIBERGLASS:
There are typically two types, classes, of fibers used in retail, production boat building. E glass and S glass. These names refer to the mechanical properties of the fibers used in the construction. Generally speaking, the S glass has “better” mechanical properties than E glass. It is more expensive.
Carbon fiber is unlikely to be found in any production boat (except for masts) largely due to cost but also it requires a higher level of artisan skill and related manufacturing methods and techniques, vacuum bagging for one, skill to work properly.
ISSUES:
Fiberglass is generally pretty bullet proof stuff from which to build almost anything, including sail boats. It does need to be inspected once in a while. Ironically it does not like to be in sunlight. It does not like to flex. Both of the negatives of these two features take a long time to manifest.
DELAMINTIONS:
This is a separation of the “skin” (one layer of fiberglass fabric and glue) from the core material. Known in the trade as Delams, these are the sites on a boat suffering this seperation and are readily found by sounding, tapping in a very close pattern along the structure. Voids and delams have a hollower sound than structure that is sound. Such technique with a rubber mallet is typically done by a surveyor at a pre-purchase inspection. This is of course common when purchasing the boat, assuming it is used. There is no reason why an owner cannot do it. Delams are generally developed over time, and use. The conditions for delamination’s in the future is typically created at manufacturing by the laminate being “Dry” as in no, or not enough, resin in the area in question.
VOIDS:
These are a subset of delams where there is NO resin in the site in question. These are an original manufacturing flaw, typically around corners. Fiberglass as a laminate cannot, or rather it is not sound to do so, be bent around a hard 90-degree corner. IF you examine your boat, you will never see a sharp corner, rather they are rounded corners, the smallest usually bigger than a 5/16” radius. Voids are where the resin is not fully spread around the fibers in a particular area. Small Voids in the corner of a cockpit corner are not particularly worrisome. Larger voids in areas of load, around the chainplates, mast partners and step etc. are more important.
Before going out in the ocean it is very worthwhile, for your own peace of mind, and your families (including your insurance agents) to thoroughly inspect all parts of the hull. Many of the systems noted above overlap. Chainplates to mast and hull for example. Check for delams and or voids in way of where the chainplates attach. It is not uncommon for Balsa cored boats to be “soft” around the chainplates due to water ingress thru the chainplates and into the deck structure.
The J-boats products the seeping chainplates are, frankly, endemic as much as I love the guys, the firm and the boats. Delamination’s in the deck around the chainplates are something to be addressed.
WATER INGRESS: Anywhere water can get into the boat is a location for delams. In the case of Balsa core, water propagates thru the Balsa, and so can spread from local ingress to larger areas of the boat over time, if not cut off at the knees. Not the case with the foams because they are ‘closed cells”, like honeycomb.
Common areas of water ingress include along the Genoa tracks, (see Fig 7, below) where hardware is attached to the deck, winches, clutches, cleats, the wee eye-straps for the dodger. These innocuous fittings, and their fasteners very likely penetrate only the outside skin and so are a prime location for water ingress into the spaces between the core, if the boat is so built, and the inside of the outer skin. If the core is Balsa, this water propagates away from the original screw hole(s) pretty quickly. AND of course, the bases of the stanchion guards for the dorades any on deck winches and so on.
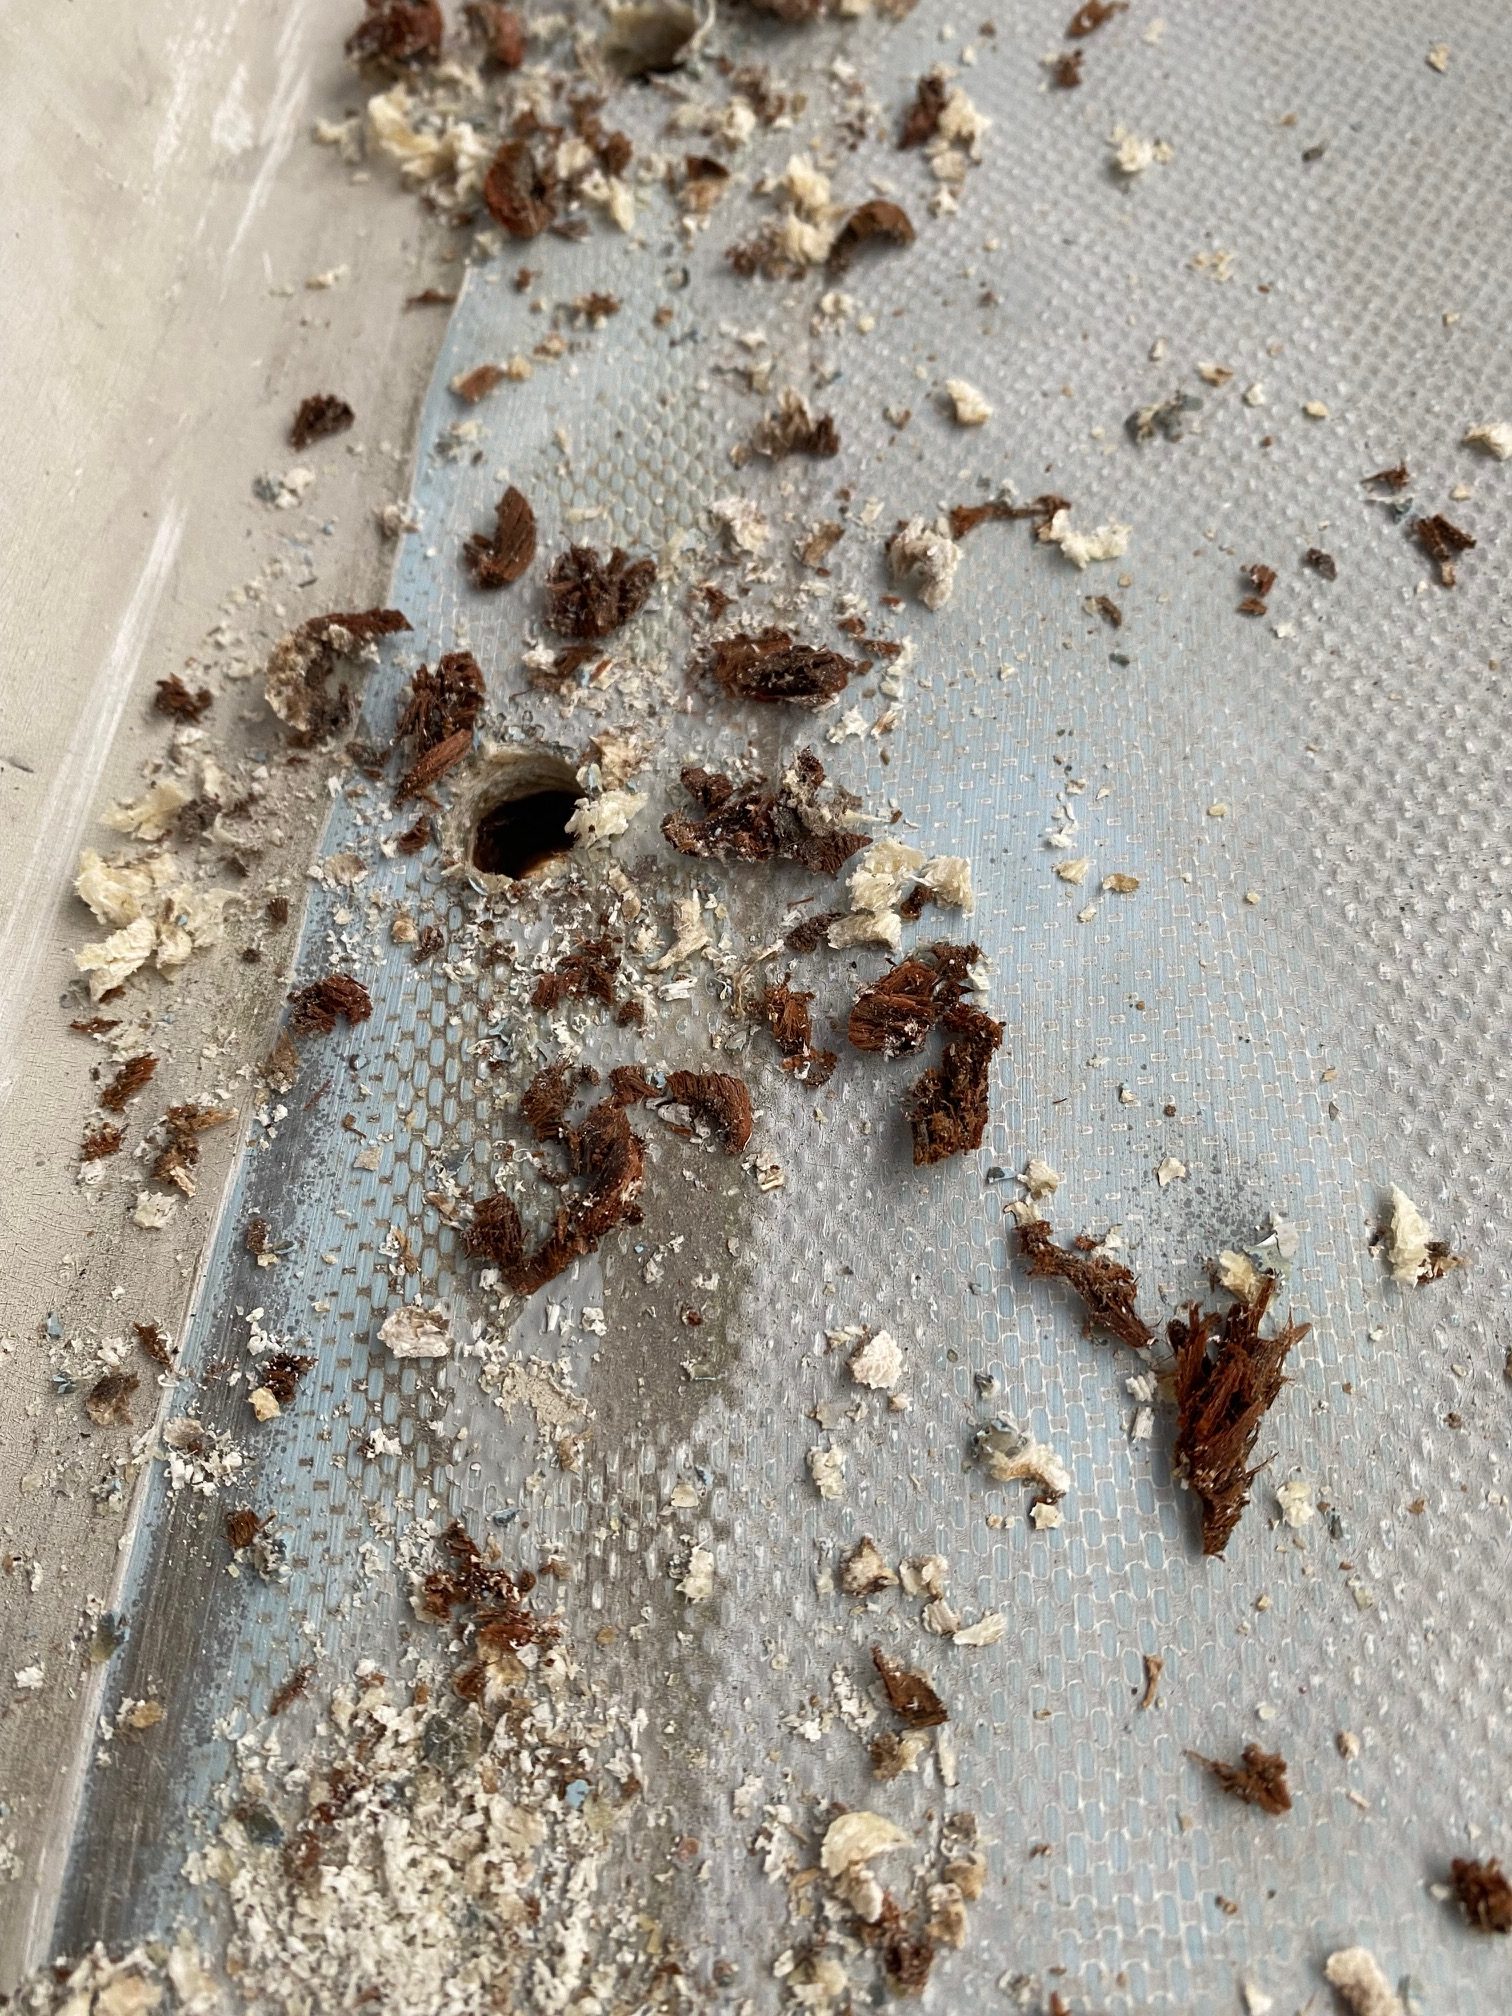
Fig 7 . This picture is the deck of my Ranger 33. I have removed the genoa track and bored out the bolt holes. Again, there is much water penetration as evidenced by the darker pieces of swarf. This is water-logged plywood. The water gets (got) in thru the bolt holes and propagates thru the plywood core between the inside skin of the deck and the inside skin of the headliner. In this case the plywood acts as a sort of faux core structure. Anywhere the water can travel thru the plywood, it will. Such propagation is very random and difficult to stop and or repair without some serious work.
The hull deck joint:
In particular with boats having a perforated aluminum toe rail, like the C&C’s, seen below come to mind. These finish details are used to help hold the deck to the hull and by inserting fasteners on usually 4-inch centers. The technique noted above for drilling such holes, oversize and back filling as the noted technique is called, is just not viable and so not done in the case of production boats. Too time consuming and man hours are expensive.
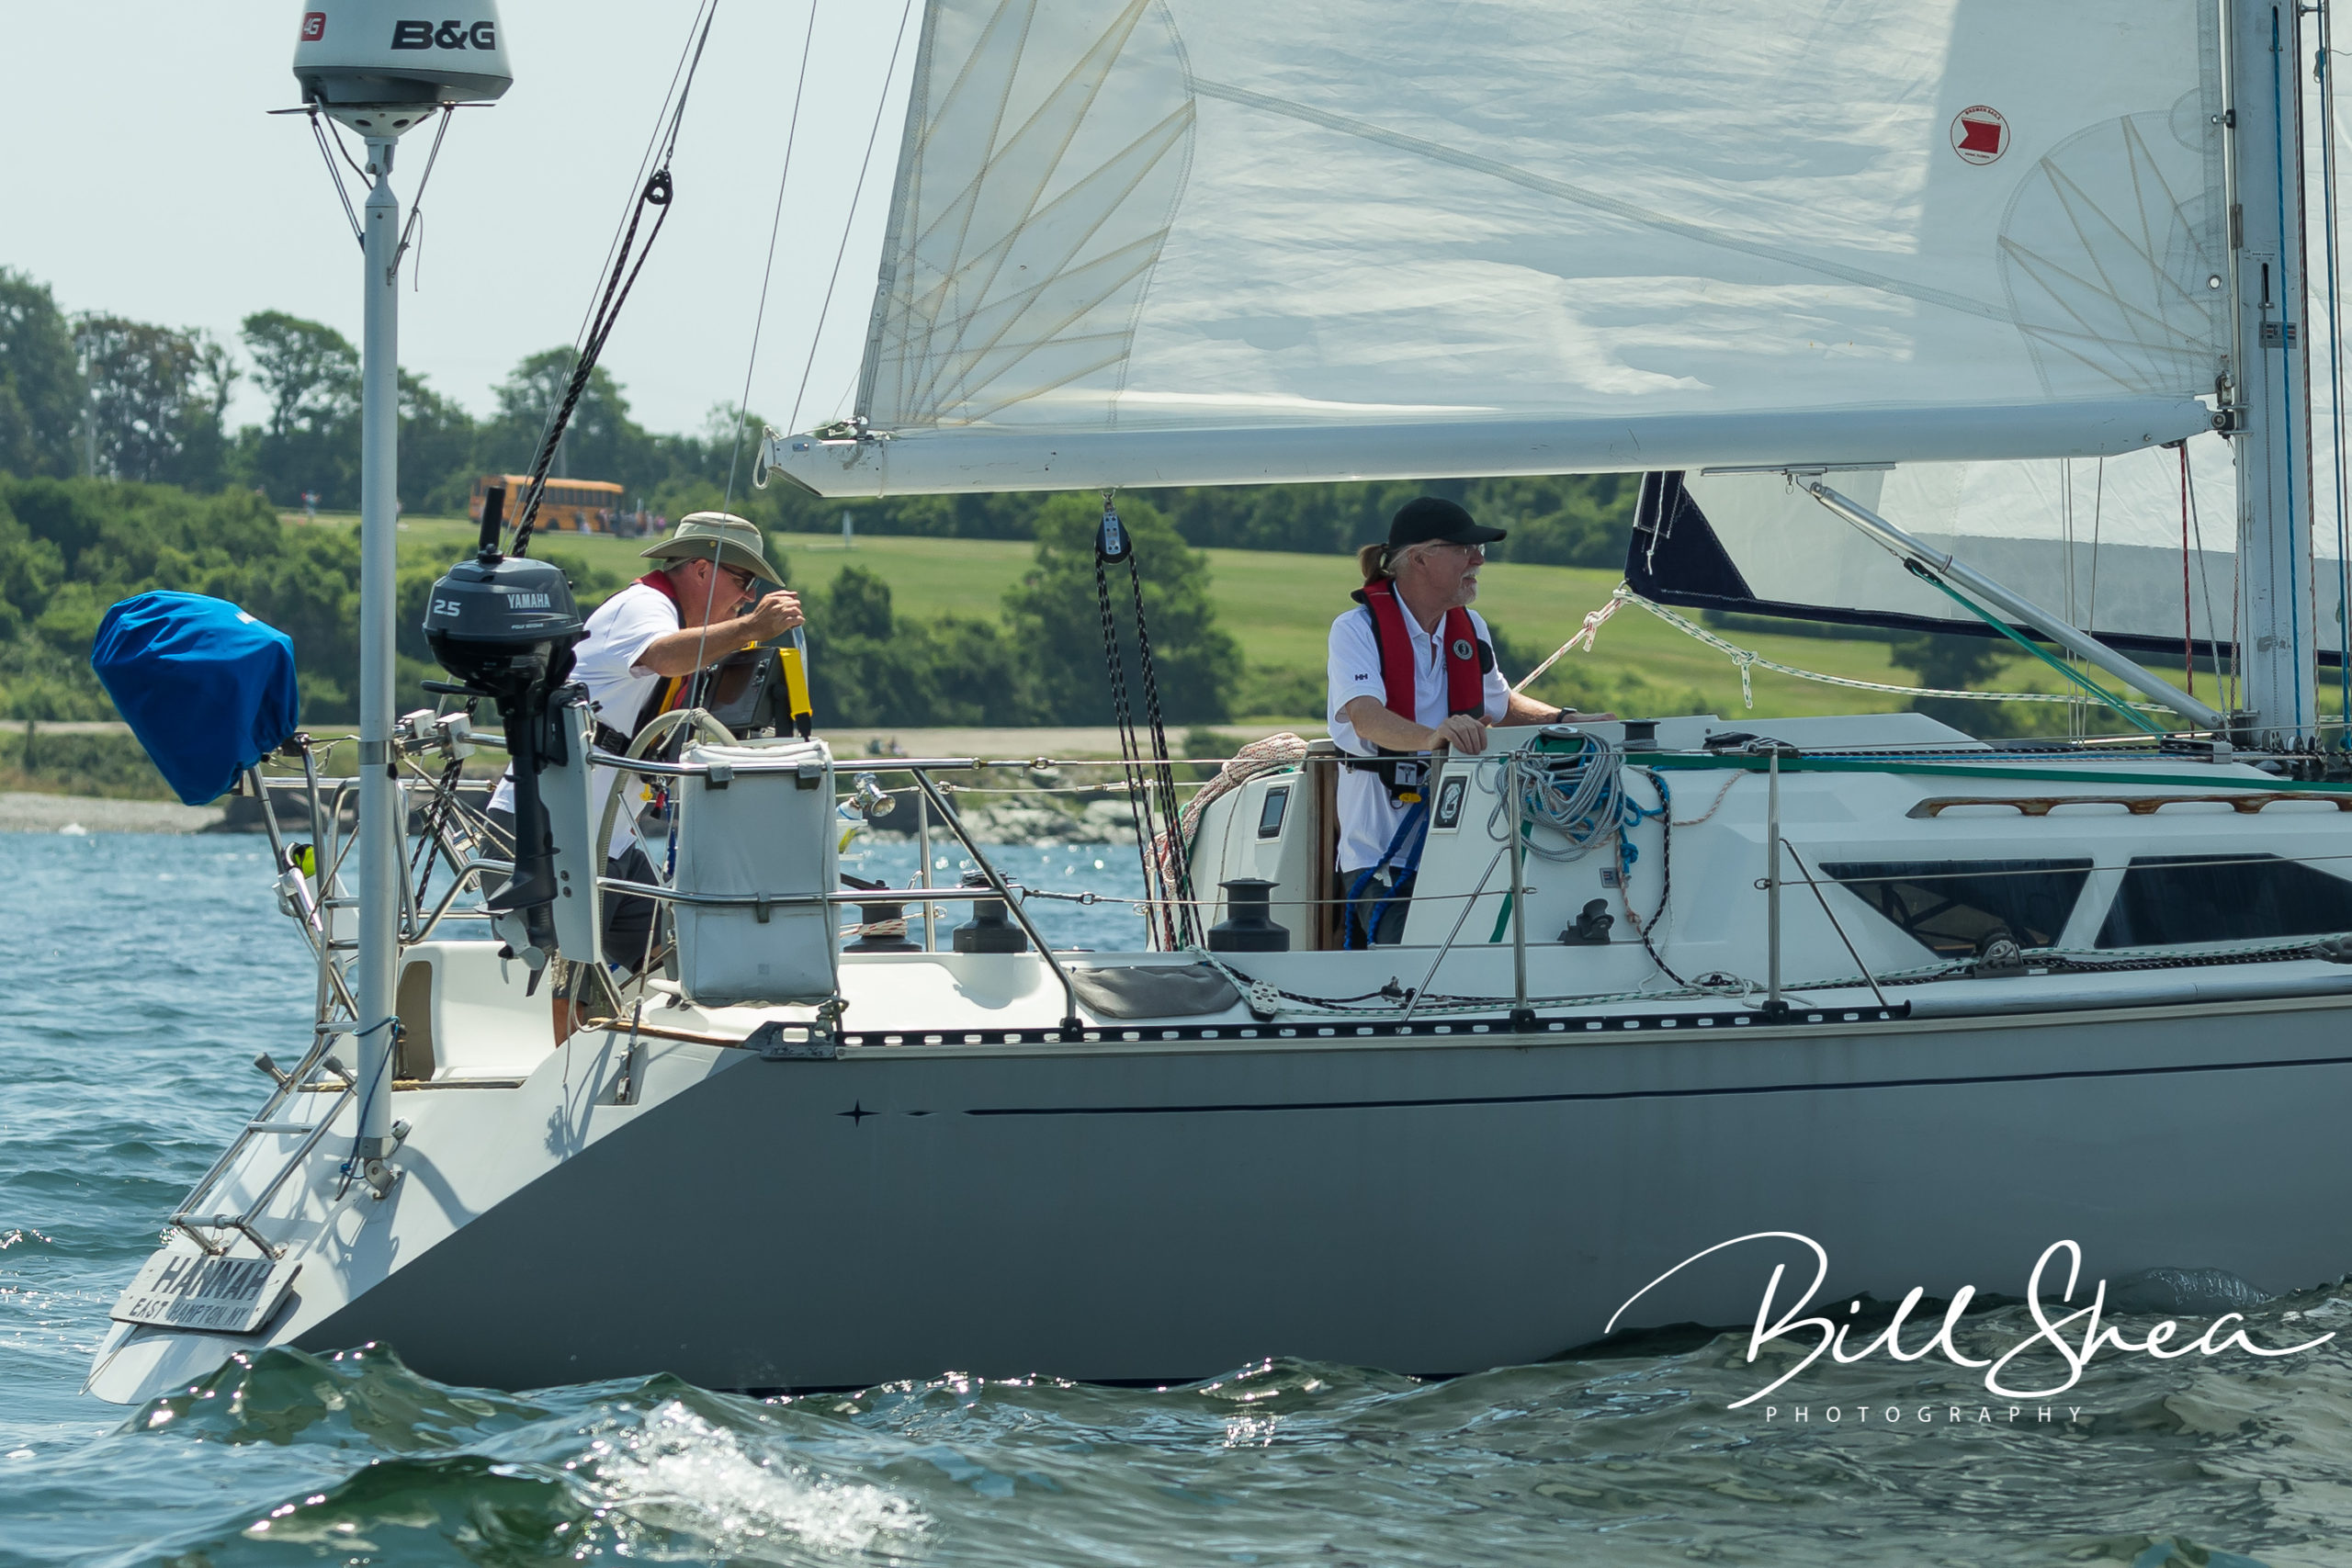
photo credit (C) Bill Shea Photography
A boat of 40 feet LOA and 11 feet wide might have say, 42 feet of gunnel with such toe rail installed. 42 feet with holes on 4-inch centers, so three per foot, will have 126 holes, PER SIDE, for a total of 252. This does not count the bow and stern rail. Four legs per each rail, 3 bolts per leg, times two is another 24 bolt holes, for a total of 276 holes, perhaps 5/16” diameter BEFORE YOU GET TO THE DECK HARDWARE.
Many boats have a box like design where the deck lip fits over a matching lip on the top edge of the hull. Several tubes of sealant are injected onto these flanges and the deck and hull are mated. Sometimes this connection is held together mechanically with bolts, sometimes the sealant is sufficiently robust to glue the whole lot together.
Some kind of cap rail, commonly teak, is then installed again held down with screws, usually not 5/16 inch and some kind of sealant.
There are a few other ways builders use of doing this task, the point is to find out how your boat is manufactured and make sure water does not get in thru the hull deck joint. If it has been, stop it.
Screwed in windows, small fittings, particularly small hardware that is merely screwed into the fiberglass all need to be inspected. Invariably such screws will certainly penetrate to the inside, the core side of the skin and so offer a channel for water to get in. In an ideal world, all holes in the structure will be drilled oversize, the local core removed, the hole and subsequent void filled with epoxy mixed with a thickener. When this goo cures, the correct size hole for the fastener is drilled, and the water cannot, if the technique is done properly, get to the core. This technique can be seen and followed using techniques from the WEST Epoxy guys, Gougeon Brothers in Bay City MI.
The numbers of holes small and large in the average production boat does not lend itself to such time (and so cost) rigors. BUT if want to not have problems and want to keep the boat for a while, such work is rewarded with a high degree of confidence and in particular when It has hit the Fan at sea.
What is to be done with this foregoing list if things to think about?
Consider the age of your boat- For classes like Bristol, Catalina, Pearson Ranger etc. there are builder/class forums. I am a member of the Ranger Forum on FB, the internet is fantastic for such research.
IF you are contemplating upgrading your current boat, to a bigger one, for The Exit Plan, these considerations ought to be on the boat shopping punch list. at least as high up as how many cabins, heads and burners on the stove. The bulk of the issues discussed, above and in this series in general will, or should be, discovered by a surveyor. Bring your questions about these issues to his attention in advance.
AND remember, you need not be contemplating racing to consider these issues. The foregoing items of strength and reliability equaling seaworthiness play into any boat planning on going in the ocean.
KEEL & RUDDER. The mechanics of how these two components are in corporate into the boat are derived from the age, and so the design and construction techniques in use at the time the boat was designed, not necessarily built. Some older style boats, I am thinking boats say in the Bristol line were still building “the same boat” in the seventies that was designed in the 1960’s. The rudder and keel, in particular need some professional inspection because any issues with them are invariably invisible to the naked eye, from the outside.
KEEL:
There are two common methods for affixing the keel with production boats.
- Encapsulated and
2. Bolted on.
Encapsulated: This technique, largely obsolete today involves the keel of the boat being laminated with the actual hull shape and when the boat is upright pouring lead into the void constructed to accept it.
Bolt on: This is the technique where the keel is poured into a mould, usually offsite by a firm who specializes in this work. There is a structure inside the mold, built for the purpose, around which the lead forms. This structure has threaded rods exposed on the top of the keel. These rods, now resembling bolts, after the lead is poured, ultimately are inserted thru holes in the bottom of the boat, nuts and washers are installed and tightened up. This work demands a high level of engineering in order to ensure the design of the component pards, the details of the welding, the particular properties of the steel used, is sound and seaworthy.
SUMPS: These are pretty common in the J-boats product. I find them to be a double-edged sword. They certainly allow a collection place for the water that inevitably enters any sailing boat. The intention of course. And so it is easy and through for the automatic bilge pump to bail out the boat. this is certainly convenient on general. The downside to me is there is a box on the bottom of the boat, that must be glued TO the boat with sufficient integrity to resist the gyrations of the keel, leveraged by being on the bottom of the box, commonly 20 -24 inches below the box hull connection. Lever arm indeed.
Any grounding requires inspection and possibly repair, rising to the level of serious depending on the circumstances of the grounding. Running into a rock at 7 knots does all manner of nasty things to the hull and framing structure too, again driven by the leverage of the keel. I have seen the interior of a J-105 so damaged and it ain’t pretty.
AGING:
The encapsulated method is pretty bullet proof in my estimation. My own Ranger 33 is so built and there are no cracks at the keel hull joint and no keel bolts to fret over. The downside is if there is a grounding, and the laminate in which the keel is held is penetrated, water can get inside the “keel” and can be an ongoing pain in the neck. Any repairs to such a keel need to ensure the water is all evacuated and te area is really properly dry, before closing the hole.
Keel bolts method: This technique has been around for ages and was how the keels on wooden boats were affixed, “in the day”. The issues here that a grounding can damage the structure to which the keel is attached and bend the keel bolts. In any event, when preparing for offshore sailing it may be worthwhile having the keel bolts examined by Non-Destructive Testing. This is roughly like an ultrasound as when your wife is pregnant. Roughly the same looking tool and similar looking pictures result.
An upside for a bolt on keel is they are able to be replaced in the event you find the need to.
THE RUDDER:
Rudders have some kind of structure inside the rudder itself, usually a metal fabrication with flanges spreading mainly aft from the rudder post. For production boats the rudders are made from, or in a mould. The rudder post and fabrications are put into the mold, and foam is into the mould also. The foam is faired off and the fiberglass is applied to the mould.
Issues: Any water ingress into the fiberglass/foam area, from age, cracking, the various dings we manage to inflict on our boats, generates corrosion on the metal fabrication parts.
The Rudder post/Bearings/Bushings
The rudder post enters the hull and extends up to the area where the designer says he wants it to exit to attach to the tiller. In the older boats, like my Ranger, so pre 1970 say, and tiller steered, the stainless rudder post enters into a fiberglass tube, glassed-in that is fixed to the boat between the inside skin of the hull and the inside skin of the cockpit. This tube may or may not have an inside bushing of some slippery plastic, or sometimes simply grease or similar lubricant.
This bushing tube method is a fast way of getting the rudder/steering system installed into the boat, assuming the steering is to be tiller.
For a boat with this arrangement using a wheel, the fiberglass tube stops some distance away, down, from the inside of the deck and there is a watertight cap on the glass tube. The quadrant affixes to the shaft, now exposed between the cap and the underside of the deck. The tube needs to be more vigorously reinforced of course.
A wheel steered boat has a quadrant, a pedestal, various sprockets with the chain running over them, connections to wire, large cast bronze sheaves in fittings bolted (or screwed) to structure all on order to lead the steering cables to the quadrant.
ALL THIS NEEDS TO BE INSPECTED, PULLED APART AND MAINTAINED. PERIOD.
The Edson company in New Bedford, MA., has a great library of information on how to do this. USE IT.
RUDDER BEARINGS: Later and or more sophisticated boats will have a pair of rudder bearings, one on the inside of the hull skin at the hull and one at the under-deck side of things. The rudder post fits into these bearings. IF tiller steered, the post exits far enough above the deck/cockpit surface to get a tiller on it. If wheel steered, the same menagerie of wires chain and pullies pertains, all arriving on the quadrant bolted to the shaft.
One feature of this exposed rudder shaft engineering to contemplate is this:
In the event of the boat hitting something with the rudder, the resultant force has the possibility of several things happening.
Simple damage to the rudder, breaking off a piece of it.
Breaking the rudder and the shaft away from the boat.
Leveraging a big hole on the area around where the post transits the hull.
This latter event leverages a decent sized hole in the bottom of the boat. The bottom bearing is the fulcrum when something hits the rudder. Such damage and the resultant even small hole, which it will not be, will let an awful lot of water into the boat in a very short time.
Very few boats are built to withstand this amount of water entering at speed.
Bilge pumps will not do it.
The answer to defending against sinking in this situation is to have a watertight bulkhead between the rudder post and the rest of the boat’s interior. This gives the crew a fighting chance of keeping the boat afloat and to effect repairs.
The most common boats so engineered are the oceanic racing boats. The IMOCA 60 footers, the massive Tri’s, called Ultimes that the French race, Class 40’s, boats used in The Ocean Race, and similar beasts.
Only one production boat I know of has such a structure, the J-121. I know an owner whose boat is still sailing after an incident with the rudder, a collision with something, creating such a hole. He and his boat were saved from sinking due to this bulkhead. He was towed in by the ever-watchful USCG.
So, the foregoing presents the idea of what the prospective offshore sailor need be thinking about in advance of casting off. This series will follow the cited systems and areas to insect, modify upgrade repair and to otherwise think about.
Thinking about such an adventure?
Are you getting The Exit Plan up on the fridge door?
Need some guidance?
Give me a shout,
401 965 6006
Coop.joecoopersailing @gmail.com This is my preferred email.
(The WP email system is not to my liking)