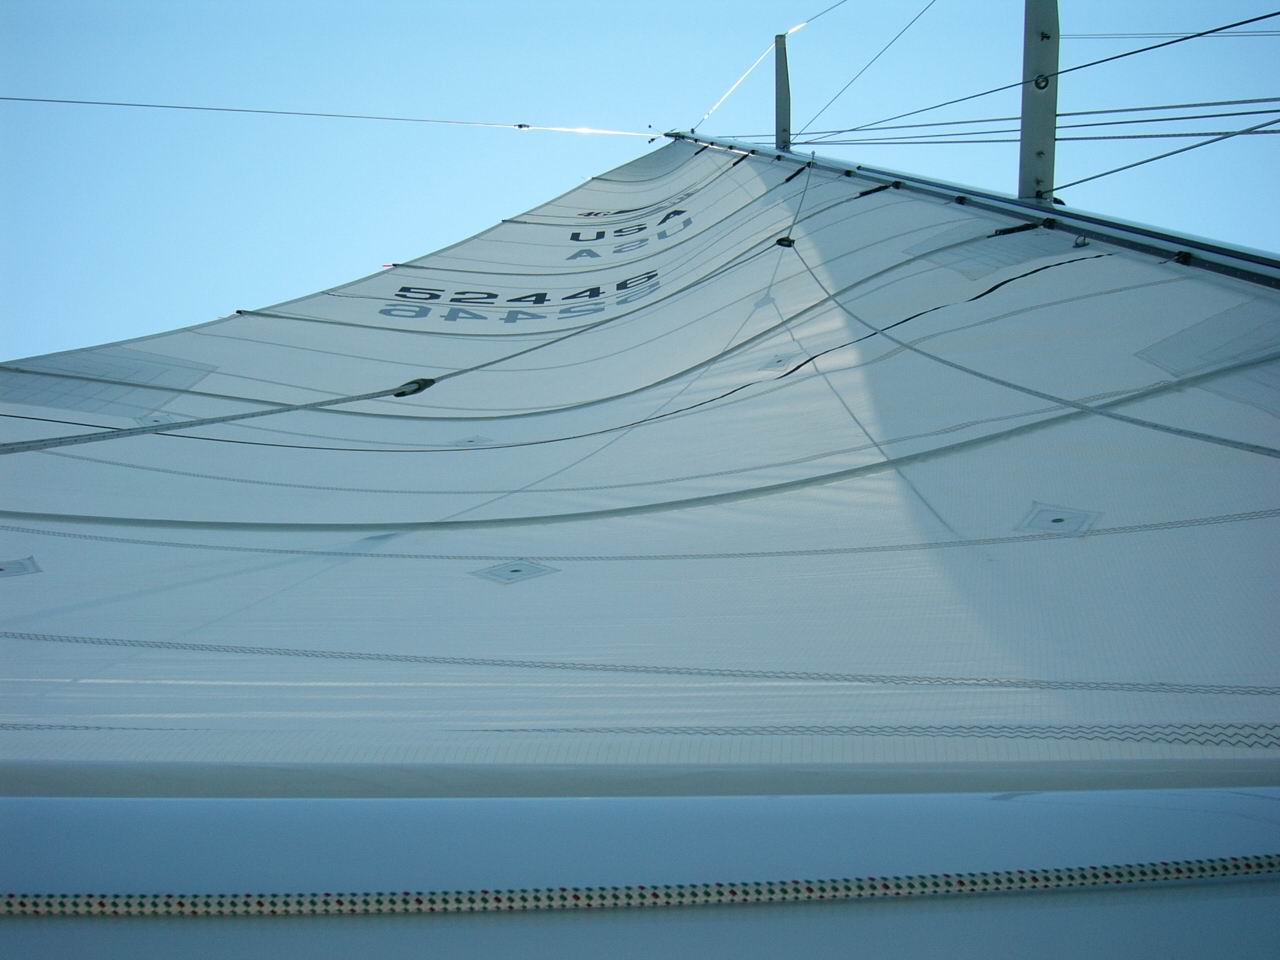
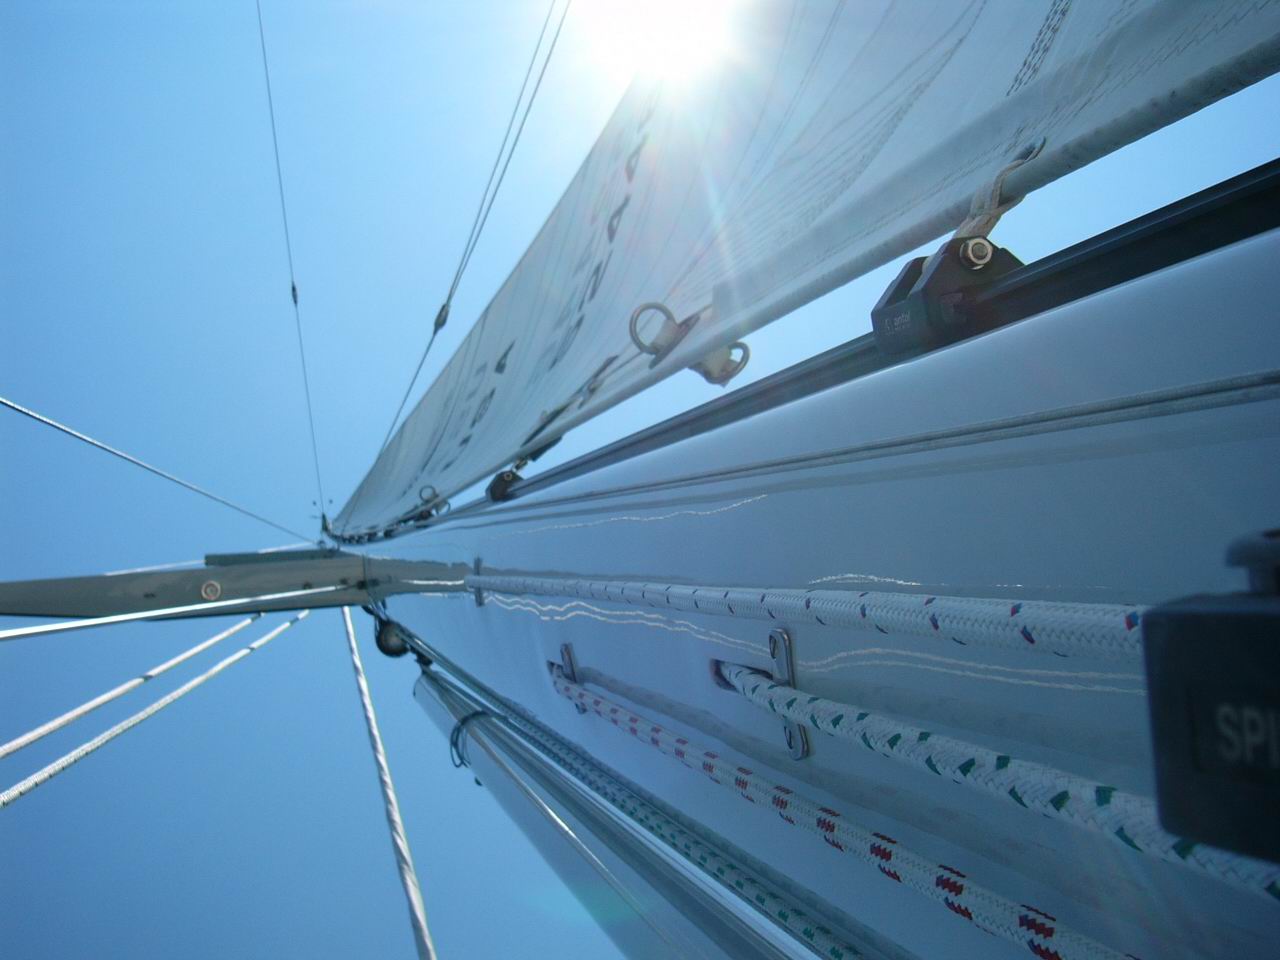
Code Zero Spinnakers

Some thoughts on sail design:

With particular attention “pointing” ability

Especially with respect to Code Zero sails

This essay is in direct response to a statement from another sailmaker to a customer that “a laminated material will point higher” compared to the heavy nylon I was proposing.This is an altogether a too broad a statement.

The type of fabric from which a sail is made is not at the top of the list when contemplating sail shape. Certainly building say a heavy jib of too light a material is not going to be effective but bear in mild also shape is only one aspect of a sail. Apart from “the shape” sails need to consider the following criteria, in no particular order.

Cost, durability, ease of handling, response to hard handling (aka tear strength) range of utility, (wind speed and angle), stowage issues are some of theses criteria.

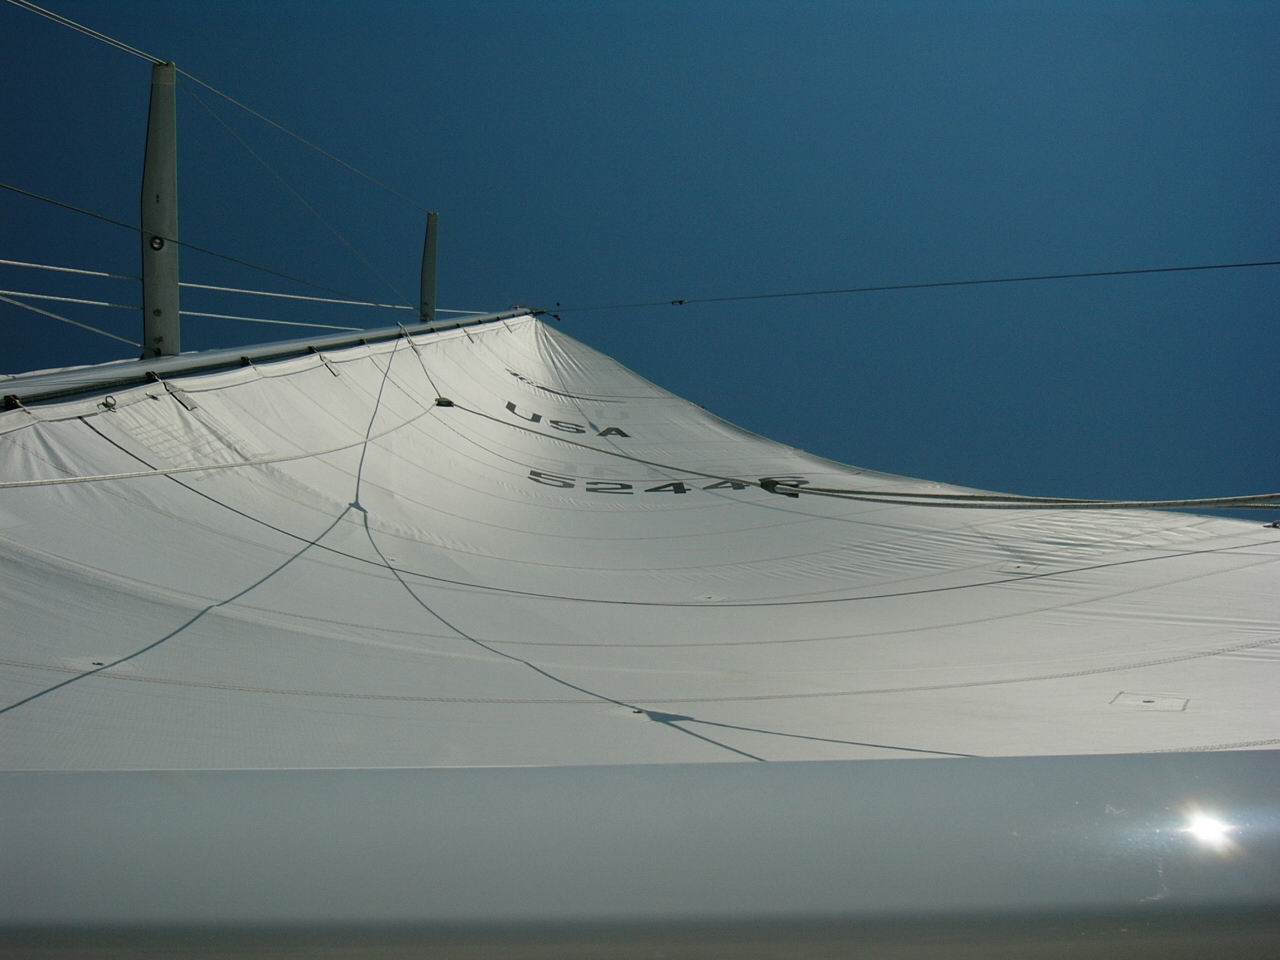
A code zero is a unique sail in that in most cases it needs to rate like a spinnaker but to work like a genoa. That is it is intended to be used in light air when the boat wants to go up wind and for want ever reason, the “normal headsails” on the boat are not as effective as a “code zero” thus the response about pointing. Years ago such sails might have been referred to as cheater sails

The original code zeros were invented over 20 years ago for the Volvo Ocean Race. Due to the sail limitation rules and the lack of a normal overlapping genoas, Paul Cayard’s team fell upon the idea of having a sail that was designated a “spinnaker” but used as a headsail. They beefed up the boat to take the high loads generated by the tight luff that this sail needed. Fast forward to about 10-15 years ago and similar sails started making their appearances on the domestic recreational race course. Since they had to measure as a spinnaker, which is a girth* issue, all the girth was in the leech, rather like the roach on a mainsail. The other issue with such sails on furlers is the tremendous loads required to set up the luff of the sail so the sail would actually roll around the luff. The boats or the masts that Corinthian sailors sail were just not built for such loads.

About 8 years ago, Hood developed a version of this cheater headsail that was able to set and handled like a normal spinnaker, and was measured as one. This sail did not need a furler, tight luff rope and related costs, was made from Nylon yet could sail as close as 40 degrees apparent.

These sails fit the use profile of the non-professional sailor: They were inexpensive-nylon is cheaper than laminated materials, especially the more recent ones designated code zero materials, they were easy to handle-Just like a normal kite, took up a pretty small space, and considering the infrequence with which they are used this is appreciated by weekend racers. And a particularly appreciated aspect of nylon sails is their relative tear resistance compared to the very light film sails from which code zeros are built. Also nylon is much more resistance to damage from flex, read flogging than Mylar film, a detail if you are to be caught out in a squall somewhere.

With respect to the statement above, a review of design issues is in order.

The pointing ability of a sail is a function of at least two details: the draft of the sail and the entry angle. The draft is of course the fullness of the sail, technically the chord depth. And this depth changes vertically up the sail too. Consider for a moment a conventional spinnaker. If it is full, you can only head up so much in any kind of luffing match with it in pole-on-the-head-stay conditions, close reaching. This is why boats have a flatter reaching spinnaker. Same idea applies to the zero it is flatter again than a regular spinnaker, but fuller than a headsail.

The entry angle is a bit less obvious. This is the angle between the chord line and the angle of the very front couple of inches of the luff of the sail. A narrower angle here means the boat can point higher BUT it also requires that the boat be more accurately steered in order to keep in the groove. If the boat falls out of the groove as when a wave passes, the boat will slow down & the trim needs to be adjusted and the boat brought up to speed again. It is not uncommon for one-design boats to have different shaped headsails for use in flat, moderate of choppy waters. The choppier the waters the wider the angle of attack needs to be so the boat can be steered around waves with out stalling. Stalling is the “falling out of the groove” feeling.

With a sail like a code zero, intended to be used by most production cruiser racers generally in under ten knots true, a wider angle of attack is to be preferred. This is to accommodate the wide variety of conditions that such boats generally sail in.

The loads on a sail diminish dramatically as soon as the sheets are started even a small amount. For instance the load between a spinnaker trimmed hard enough to develop a crease between the tack and clew, as when trying to keep it full in really light air, diminishes quickly when the sail is eased to where the crease vanishes. That is why you may need someone to crank the sail to get it to that stage, but ease it a foot or so and the trimmer can trim by hand.

Going back to the sentence above about building a heavy weather jib from light fabrics, one enters the realm of properties of the fabrics in question: Nylon and code zero fabrics. The latter are a sandwich similar to composite boat building in that there are several layers and glue.

By far and away the vast majority by area of a code zero fabric is Mylar film. Bear in mind that the fabric has two sides, so the Mylar film is 50% of the total fabric in area. This film is half a mil thick. For comparison, a normal laminated sail might be .75 of a mil Mylar for a light air headsail for a 35 foot boat up to say 2 mil Mylar in sails on a bigger boat. It is pretty rare to get thicker film than that because such fabric becomes a real bear to handle.

Next in area is the other 50% of the sail fabric which is very thin deniers (small, tiny in fact yarns) woven polyester that is not shrunk. This is glued onto one side of the fabric.

Finally we get to the strong fibers. These fibers, called tows are glued in between the film and the taffeta. They are described by their denier. This is how thick they are, roughly like half inch line is thicker than quarter inch but thinker than five eighth. 50 denier is what light nylon sails are woven from, 1100 is a thick denier. Most fabrics operate in the 300-900 denier, as a broad statement. Reading the data from one of the major cloth suppliers in the US, their second to lightest material is made as follow:

Half a mil of film:

A tow (cloth speak for a “bundle” of fibers-Visually a tow will look like a thick piece of string) of 1140 denier aramid fiber, gold in color, set on half inch centers on the zero axis. The zero axis is parallel with the length of the roll.

There is a flat X shaped 750 denier tow of an aramid called Technora, this is black

There is a taffeta on the other side of the film.

There is a glue line holding the lot together.

To review

This material is 2.1 oz

This code zero fabric is close to two times the cost per yard than 1.5 oz Nylon.

It is about 30% more expensive per yard than grand prix nylon.

It is about half as stretchy on the zero axis as a comparable nylon

The film on this fabric is only half a mil-Not a strength consideration but a handling and durability question:

Durability is a factor in the sense of dragging the sail over life lines, across stuff on the deck, by the rigging turn buckles with cotter pins just starting to poke thru the electric tape, meat hooks on the halyards of the mast, and around down below. And as noted if caught out in building breeze and it spends time flogging, this (flexing) will degrade the film more than any overloading will do. At any rate most sailmakers to day will make the clew so the ring fails before the sails blows up.

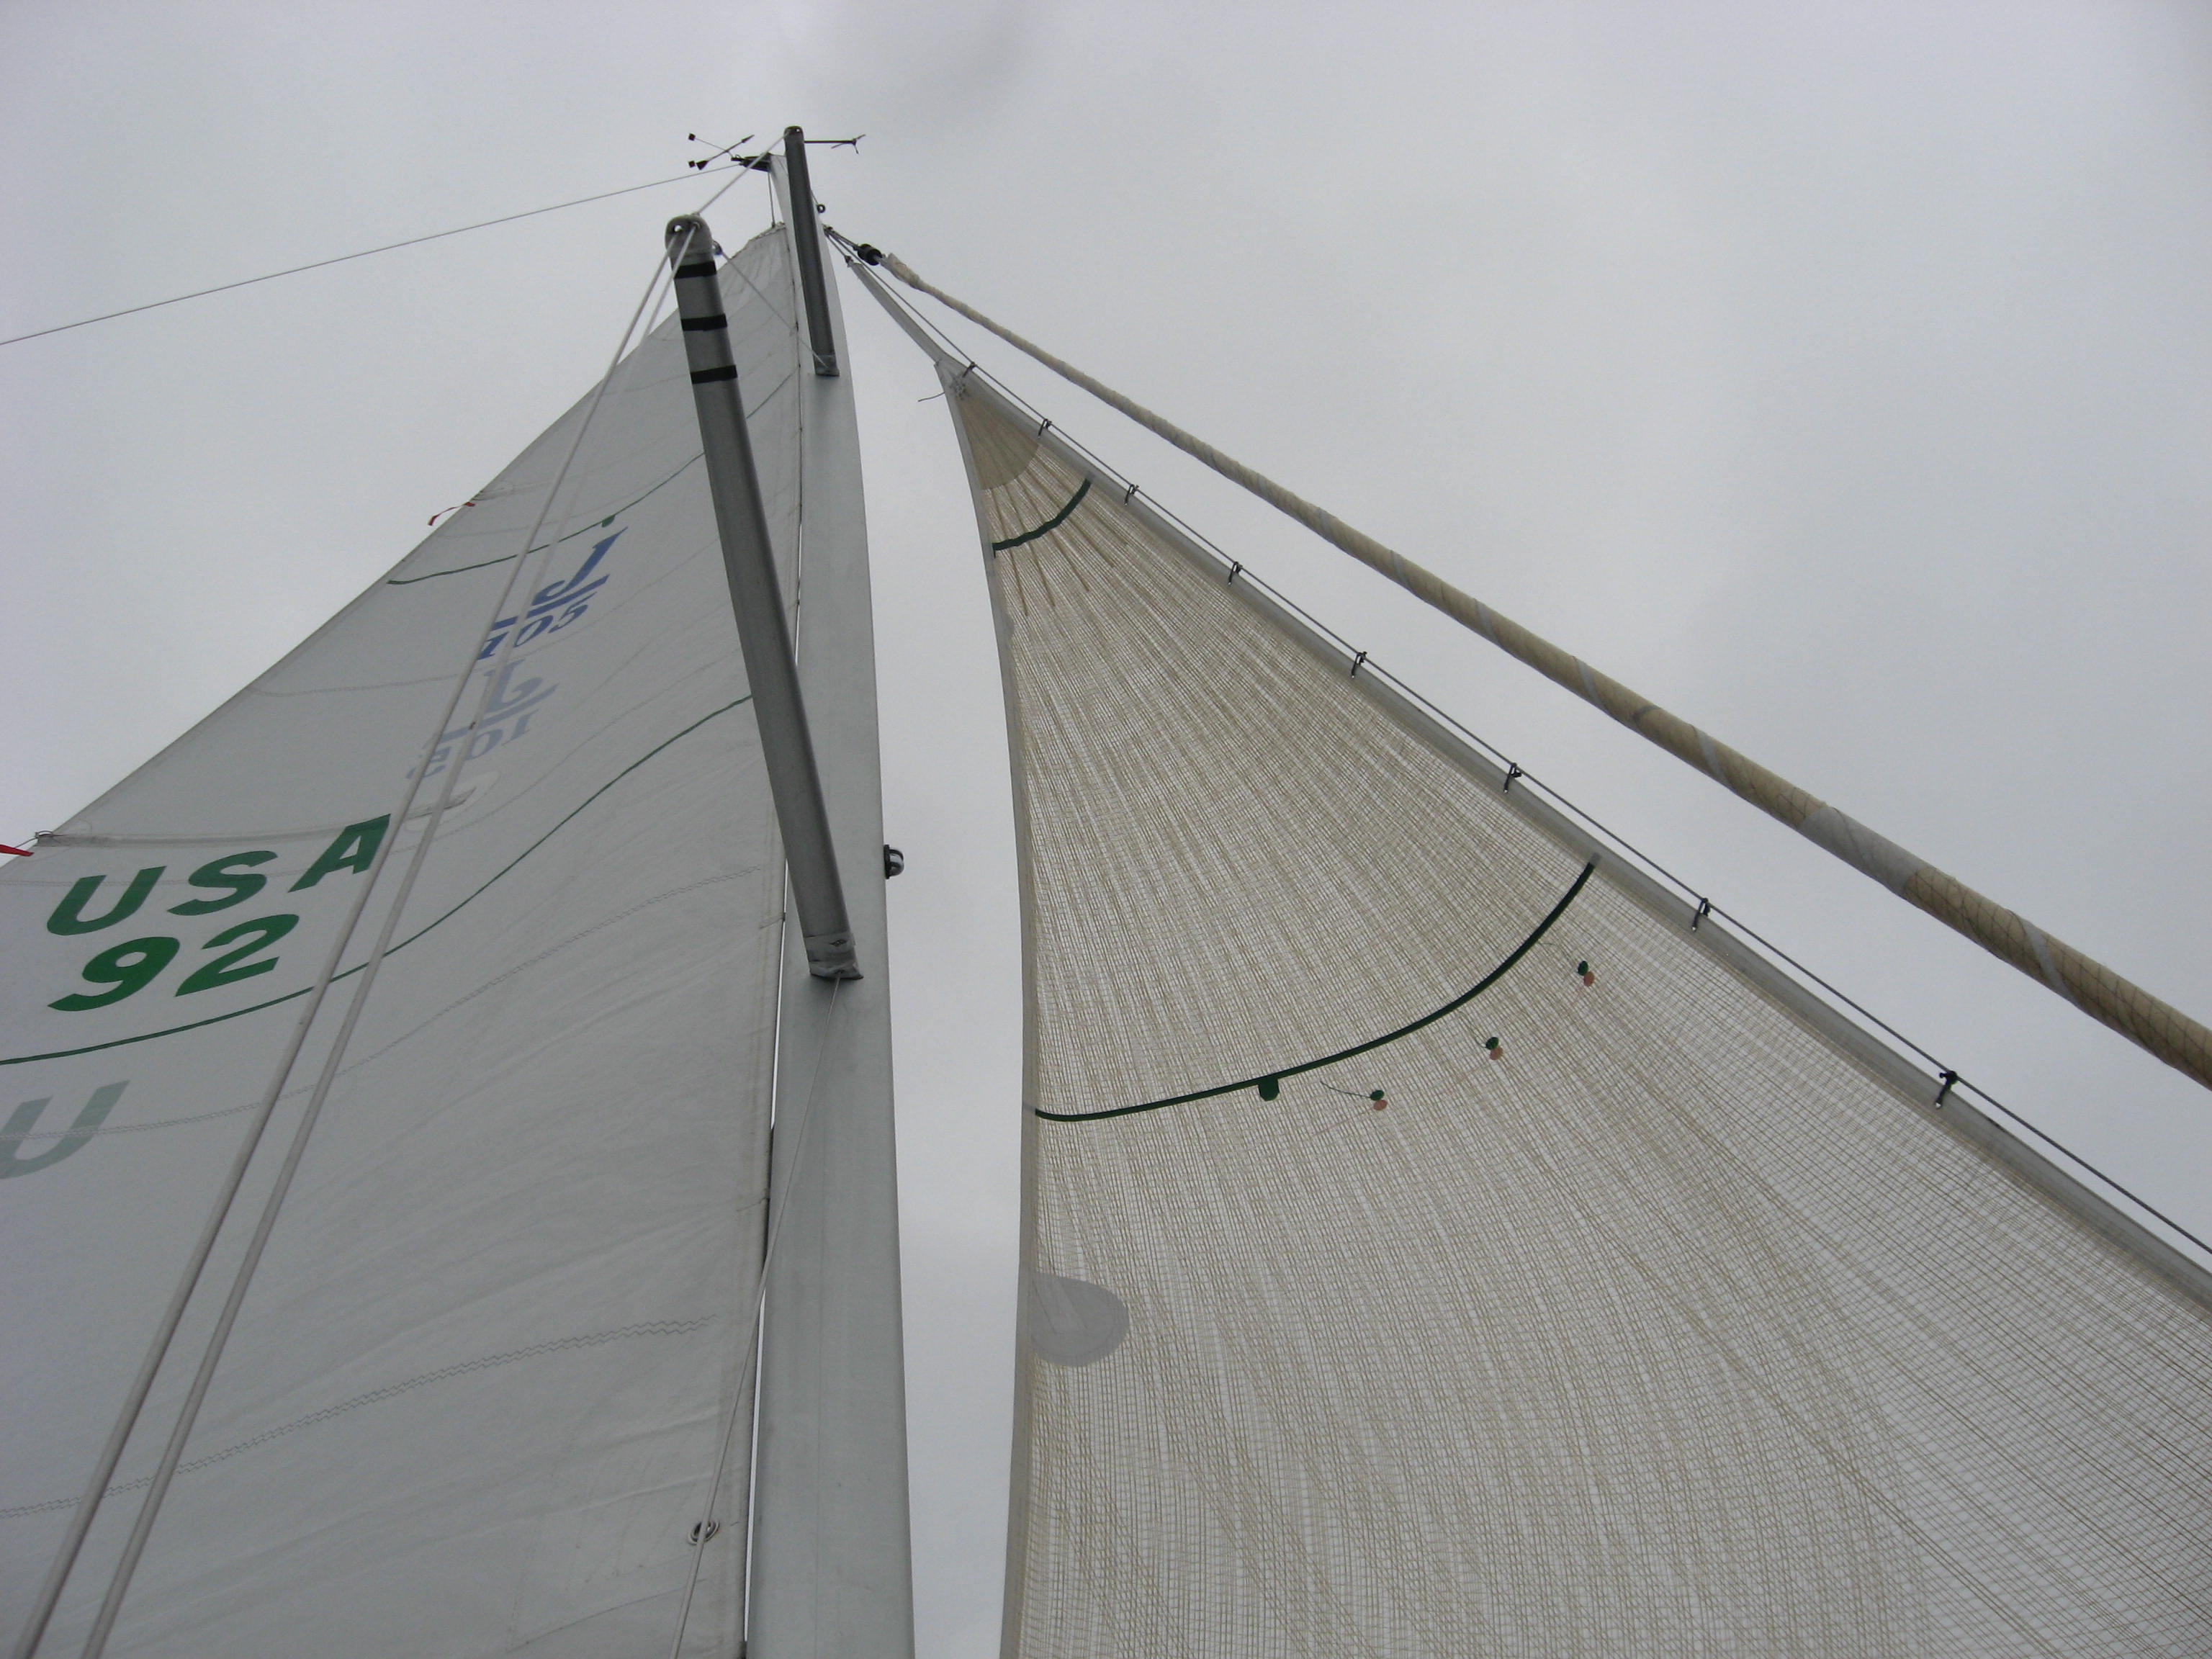
This video is of a Hood Code Zero on a J-105. I was sailing this boat from Newport to Fishers Island alone. In this circumstance we are actually beam reaching, not going to go up wind. I have used this same sail in 25-30 knots true sailing at 90 apparent double handed from Block Island to Greenport in a race. We won because we had a sail we co old set that was right for the conditions.


Solent stays and storm jibs


A Solent stay is an excellent way to get a heavy weather Jib or a Storm Jib rigged on your boat. This post will discuss another layer of rigging issues as posed by a fellow from the LinkedIn group. The personal names refer to the people in the discussion topic on LinkedIn.

A Solent stay is a great way to get a smaller sail set when it is too windy for the Jib on the furler

A Solent stay is a great way to get a smaller sail set when it is too windy for the Jib on the furler.

Several issues will be discussed here:

  1. Spar and deck integrity
  2. Aspect ratio of the headsails
  3. Running backstays

Implicit in this essay and the above issues is the  design of the boat and in particular the size of the fore-triangle, in absolute terms and relative to the overall length of the boat.

I am answering a question from a LinkedIn group discussion here since my response on the group was way to long for the comments section and I cannot post images. So this post will read a bit more like a monologue that the usual Blog Post Essay style.

The answers I wanted to post on LinkedIn begin here:

Gentlemen,

To continue on the subject of how to set what kind of small sails for when it is blowing too hard for the bigger ones.

Some points for discussion:

  • Pad eyes ripping out
  • Inner staysail stay (& Runners?)
  • Aspect ratio, again
  • One alternative

 Pad eyes ripping out

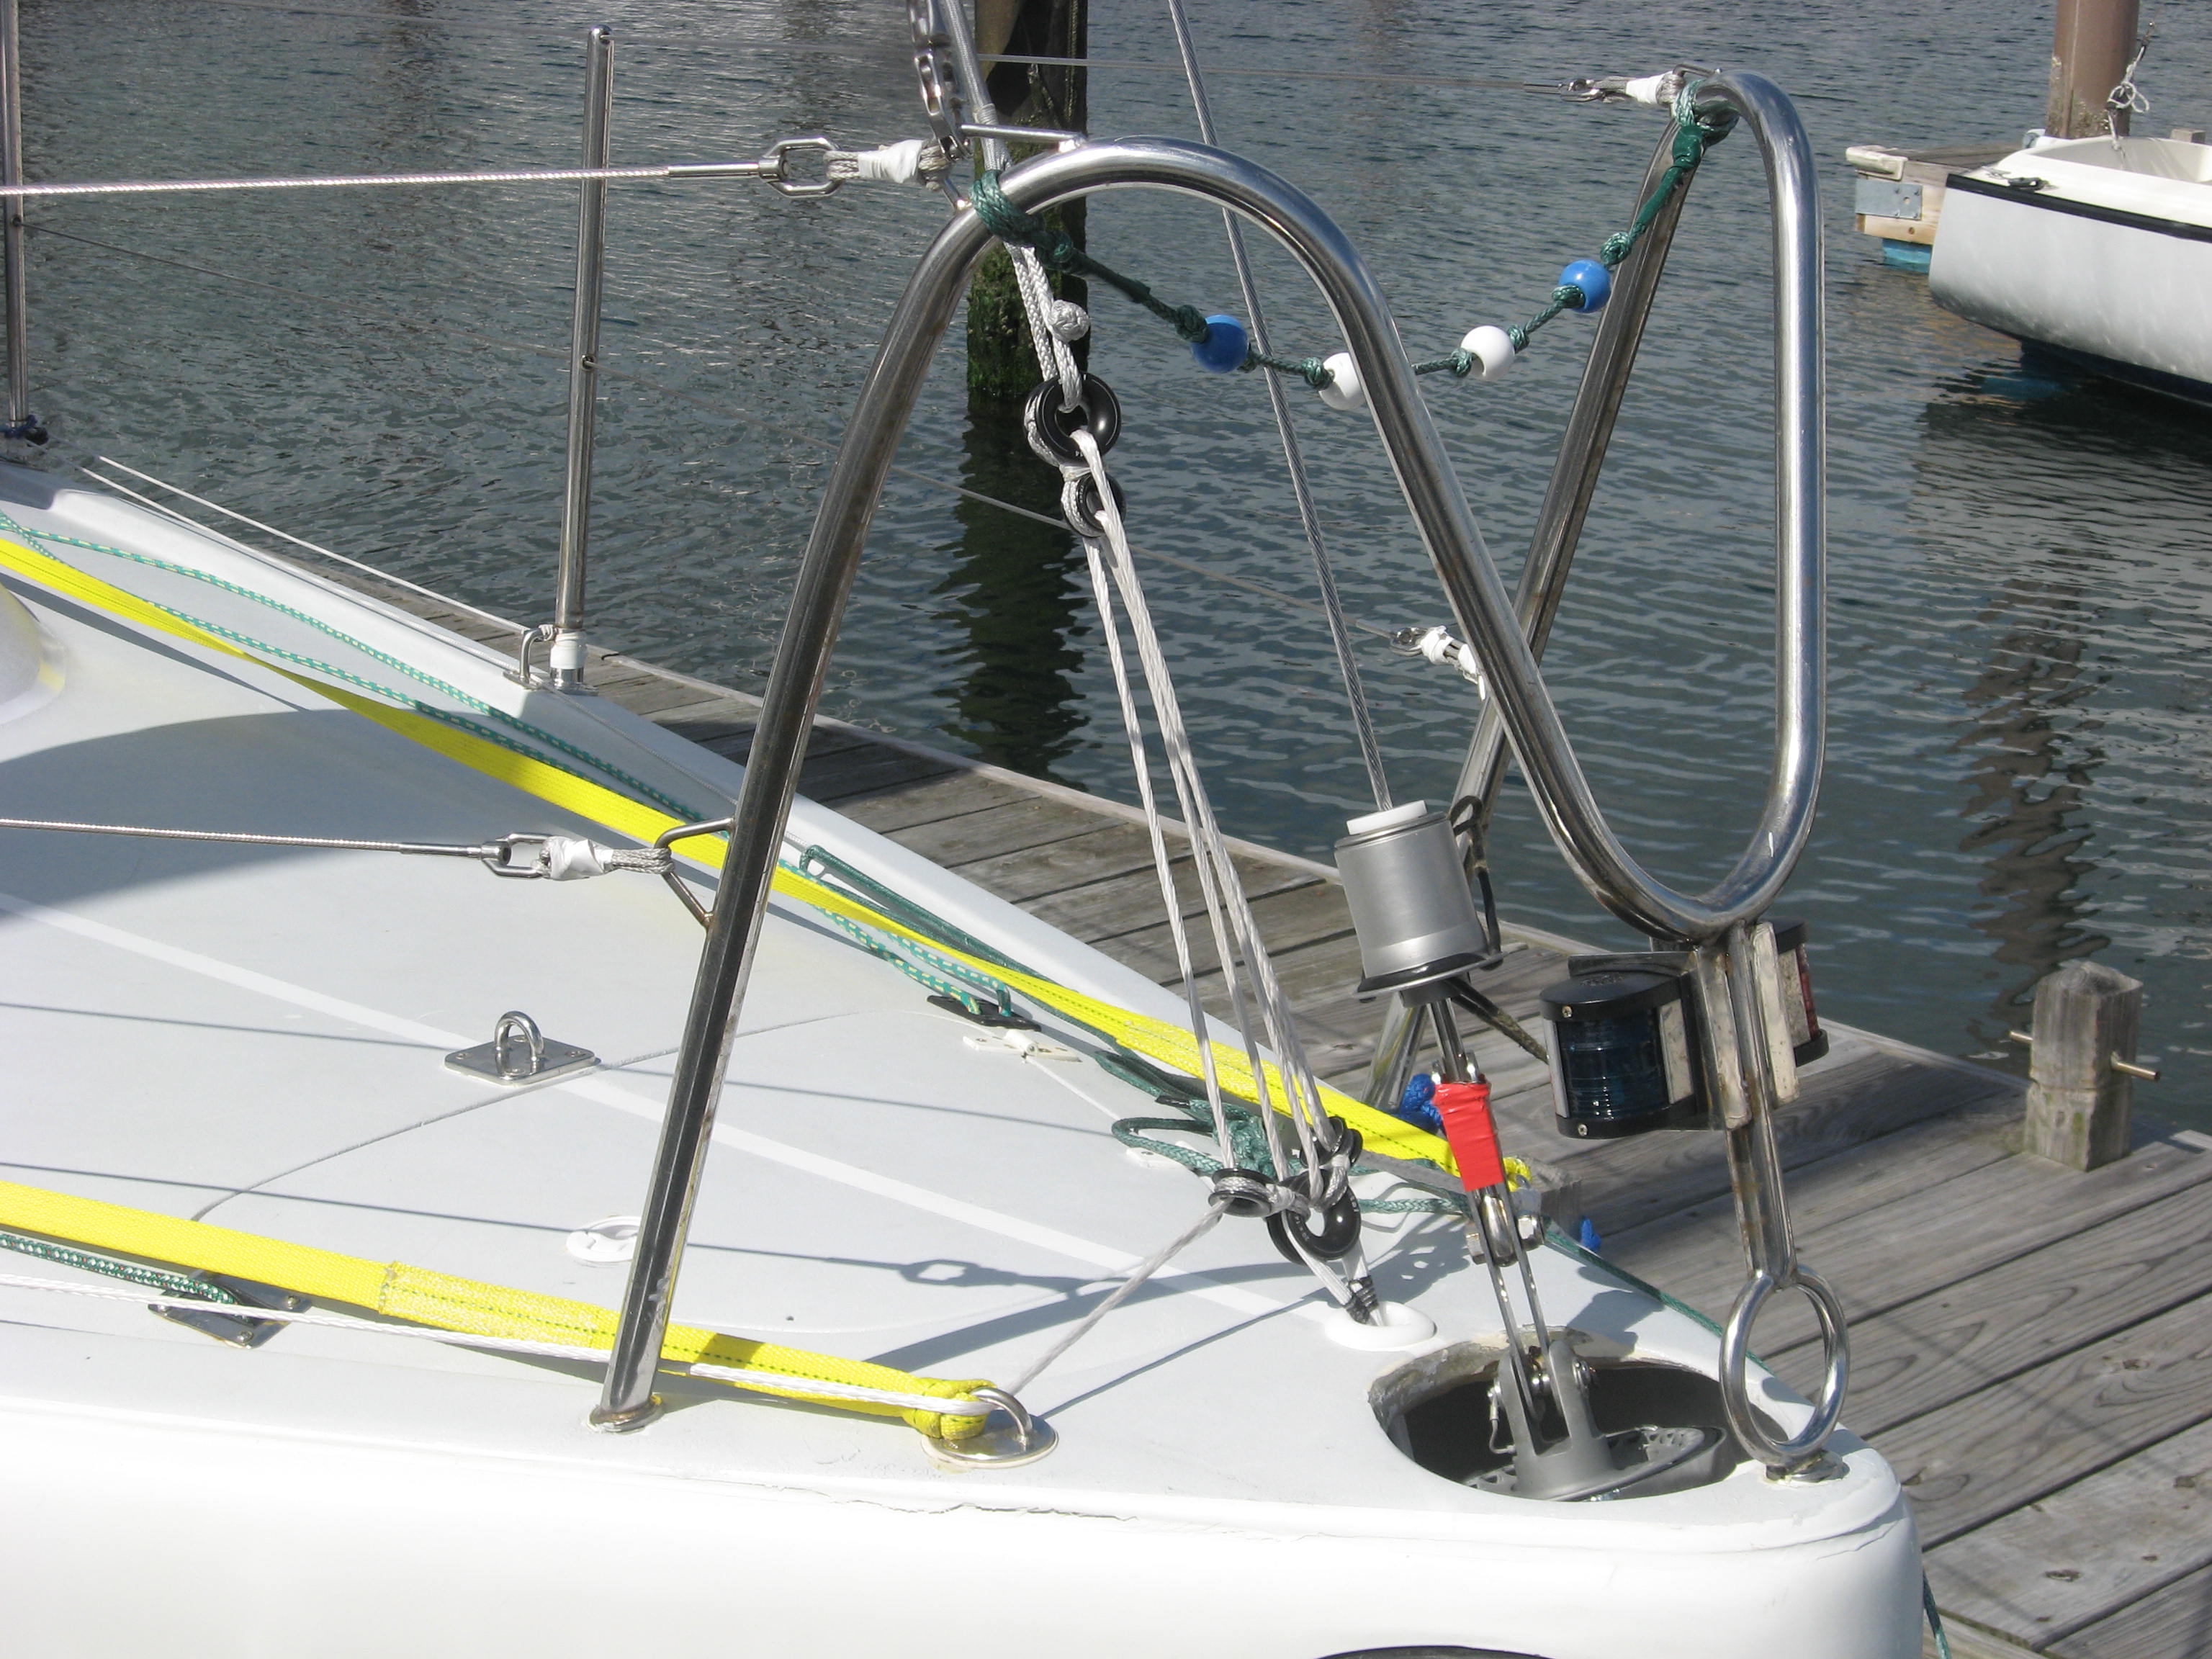
Graham is correct. You must make certain beyond any doubt that the structure at the deck termination of the stay is absolutely capable of taking the load. Not merely the load of the stay tension but the dynamic load of the boat bashing off waves etc.  (Please review the images below taken from a Quest 30 set up for single and double-handed sailing in the ocean) Simply because there is a “bulkhead” there, does not mean for a moment it is a true structural member capable of withstanding the loads imparted when sailing in 30 plus knots. Far more often it is merely masking the forward part of the forward cabin from the anchor rode etc. so merely glued in to make the interior look nice. I had this exact situation on a delivery with a Santa Cruz 52 one time. We pulled the padeye out of the deck along with a bit of deck while sailing with the SSL in only about 30 knots and modest seas. Upon subsequent inspection we discovered that the forward “bulk head” was just what I described above, a way to make the forward cabin look nice. Virtually no structural content, yet someone had landed the staysail fittings there….

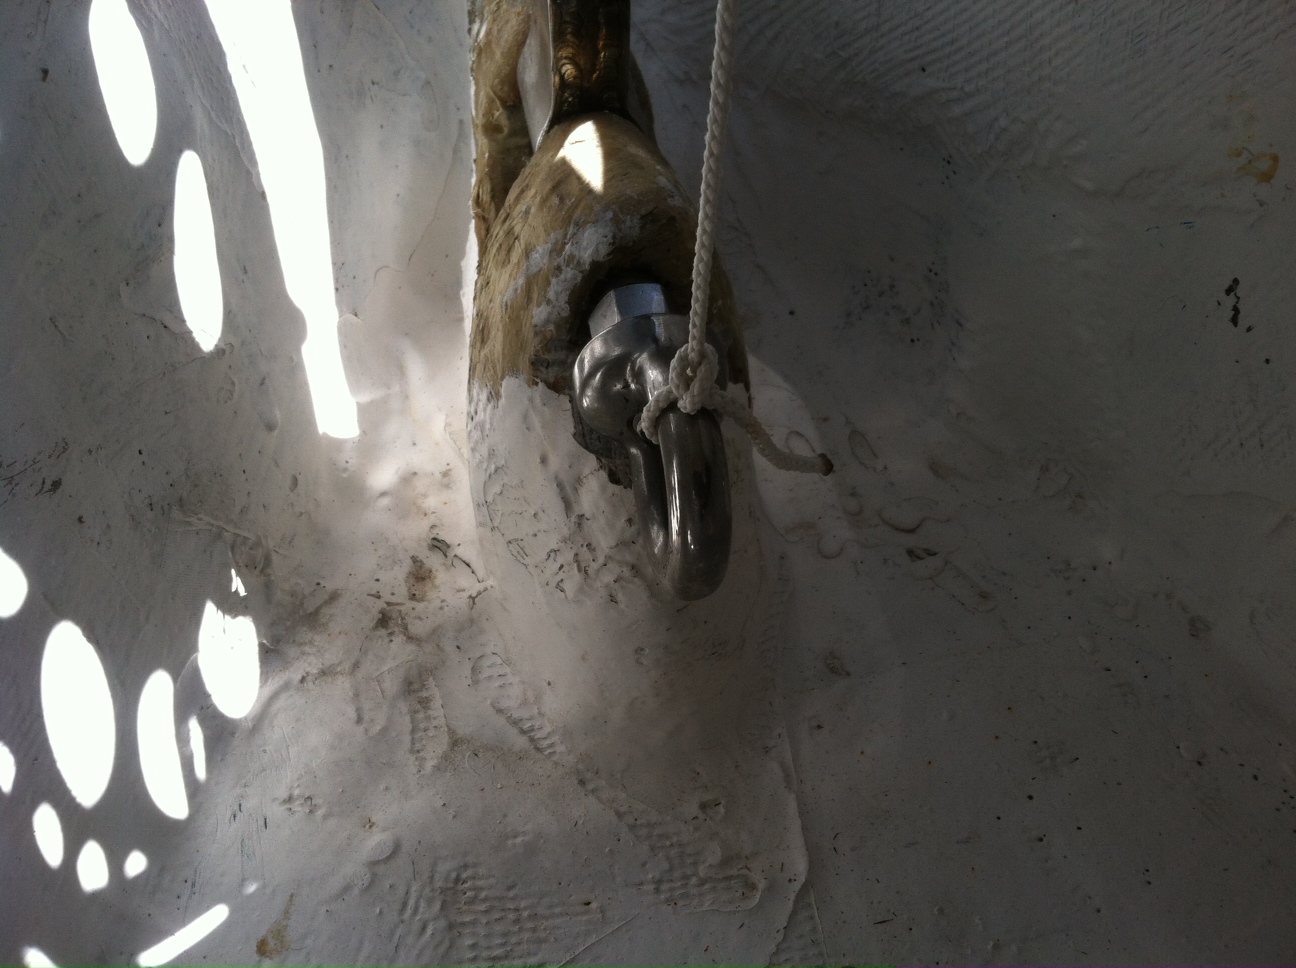
This image is inside the anchor well on the boat

This image is inside the anchor well on the Quest 30. As you will see the furler is under the deck in the anchor well.We took the primary pin securing the headstay to the boat and attached the eye that is seen here. The piece of string is part of the method we used to align the hole in the deck so the strop would be as straight and parallel with the stay as we could manage.

This issue of local structural strength is one of the reasons I often advocate for the stay to be at the bow because in variably the forward part of the boat, where the head stay lands is strong both in terms of layers of materials but the angular nature of the bow, provides lots of strength through the structural geometry.

We spent a lot of time measuring angles to get the position of the hole in the deck right.

We spent a lot of time measuring angles to get the position of the hole in the deck right.

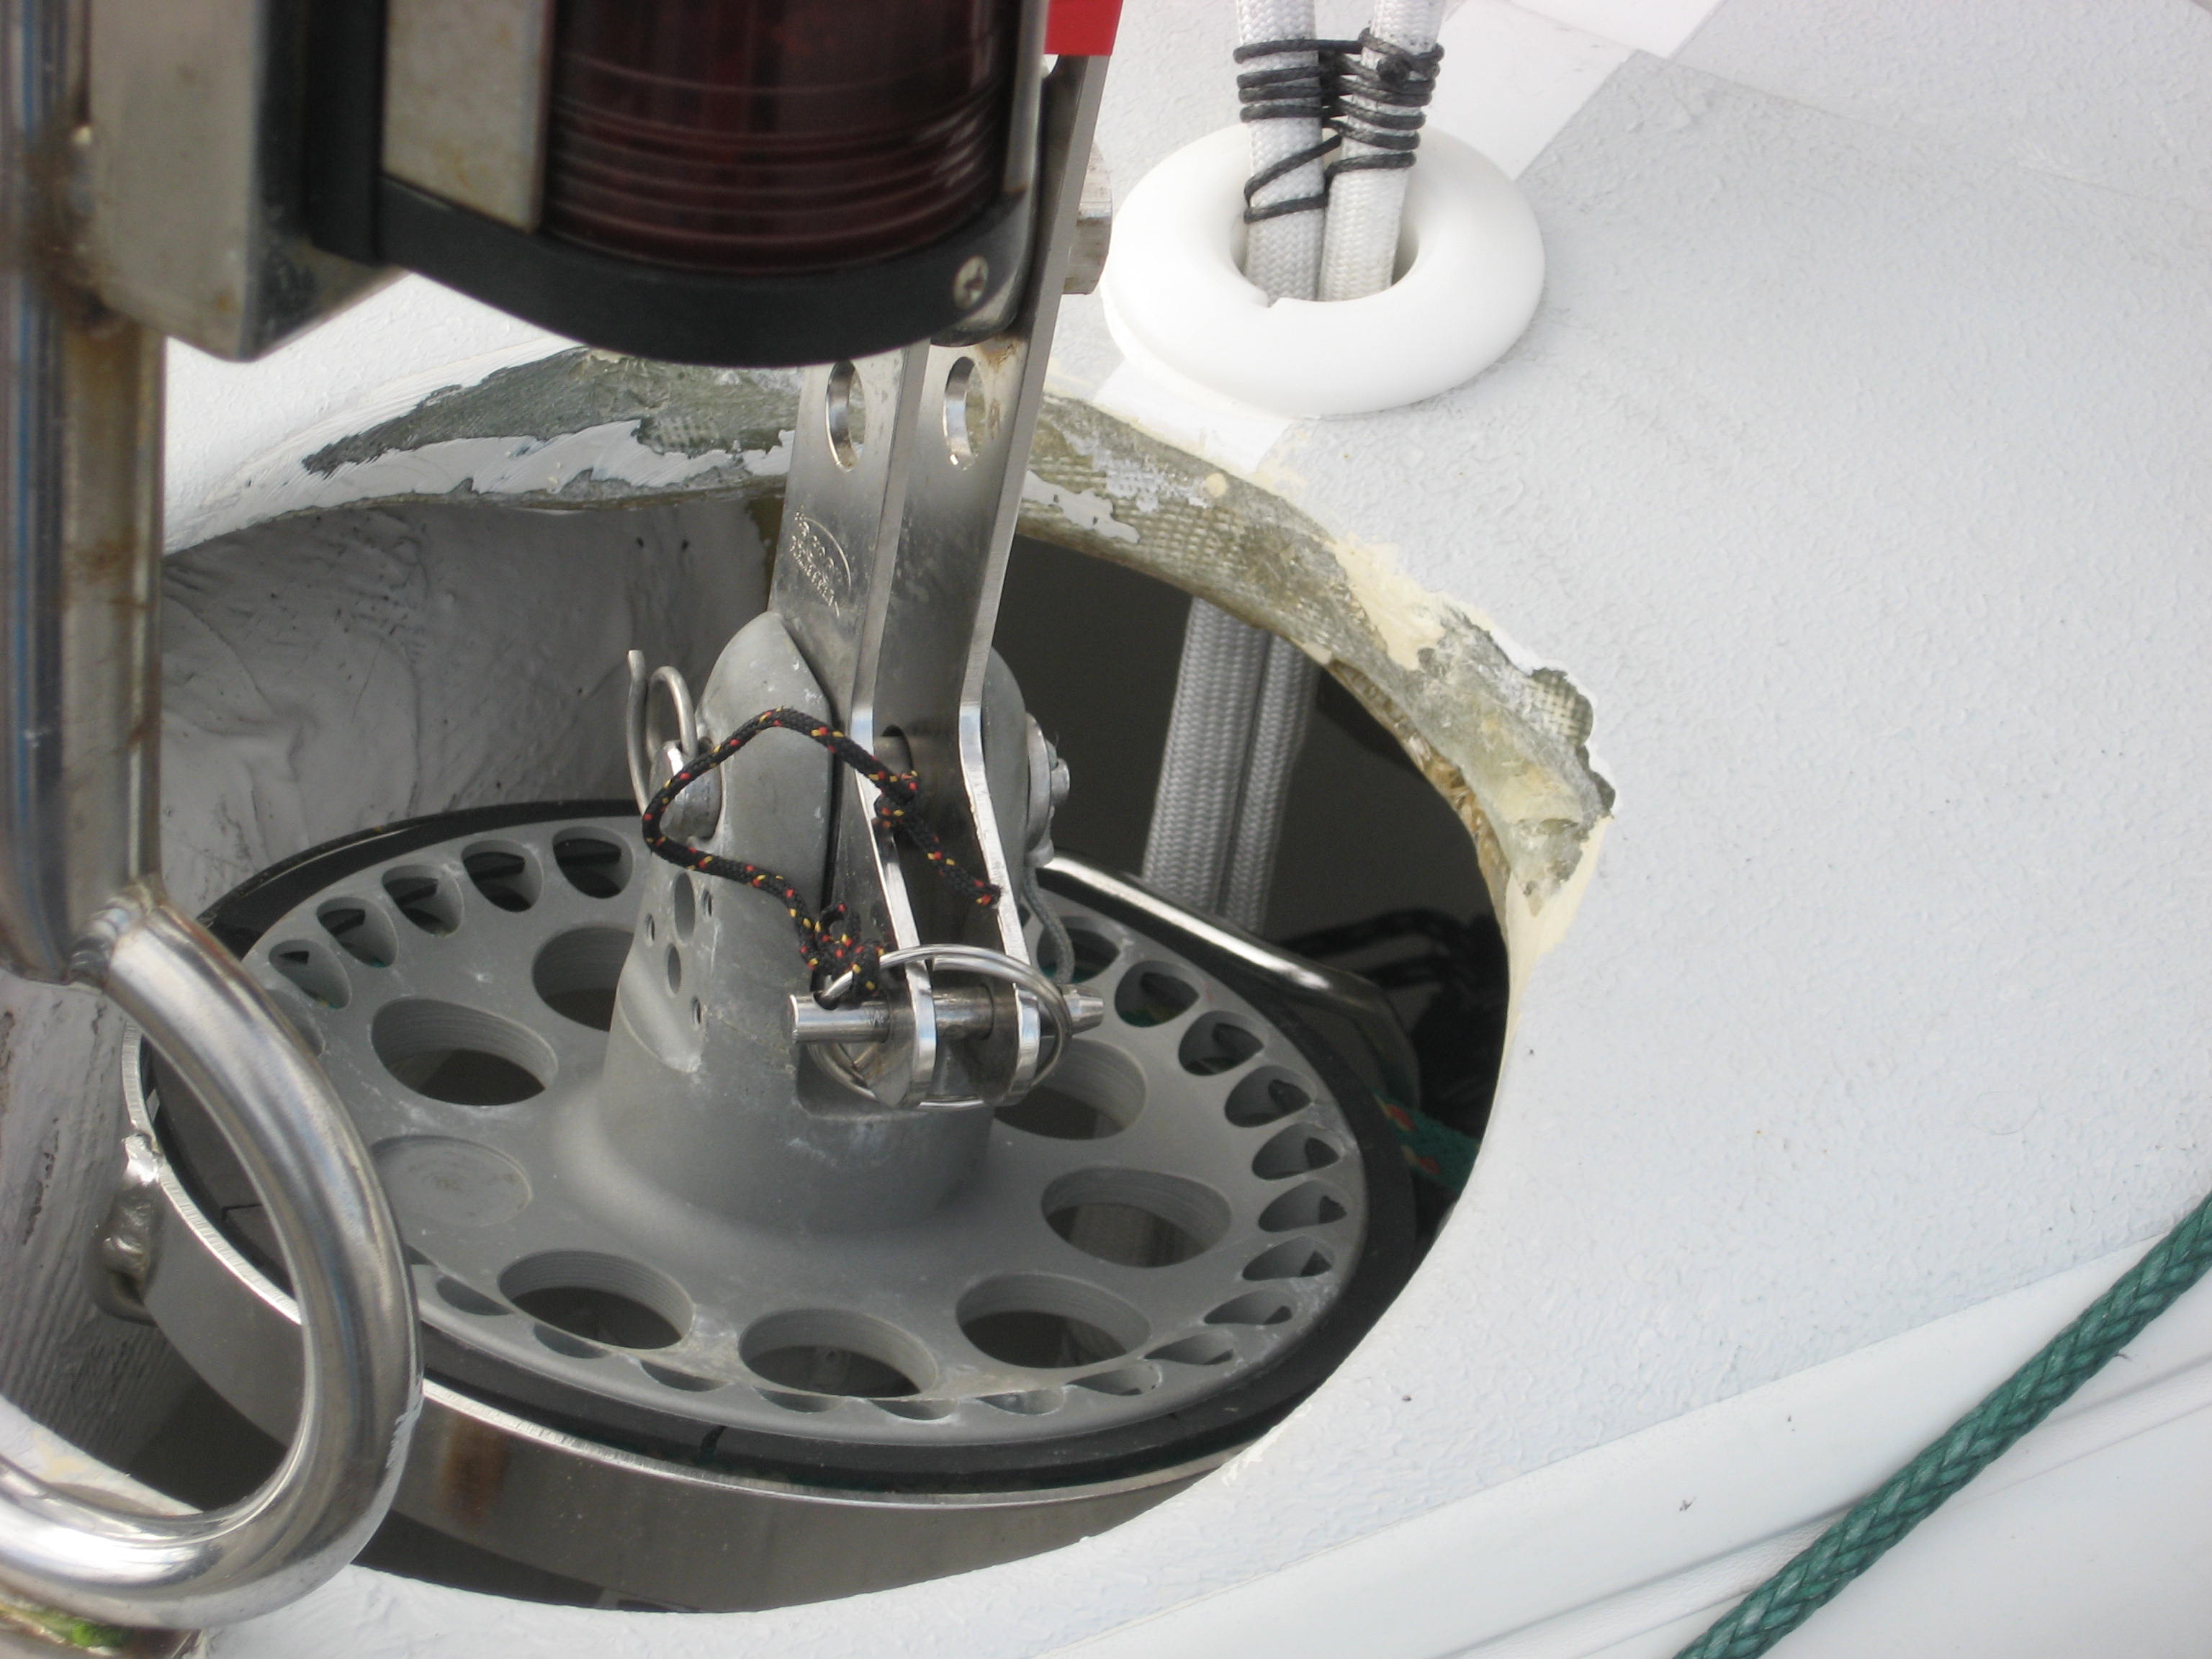
The staysail passes thru the deck (and into the anchor well) just aft of the headsail furler

The staysail stay passes through the deck (and into the anchor well) just aft of the headsail furler. You can see we lined the hole we made in the deck with a plastic through hull and used a textile strop connected to the eye seen in the picture above.


This  is what the strop looks like attached to the adjustment tackle on deck:

Here you can see the strop passing through the deck to the eye on the primary headstay pin seen in the images above

Here you can see the strop passing through the deck to the eye on the primary headstay pin seen in the images above We got the alignment of the whole arrangement pretty good. The strop is only just bearing on the aft edge of the hole.


Inner Stay and Runners:

This image os of the Inside stay arrangement on a 30 footer. It is NOT a Solent as in a sail that is arael to and just aft of the headstay. Rather it is in snside staysail, staysail storm staysail, choose your name.

This image is of the inside stay arrangement on the  Quest 30. It is NOT a Solent as in a sail that is parallel to and just aft of the headstay. Rather it is an inside staysail stay, a staysail stay, a storm staysail stay, choose your name. The idea is that it provides for a smaller sail for use when the one on the furler is too much.


In the images above, the salient points are:

  • Smaller sail set on hanks when the furling headsail is too much
  • The hardware for this sail was already on the mast
  • Using the pad eye on the deck, seen above just aft of the stbd. stanchion made the aspect ratio AND the size of the sail too great and small respectively. (Refer to the Power Point link further on in this post)This is relative because you do not want too much of a jump in sail area between sails other wise there is a gap in the “gear box” as I refer to it as.
  • It later transpired that we discovered the pad eye was intended for a spinnaker staysail which of course see a lot less load.

Timo: I do not know so far if: a) your boat already has an inside stay-a stay originating from a point on the spar about the location of the spreaders, and b) if so is it already set up with a stay, a halyard and so on?

If so, then I again advocate for the base of the stay and so the sails tack fitting to be as forward as possible.(as in the image above) For the reasons previously outlined. BUT be very careful with the mast.  If there is for instance a Spinnaker pole topping lift sheave and line at about the right place. Almost for sure the sheave and related structure for a spinnaker pole topping lift is inadequate to carry the loads of a heavy weather stay.

Staysail stay attachment point on the spar and runner take offs.

Staysail stay attachment point on the spar and runner take offs. The necessary components for the staysail to be attached to the spar  are seen here. Stay attachment-Via a T fitting into the spar, the halyard sheave box and halyard, and attachment points for the runners. Note too that the spar has been reinforced in the way of all this


If not, then the issues surrounding installing such rigging are roughly the same as for a Solent stay set up except that you will need to add running backstays too. This may be complicated by the location of the spreaders so you may want to move the ideal location for the stay and halyard away from the spreaders area-Too many holes for one thing.

Aspect ratio:

I had previously mentioned that the Aspect Ration of the Avance 36 fore triangle is over 3:1. I have done some rudimentary calculations and your Self Taking jib is even higher. This is because the 3:1 number originated with the boat’s specified “I” and “J” dimensions. The actual sail dimensions are shorter on the luff and much shorter on the foot. The latter because if the sail sheets to a track, self tacking track, then the clew will be further forward than if the sail sheeted to a track on the deck like “ normal”. I have an old essay on this issue I will post as soon as I can find it.

This link, below is to a 4 slide power point presentation on this Aspect Ratio Question in particular as it applied to the Quest 30. It was prepared by Mark Washeim at Doyle Sails Long Is. (New York) who worked with us on this sail/rigging/seaworthiness discussion

millard hvy staysail 042413

One alternative:

Depending on a few variables like: how confident are you, with whom do you sail, where, how athletic are you and a few more, a way to address your original question: “What to do when it blows harder than the roller furling jib is suitable for?”One answer is to convert the boat back to hanks…..What you say? Give up my roller furling?

Well sailing as you know is a trade of. You know what the trade offs are with the furler. Some of the nice aspects of a sail with hanks are:

  • Nicer sail shape, the Jib can have battens and look like a real Jib.
  • When not sailing close hauled but say close reaching-say 40-80 degrees apparent wind angle, it is possible to rig up a rail lead and so help the sails shaping.
  • With a hank on Jib, it can have a reef like a mainsail-the mechanics are the same as for a reef in the mainsail and any sailmaker worthy of the name can do it.
  • The sail can be a bit bigger, because there are not deductions for the furler and the clew can be further aft, depending on the location of the headsail track.
  • When you need/want to sail in harder wind, you can have the sail that is designed for the conditions, small flat strong etc.
  • Less windage if you have to anchor in hard wind.
  • Less or not chance really of the sail coming partially unfurled in string wind while you are at work. (Something I have seen too)
  • Hanks are way more reliable that ANY Furler (or its furling line…)

 Some points AGAINST reverting to a hank on headsail.

  • What do I do in winds under say 10 knots?”
  • I have to go to the bow to change sails in wind and waves
  • Where do I put the sails?
  • I have to put it on and take it off every time I want to go sailing-I cannot just unroll it.

 Some THOUGHTS on the against list:

  • Under to knots you can use a light air headsail made from heavy nylon and with a strong textile rope in the luff and no hanks. This sail is not very common these days but I would use them a couple of times a year for different customers when I was at Hood (15 years) to answer this very question for all the same reasons we are having this discussion.
  • This sail is easy to handle because:
  • Is Nylon so can be “handled” like a spinnaker-Stuffed into a bag, sat on, kids (or adults…)can sleep on it, it can be stuffed into a small space, it need not be treated with the care of a Dacron sail-I.E. always folded up and so on. It is inexpensive both in capital cost AND compared to the VALUE of it. It can be used as a reaching sail in more wind at wider apparent wind angles.
  • It is light,  so fills in very light air.
  • The next sail-the Jib-Can be already hanked on. This Nylon sail, being set free-flying, can readily be dropped and pushed down the fore hatch and the jib hoisted in less than one minute most of the time.
  • You may be able to sell your furler and so recoup some of the costs…

All of this assumes that you have a larger headsail now for very light air. I do not know either way….. If the only sail you have is the sail on the self-tacker then I submit to you that this hank on jib offer a lot of benefits.

Finally while looking on the web for pictures of an Avance 36, I saw a 33 for sale and it is rigged with only a self tacking Jib and hanks….. And the pictures of it on the mooring showed the sail hanked on and stowed in a cover like the mainsail.


Mast bend, the use of the backstay, OR topmast running backstays, to adjust the shape of mainsail and headsail.


Running backstays, commonly called simply “runners” are used not only to oppose the cutter stay on boats so rigged, they can also be used as a fine tune for mast, and so, sail shape.

During the course of the series on Full Length Battens, I received an email question from a fellow named Chris who owns a Condor 40 Trimaran. This post is more of a one way monologue with me answering his question rather than the usual essay but the information is all valid regardless.

This fellow is asking basically a sail shaping question.

His note to me in italic red, my comments in bold black. His question in blue italics.

Very interesting article Joe. On my condor-40 tri I have no back stay (Cooper comments: Not in the sense mono-hull owners recognize a backstay. He has two, one on each side so, among other things, his mainsail can have a big(er) roach unencumbered by a single standing backstay) and my spreaders are swept back however they are set up supporting diamond wires never connecting to the deck. (Cooper comments: These are known as Diamonds and are rarely seen on most normal “yachts”-Multi hulls and various skiff classes, yes, for all sorts of reasons.)

My side stays (Cooper comments: What mono-hull sailors would recognize as the “cap shrouds”) run from the top of the mast to the amas and are aft of the mast base eliminating the need for a fixed back stay. I do have running back stays (Cooper comments: Language or choice of words is important here: What he calls “running backstays” are almost certainly “TOPMAST running backstays”, again to do with the roach-see above)  that are combined with an intermediate running back stay. Both runners are adjusted via a 2-1 purchase and then a 2 speed wench. The intermediate runners also have their own adjustment via an 8-1 car assembly on the cabin top. All very slick. My question since these are new to me is how do I know how much tension to load the primary and secondary running back stays? And with my wide boat I have bunji cord that pulls the unburdened back stay far to the side so it does not chafe the sail in most points of sail. Thanks in advance. Oh yes Happy Thanksgiving today.

End of his note to me.

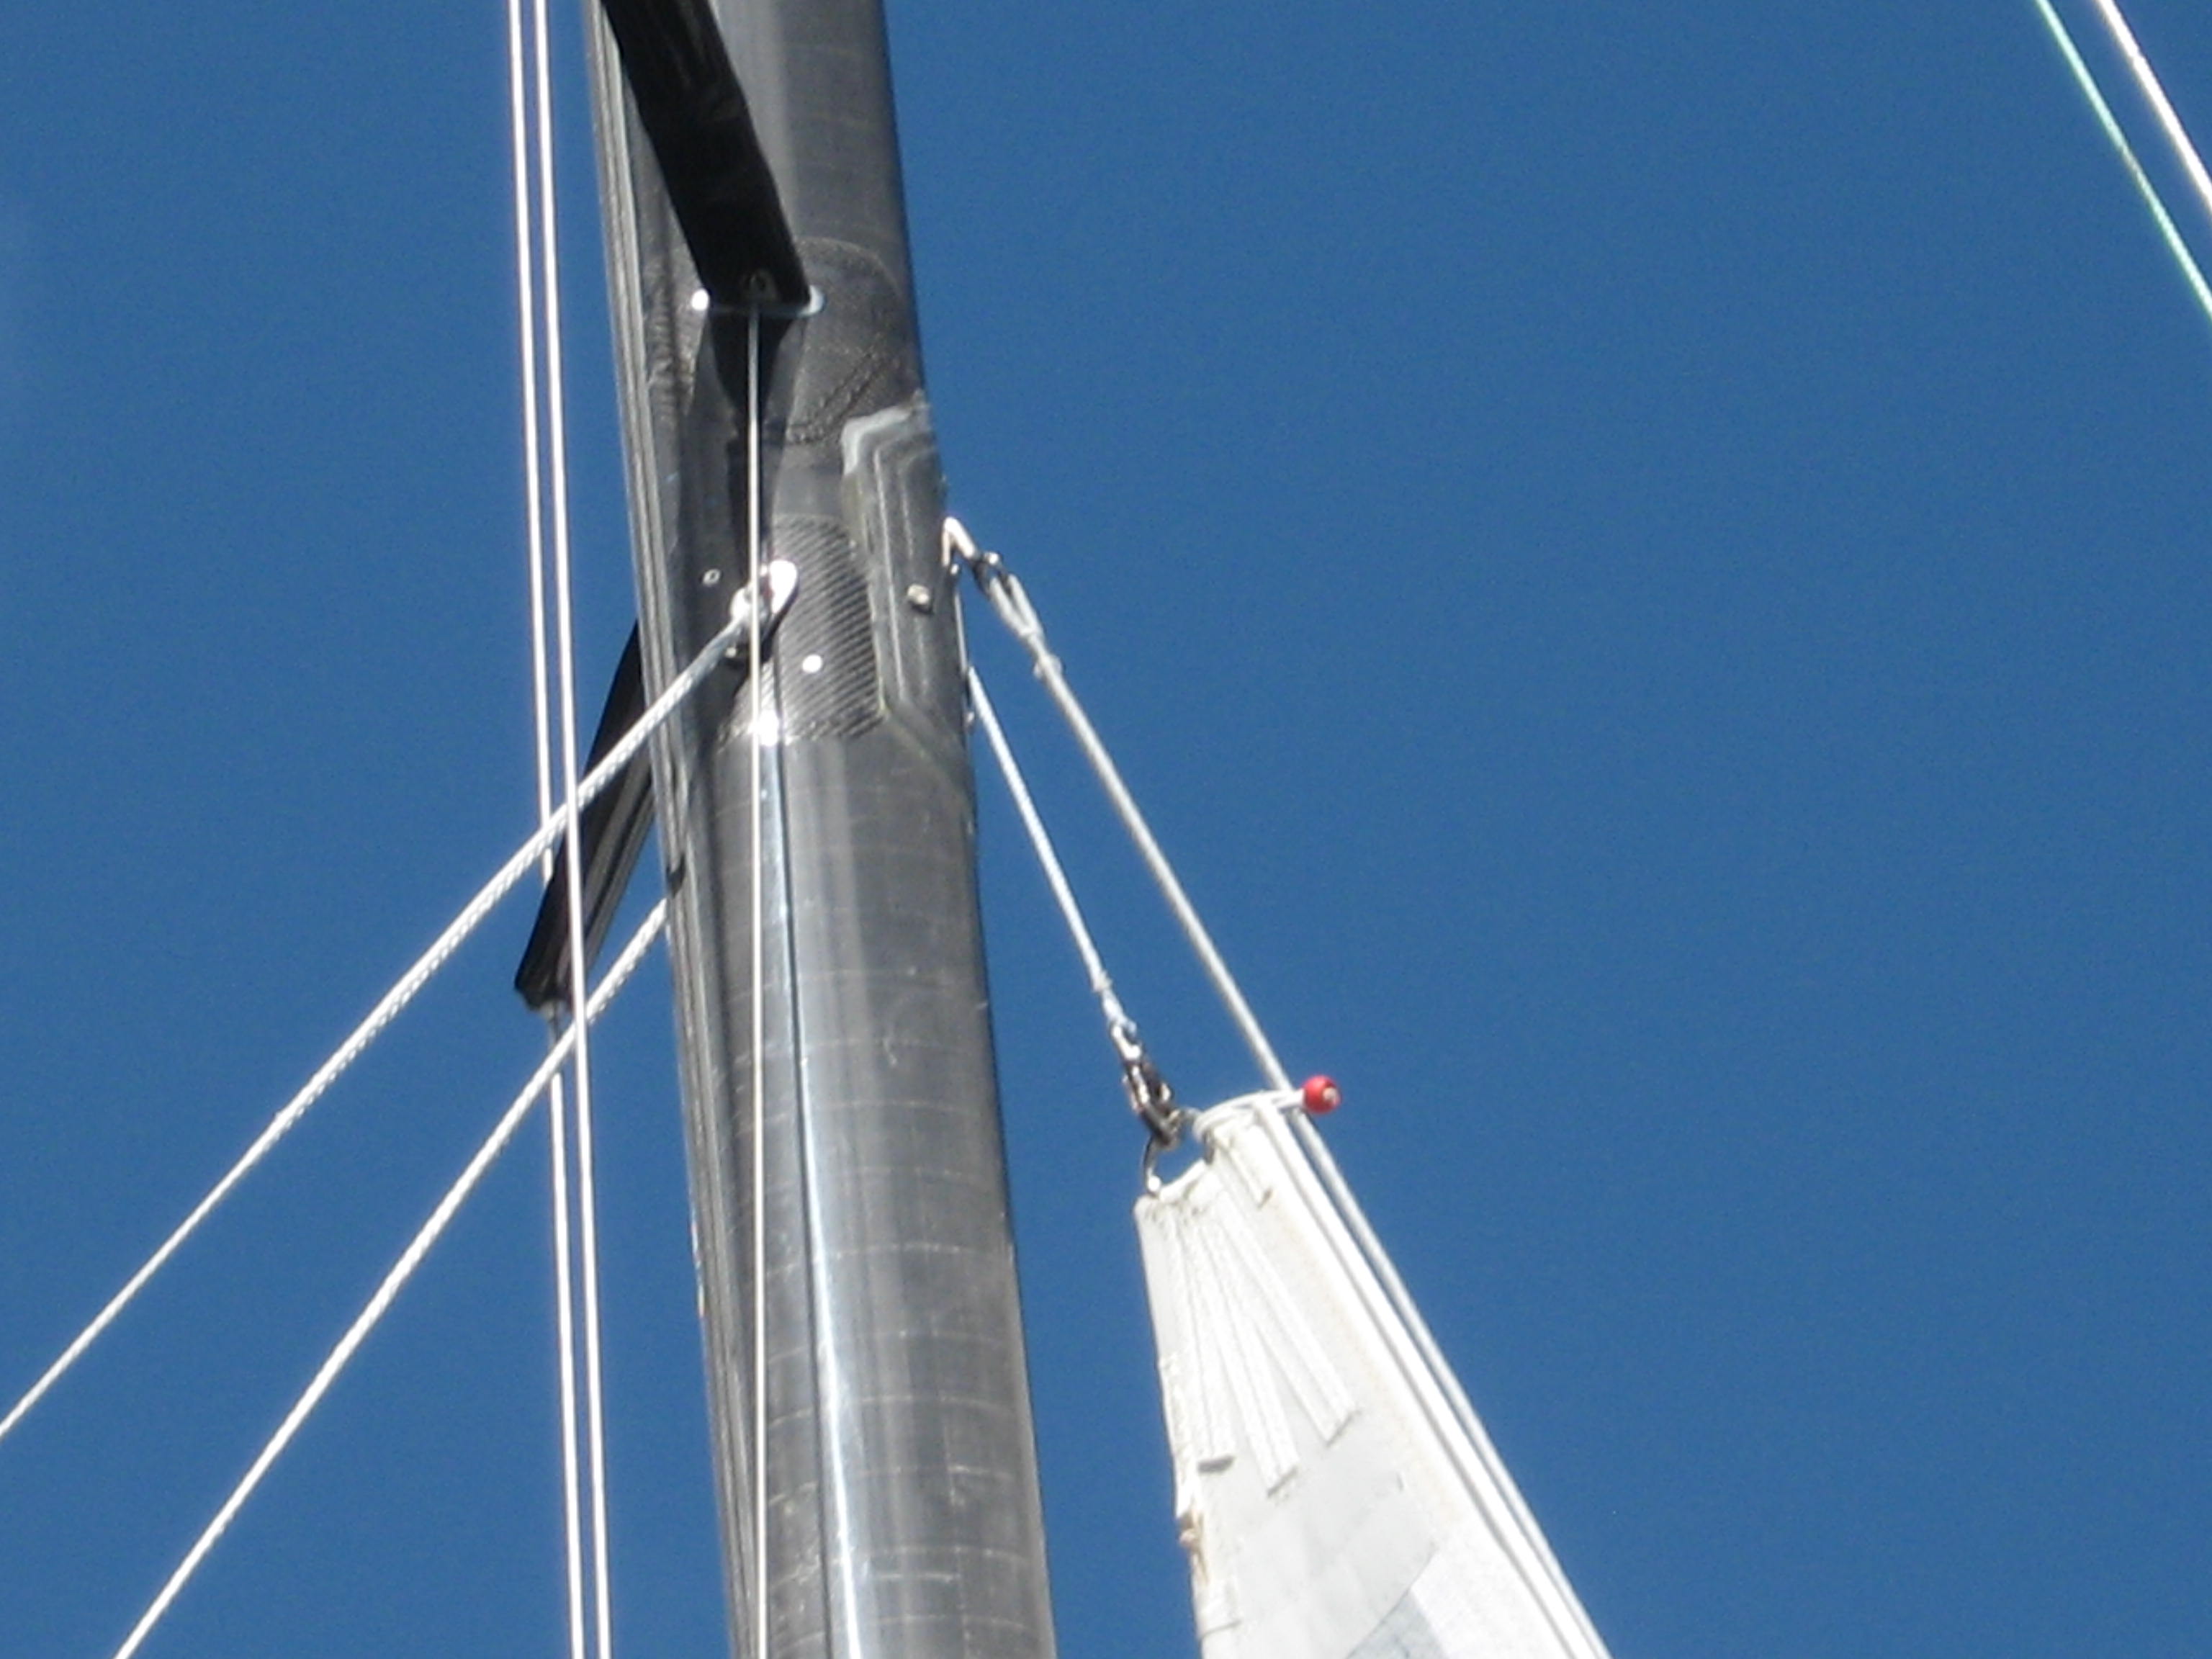
A closer look at the type of detail Chris is describing-Topmast runners AND lower or check stays attached to the topmast backstays

A closer look at the type of detail Chris is describing-Topmast runners AND lower or check stays attached to the topmast backstays. You can see the adjustment tackle on the lower, intermediate “check” stay. Because this boat is small, a Mini 650, it is possible to adjust this stay using this tackle most of the time.

I understood/understand the bulk of his description on the runners. What I did not quite get is this statement:

“The intermediate runners also have their own adjustment via an 8-1 car assembly on the cabin top”.

If the intermediates runners are connected to the topmast runners like the arrangement on the Mini pictured above…How do the lower ones, the intermediates, get to the cabin top? Do they for instance go into the mast then down and out and aft, like a halyard? This would give you the option of adjusting the intermediates while not adjusting the topmast stay. This has done on occasion on mono-hulls, although it is losing because it is not every accurate because the spar can still move around the sheave in the mast. Ideally the runners and backstays connect directly to the spar so that once adjusted it stays adjusted.

Regardless this is the answer to your question:

Both runners are involved in sail trim, the overdrive or the “final gear” part of the overall sail trim as follows.

The topmast backstays will control the head-stay sag and mast bend  like the “regular” backstay on a mono-hull. And likewise the check stays (or lower runners or intermediate runners-Depends on what country the speaker is from…) will control the mast bend in the middle of the spar.

This shows the mainsail shape of a 45 footer, prior to being "set-up" for the (increasing) wind conditions. Follow alopng as the other images in this sequence show the mainsail getting flatter and smoother by use of the topmast backstay

This shows the mainsail shape of a 45 footer, prior to being “set-up” for the (increasing) wind conditions. The other image below shows the mainsail getting flatter and smoother by use of the topmast backstay. Here the sail is too full and there is not enough luff tension-Cunningham set up. The stings floating around are the lazyjacks.


Via these two adjustments the topmast backstay will tension the head-stay reducing stay sag and improving pointing and making the sail flatter. They can also contribute to the mast bend if the mast is so designed.

This is the final set up for this mainsail on this trial. IT is starting to blow back because the breeze went from 11kts. to about 16/17kts. in the time we were getting set up and the headsail had not been adjusted too match the harder breeze.

This is the final set up for this mainsail on this trial. You can see how the sail is flatter then in the previous image.It is starting to blow back because the breeze went from 11 kts. to about 16-17 kts. in the time we were getting set up and the headsail had not been adjusted too match the harder breeze. The bulk of this flattening was by virtue more backstay tension

The intermediate runner controls the mast bend in the middle of the spar. If the runner is tight, the mast will be straight. If the intermediate is not as tight the mast will bend a bit and so flatten the mainsail too.

Try this: At the dock one day set up the runners to what looks/feels like “normal”. Go forward and look up the mast to see what kind of bend there is, especially around the middle of the mast, where the intermediates connect.

TIP: You can usually reference this bend by securing the main halyard to the tack fitting and then putting a reasonable amount of tension on the halyard, to keep it tight and straight. Then measure the fore and aft length dimension of the spar. When doing these sightings, relate the fore and aft dimension of the spar to the distance between the back of the spar and the halyard. If it is, by eyeball about the same as the mast dimension then that is known as one diameter. So if the spar is 6 inches F&A, then you have 6 inches of mast bend at that point minus the amount the halyard is aft on the tack fitting.

This will give some idea of the idea behind sighting up the spar to determine mast bend.

This will give some idea of the idea behind sighting up the spar to determine mast bend.

Then go forward and wiggle the head-stay, to get a sense of how tight it is.

Return aft and tension the runners again so that there is a difference in the feel/load. Repeat steps above, sight the spar and feel the head-stay

If you are OK with it, go and tension the runners again to “Max” and repeat the sightings and wiggle.

THEN adjust the lower runner through, I am guessing, the tackle you refer to on the cabin top.

The question about “How much to load them” has a couple of answers.

1. You can go sailing in a variety of winds and adjust the settings until the boat feels best in that wind sped.

2. You can wind them up pretty tight and forget it-You probably will not pull anything off the deck, but it is always possible

3. You can spend a chunk of change on a digital load meter and put that on the runners or the headstay. Most of the high end sailing instrument makers have such a device that works with Navtec fittings. Personaly I would use the eyeball method.

In the big picture backstays (or a single normal backstay on a mono-hull)can be used to adjust the mainsail shape via the mast bend (in conjunction with intermediate runners if installed) and the head-stay sag. All of which are fine tune adjustments rather like the over drive on a car. How much load is applied varies with the basic shape of the sail the flexibility of the rig and a host of other variables.

Easy upgrades for short handed sailing


The link below goes to Wind Check magazine. You may know I write a monthly column for them. For this winter, they wanted me to write about some simple easy things owners might do over the winter to improve their lot when sailing, as most boats are, Short Handed.

Well I started out to do the 2 x the regular column (which is about 1,000 words) that they asked for, so about 2,000 words. At about 5,000 words I hove to and thought about the subject for a bit. In order to get in all the simple cheap(ish) easy things AND do justice to the two most important aspects of any sailing, this whole idea needed to be bigger. I think that in any sailing but short handed in particular, one must be really comfortable with handling the sails. This includes, for the mainsail, hoisting, lowering, reefing, shaking out the reef, and putting the sail away and cover on. Then there is the issue of roller furling headsails and their part in the big picture, then smaller sails for use when the breeze is over about 15  knots, down wind sails, and well you see where this was going. Each sail and method of handling it might be its own stand alone piece in one edition of the magazine.

I sent Chris Gill, the Editor at WindCheck a note suggesting he/we make this into a 3 or 4 part series so we can really get into the meat of the matter. We volleyed emails back and forth for half an hour and ended up with at least three and maybe four part series on the subject.

So this first part is some of the simple things one can do.  The other pieces will come along further into the winter, but early enough that you can still get a good deal on stuff at the boat shop if you find something you like.

I invite you to read it and study it. It is all from long experience, learned, often at 0230 on a cold raining dark and stormy night somewhere in the middle of nowhere blowing the blazes with something or another broke or looking to break.

Full Length Battens-4: The Hardware.


I hope the earlier essays have covered the issues surrounding the full batten question from the sail performance, efficiency & speed perspective.

The ease, or lack of it, with which a FB mainsail can be operated during the various maneuvers a crew must make while at sea full battens offer these advantages:
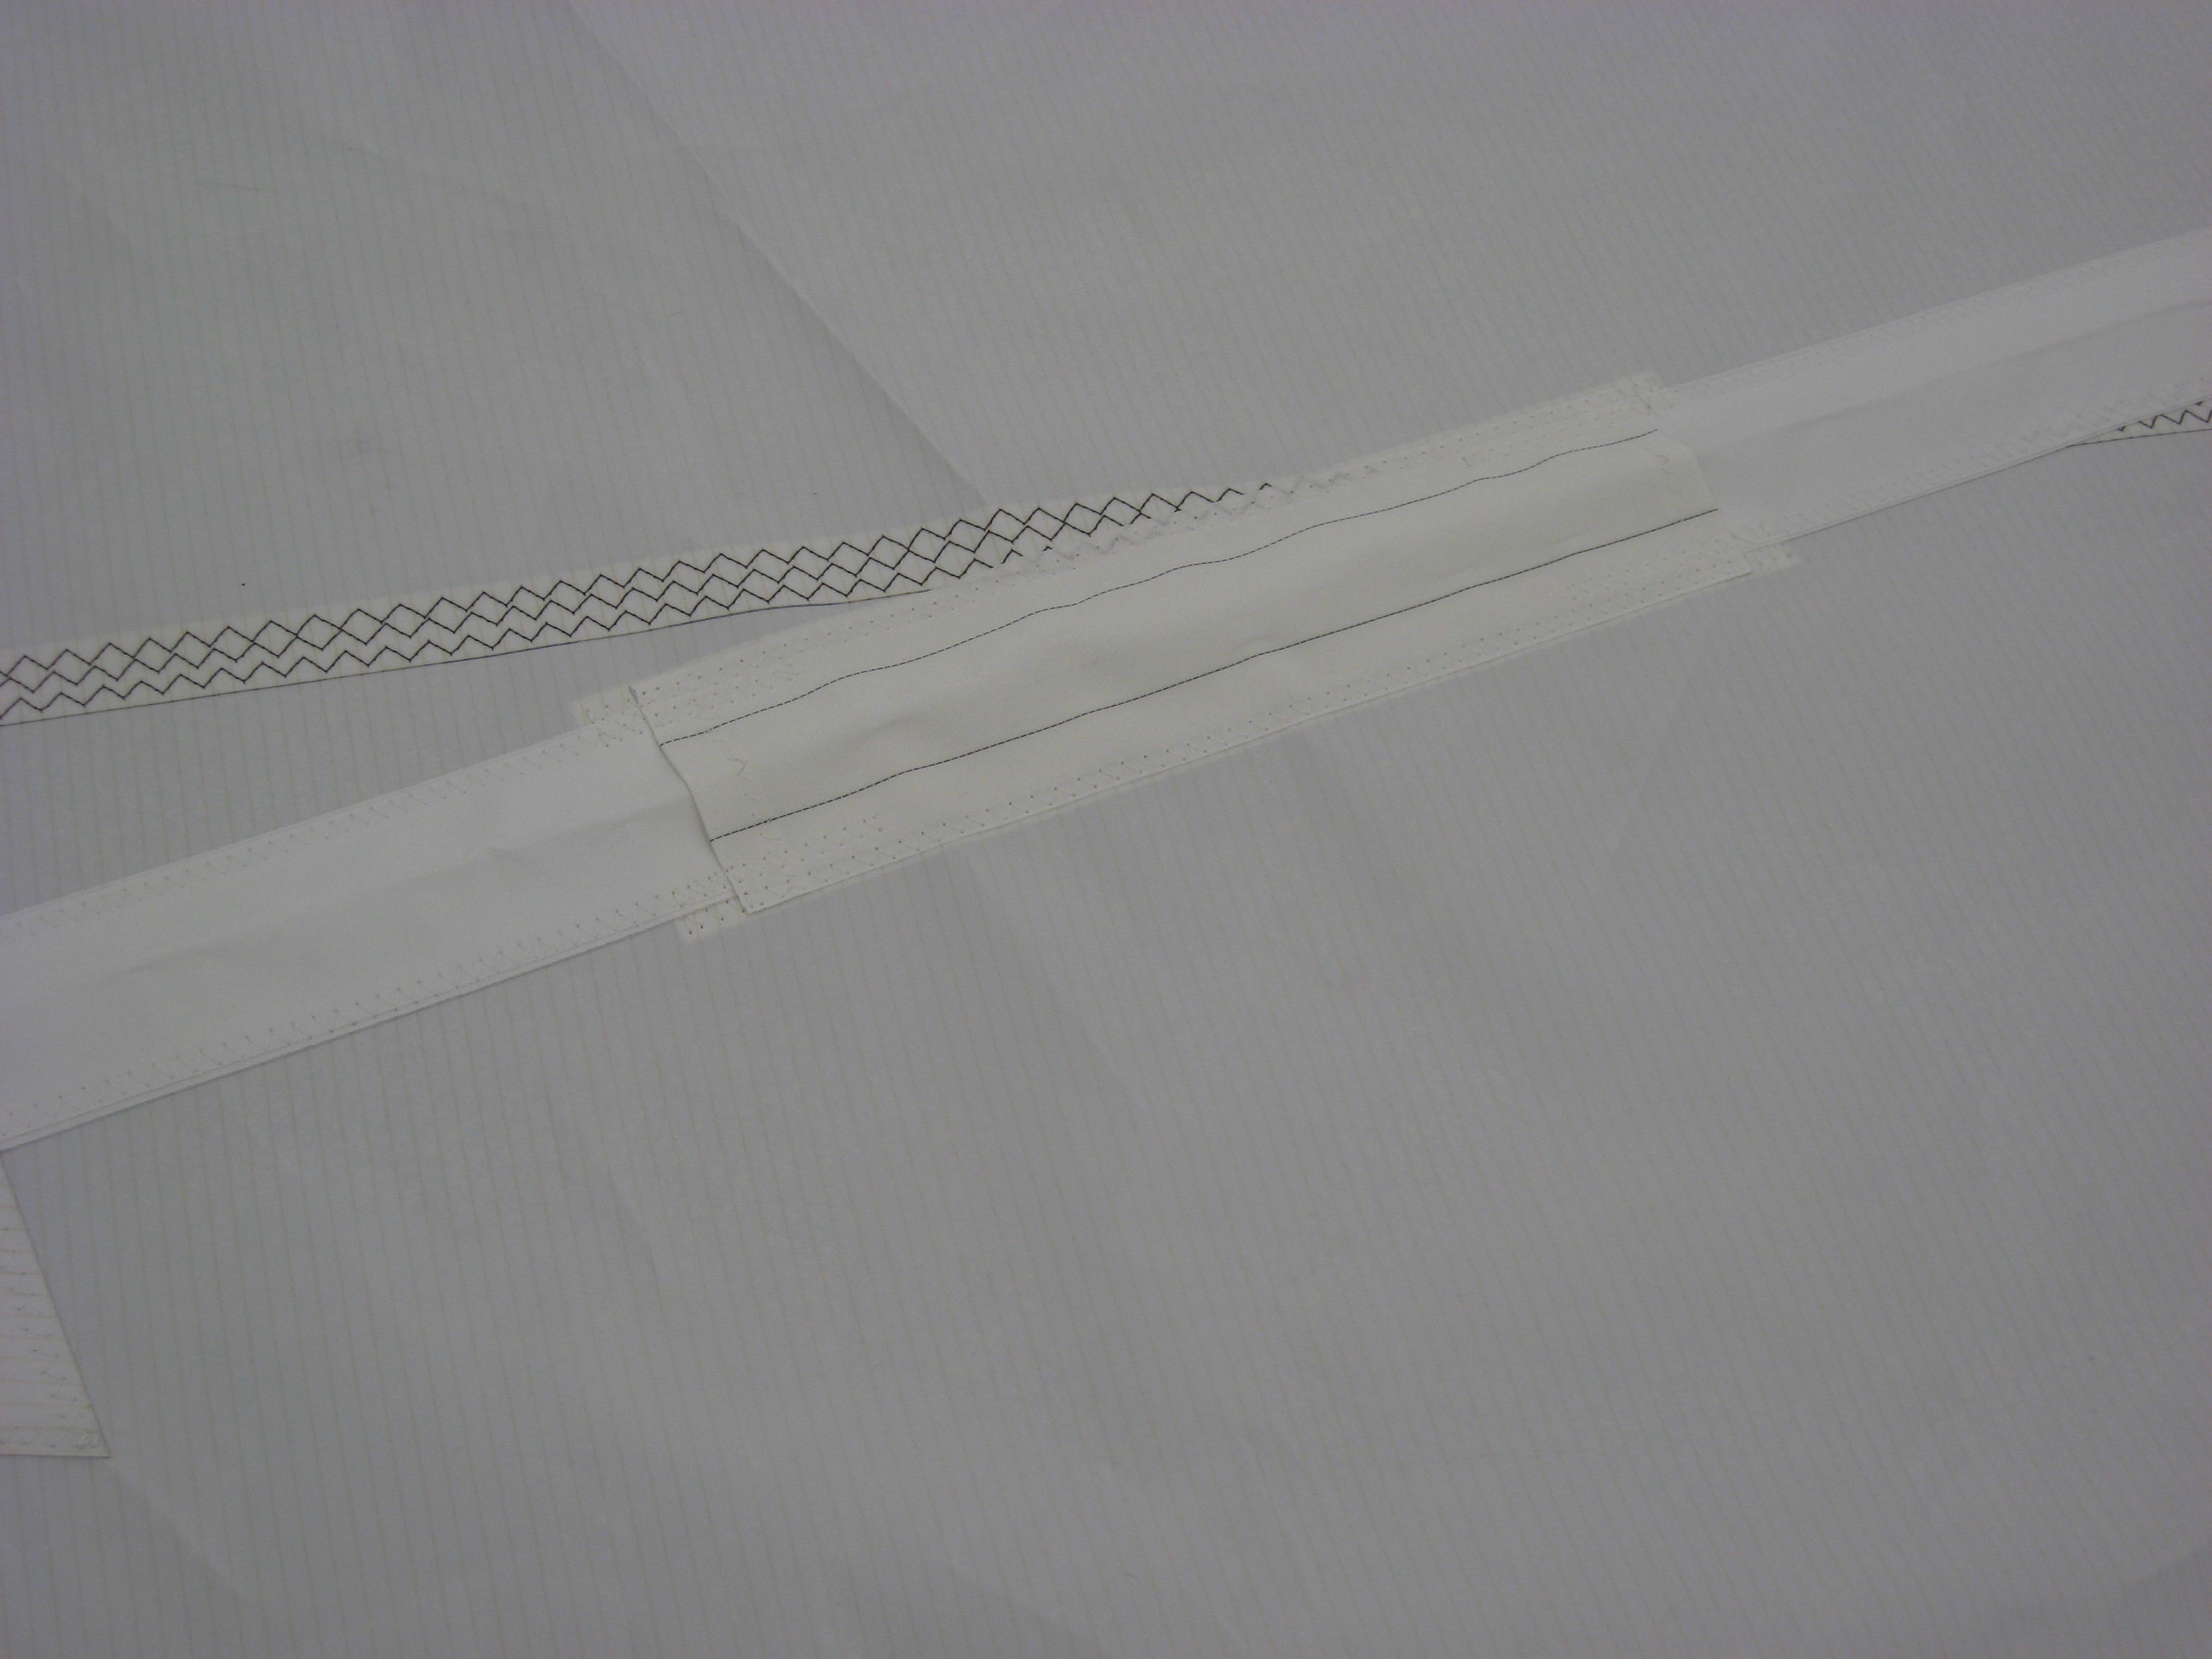
On boats with aft sweep to the spreaders, it is important to have the area where the batten pocket bears on the rigging to be reinforced with sacrificial chafe protection.

On boats with aft sweep to the spreaders, it is important to have the area where the batten pocket bears on the rigging to be reinforced with sacrificial chafe protection. This image shows just such protection on the pocket of a Deerfoot 60 mainsail Hood built. While chafe protection is a good detail to have on your sail when going of into the open ocean, it is more important on FLB sails due to the grinding effect the batten imparts on the stays, or anything else the batten and sail are bearing on.


  • The mainsail is much quieter when flogging the battens reduce the frequency at which the sail flaps-This is because the stiffness and mass of the batten resists the wind force more than a mere “cloth.”
  • The effect of the batten separating-pushing the luff from the leech makes it easier to get a hand full of sail and to some degree put it where you want it, particularly if there is some kind of boom bag for the sail to settle in.
  • Full battens are more effective at keeping the sail constrained between lazy jacks, even more so if the lazy jacks are located with respect to where the reef points and the batten’s leech ends are.

The real trick that makes ALL of this work as an integrated system is to mate the hardware to the boat, the sail and the intended use of the boat. This requires a combination of learning about the pluses and minuses of each version plus some other contemplation: Much of this information can be supplied by the sail makers and or rigger, but as with any business, they most likely have their own favorite hardware, mainly because they are used to in.

In no particular order some of the details to decide or to think about before even picking up the phone are:

  • Track or no track and
  • Ball bearings or no ball bearings.
  • Number of battens
  • Will the battens be installed from the Leech OR the luff
  • How the batten pockets will made to will resist chafe
  • How the sail is to be captured when it falls down
  • What you are realistically going to do with the boat/sails/battens–The further offshore you go, the higher value the most friction free gear you can get will be.
  • Stack height
  • Reefing details
Making sure the reefing system is coordinated with, in particular, the placement of the battens and cars is one of the  important details to get right.

Making sure the reefing system is coordinated with, in particular, the placement of the battens and cars is one of the important details to get right.

This installment will begin to cover the available hardware for making the most of the benefits of the full batten sail which are to my mind “ease of handling”. It should be noted that the bulk of the following information pertains to the hardware I have seen and or had experience with in the US.  Regardless of hardware the principles are the same.

First off a definition is in order for the idea of “ease of handling”

For this discussion ease of handling includes:

  • Any hardware-Tracks cars batten boxes etc.
  • Or sub-system-Lazy jacks boom bags etc.
  • Or technique, practice skill in handling the boat during sail handling activities

OR

  • That which makes the manhandling of the mainsail on the boom easier and/or less stressful, and/or safer, whether hoisting, lowering, reefing or unreefing.

Reefing in a seaway is potentially one of the most hazardous parts of sailing a boat. The crew is, often out of the cockpit, it is blowing, often quite hard, there is a sea running perhaps quite large and there is the personal  stress factor, both on the part of the crew member doing the work and the master worrying about his crew….

wx map 13 April 13

When your weather map looks like this you better be sure that all the gear, especially the sail handling gear, on your boat works 100%, is easy to work, fast,simple and tested.

Traditionally one of the hardest parts of dealing with a mainsail is the friction generated mainly by the slides operating in the track. This is closely followed with what to do with the bunt of the sail after the reef is secured. On modest sized boats this is not so much a problem. If the “Depth” of the reef is say 4,5,6,7 feet- and boat that has three reefs at 7 feet apart might have a rig close to 45-50+ high feet, so perhaps a 40 footer. Depending on all manner of variables it may be sufficient to let the bunt flap to leeward, although personally I would roll it up and tie it off. Boats with a larger gap between reefs of course get progressively larger; the size of everything goes up as do the loads and the weight of everything. The requirements, desirability and the cost (all equaling value) of using low(er) friction luff sliders increases with the size of the boat, the sail and owner’s horizons.

As if this writing, I identify the following categories of luff slide hardware-And yes all of it can be used with a conventional sail with just leech battens too. These categories are:

CARS/SLIDES: With ball bearings and without.
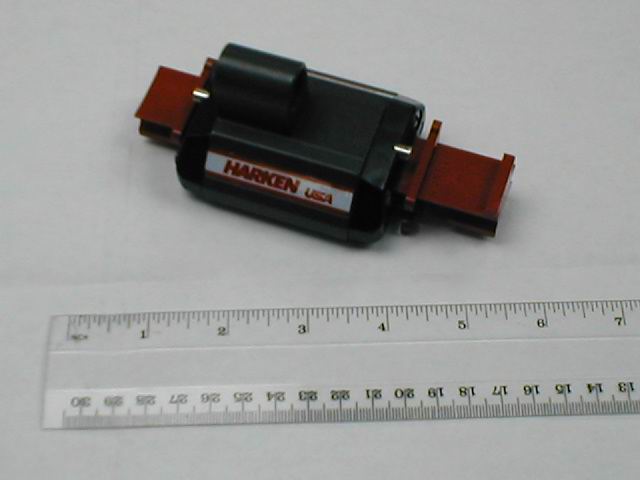
This is a Harken ball bearing car for the batten box to attach to. Originally the red dummy track was used to keep the balls in the car. This has been improved on now so that the balls are held captive in the cars, minimizing one of the great arguments against ball bearing cars.
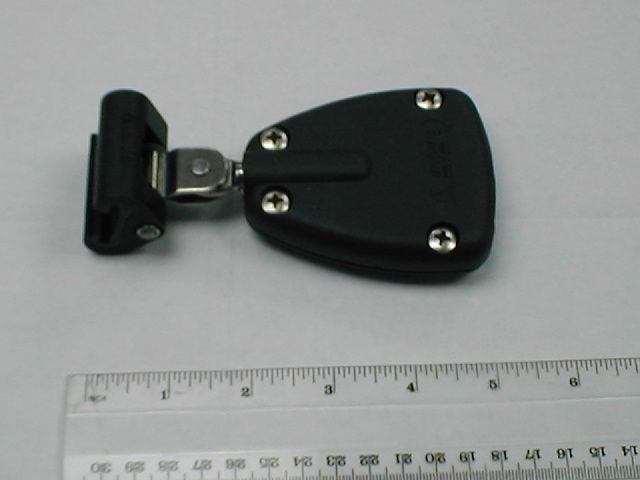
This is a Harken ball bearing car for the batten box to attach to. Originally the red dummy track was used to keep the balls in the car. This has been improved on now so that the balls are held captive in the cars, minimizing one of the great arguments against ball bearing cars.

Antal track slider & Toggle with Antal leech loading batten box.

This is Antal track slider & Toggle with Antal leech loading batten box.

TRACK: Those that employ a dedicated track that needs to be installed into the existing mast groove with track. AND NO (dedicated) TRACK-Those systems whose sliders operate in the mast’s groove.
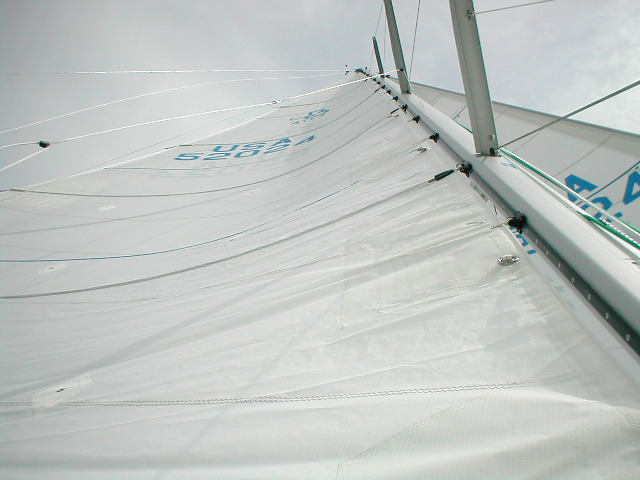
Dedicated track requiring attachment to the spar is a hallmark of a high end ball bearing system

Dedicated track requiring attachment to the spar is a hallmark of a high end ball bearing system

BATTEN BOXES: Those that are adjustable, to tension the batten in the sail and those that merely accept the batten and the batten tension is applied elsewhere, usually from a lashing or Velcro arrangement on the leech.
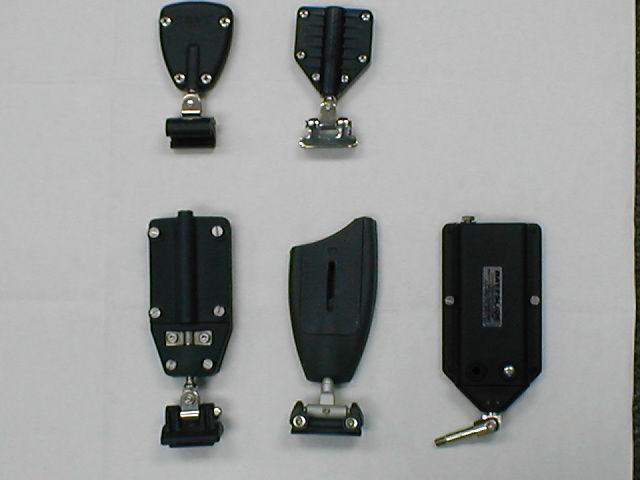
Batten boxes come in almost as many flavors as the systems themselves. Top two items, L-R: Antal slider with leech load box, Tides Marine slider with their leech loading box.  Bottom three, L-R Sailman box and slider from Bainbridge, Rutgertson box and slider and a Battslide brand box with toggle.

Batten boxes come in almost as many flavors as the systems themselves.
Top two items, L-R: Antal slider with leech load box, Tides Marine slider with their leech loading box.
Bottom three, L-R
Sailman box and slider from Bainbridge. A Rutgertson box and slider
and a Battslide brand box with toggle. This toggle would fit into the Harken batten car, shown above, in the red dummy track and all of the others reference here except Dutchman.  Not shown is another box called PNP, roughly similar to the bottom three.
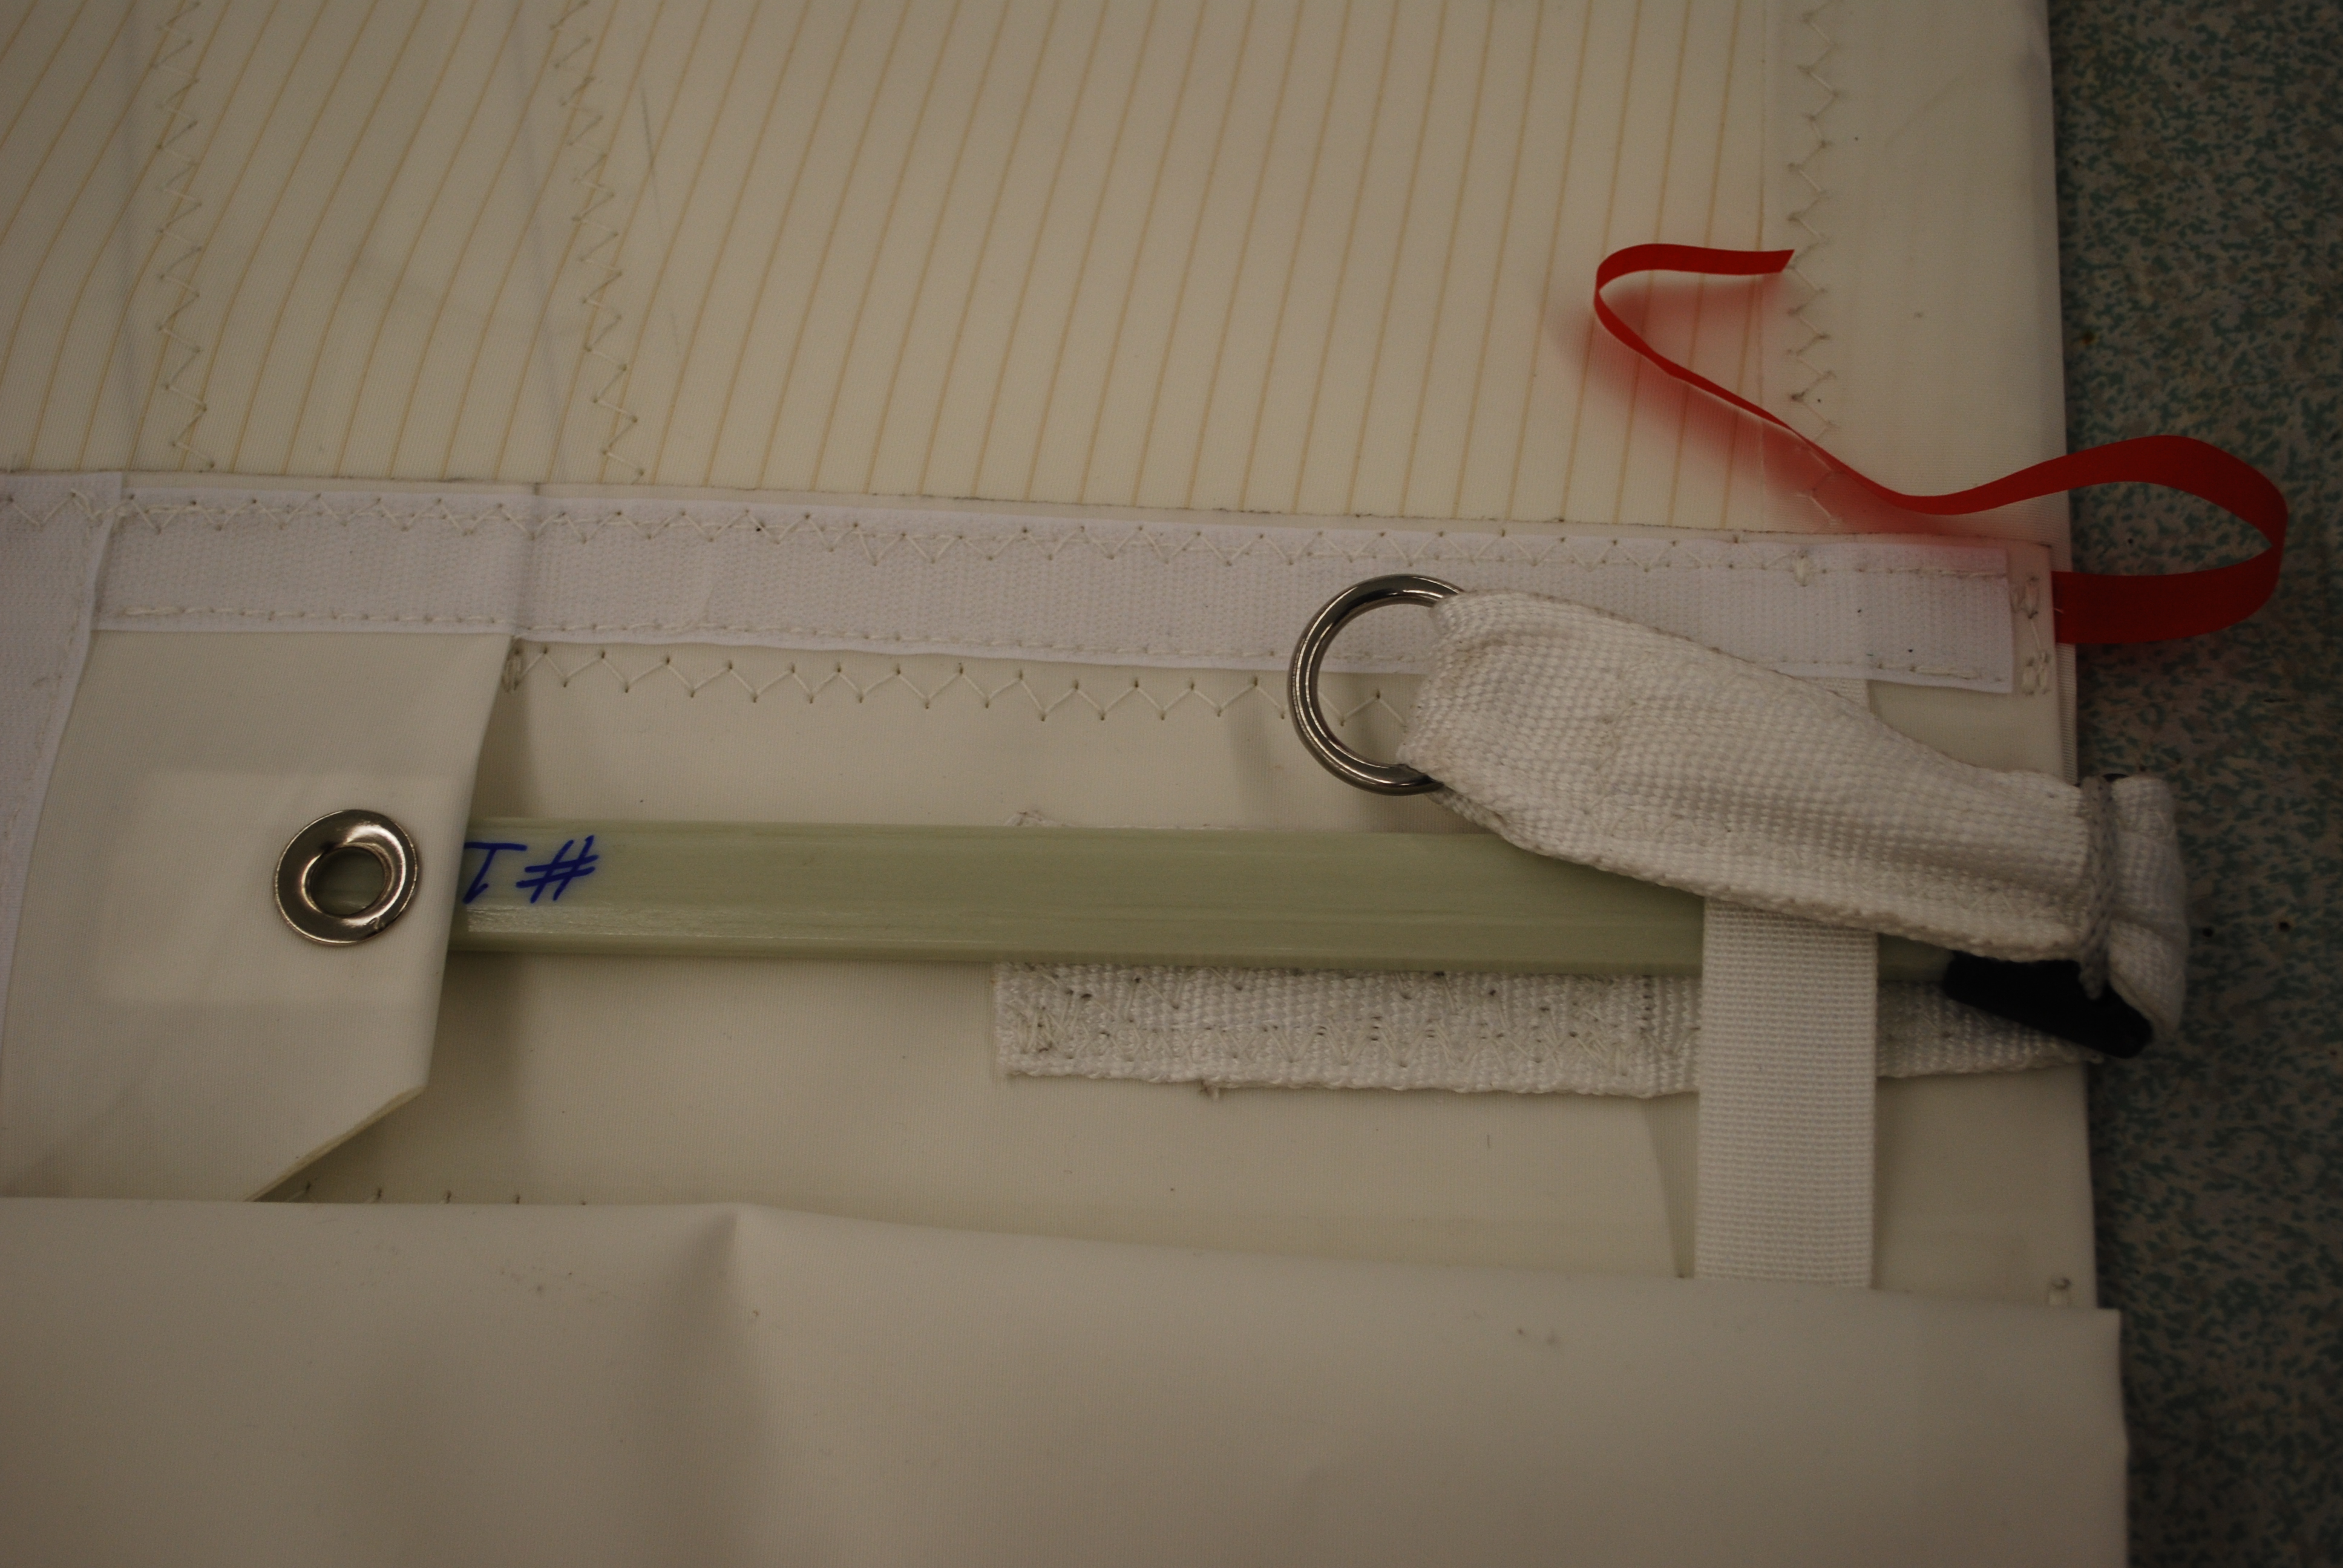
 

This detail shows a leech loading batten pocket tensioning mechanism. BUT not only should the leech tensioning method tension the batten, it needs to be engineered in a way that makes it really hard to loose the batten out the end, as when flogging the sail in hard wind while reefing or attending to some drama aboard. This is a good reason for the luff loading battens with adjustable boxes. Adjusting the tension on the batten is a lot easier too-You do not need to be scrambling around up on the boom to get to the leech of the sail, rather you can stand at the mast and use typically a hex socket or sometimes a screwdriver.

This detail shows a leech loading batten pocket tensioning mechanism. Not only should the leech tensioning method tension the batten, it needs to be engineered in a way that makes it really hard to loose the batten out the end, as when flogging the sail in hard wind while reefing or attending to some drama aboard. This is a good reason for the luff loading battens with adjustable boxes. Adjusting the tension on the batten is a lot easier too-You do not need to be scrambling around up on the boom to get to the leech of the sail, rather you can stand at the mast and use typically a hex socket or sometimes a screwdriver. In this image you can see a length of light spectra lashing , far right, secured through the batten end and around the webbing strap. The batten is tensioned by a lashing (not installed yet) passing through the webbing and the grommet on the flap, to the left.

TOGGLES: These are usually metal devices that connect the batten box to the luff car. They are superior to merely webbing the batten pocket to the car because they maintain a separate specified rigid distance between the sails edge and the car. For the batten box to slider connection a more or less standard M10 and M12 threads on the studs entering into a matching female on the box. The boxes in the image above the one of the leech loading pocket detail, are all connected to their respective slides by the toggle.
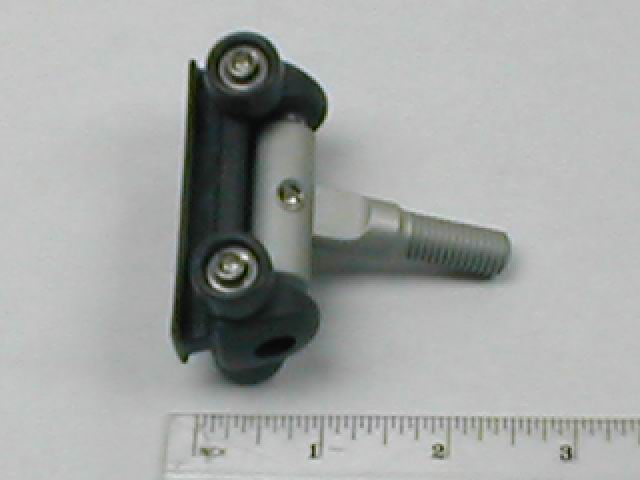
Virtually all toggles are a variation of this version on a Rutgereson roller slide.

Virtually all toggles are a variation of this version on a Rutgereson roller slide. Most batten boxes have a matching M10 or M12 female into which the stud threads. This slider BTW is one of the crossovers in that the ball bearings are in the wheels, which bear on the outside of the mast tunnel-No dedicated track required.

CROSS OVERS: There are at least a couple of products that offer in-mast sliders that require no dedicated track and have ball bearings or some kind of roller on the slider.
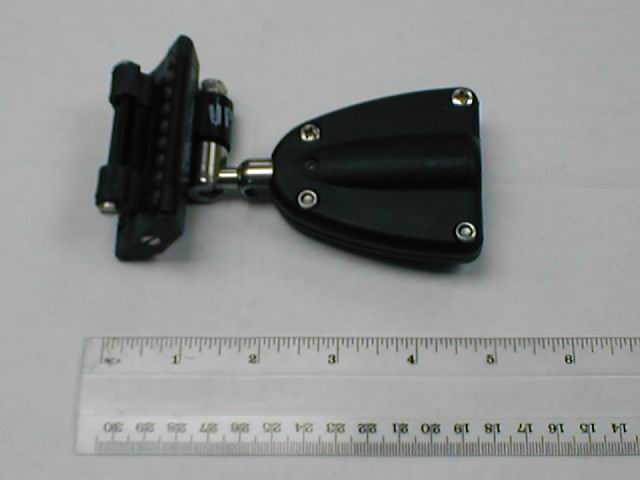
This is one of the most elegant cross-overs-The Ronstan Ballslide. They come in two sizes a 6 and an 8

This is one of the most elegant cross-overs-The Ronstan Ballslide. They come in two sizes a 6 and an 8. You can see the “feet” held in place by the screw, on the left of the image and the balls in their cavity. If memory serves the numbers refer to the diameter of the balls.
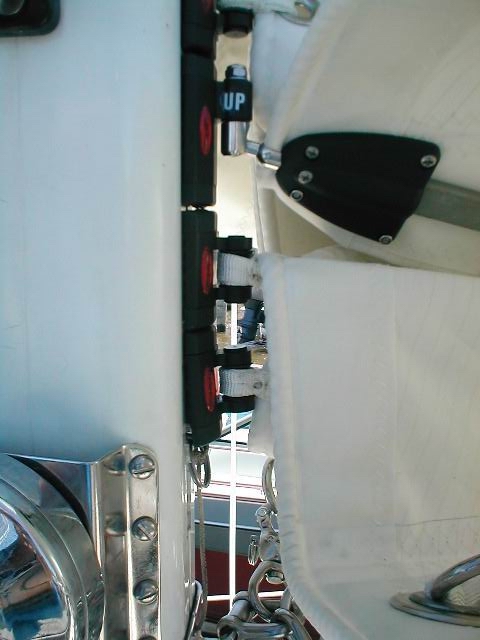


Ronstan ball slides on a Sabre 30. Perhaps a tad over kill for some, but the owner wanted to be able to reef the main from the cockpit. He reports being able to exactly that. In order to achieve this for him I had to rework a chunk of the reefing system on the boat. All done remotely-He In Michigan & me in Newport.

Ronstan ball slides on a Sabre 30. Perhaps a tad over kill for some, but the owner wanted to be able to reef the main from the cockpit. In order to do that, incorporating all the inherent friction from such a reefing arrangement he needed a low friction solution at the luff. In order to achieve this for him I had to rework a chunk of the reefing system on the boat. All done remotely-He In Michigan & me in Newport. A particular advantage of the Ballslide system is the ability to simply remove the sail from the mast with out worrying about the carriage carriers. In fairness most of the Ball bearing systems with track now do this too but not having to install a track is something many find attractive.
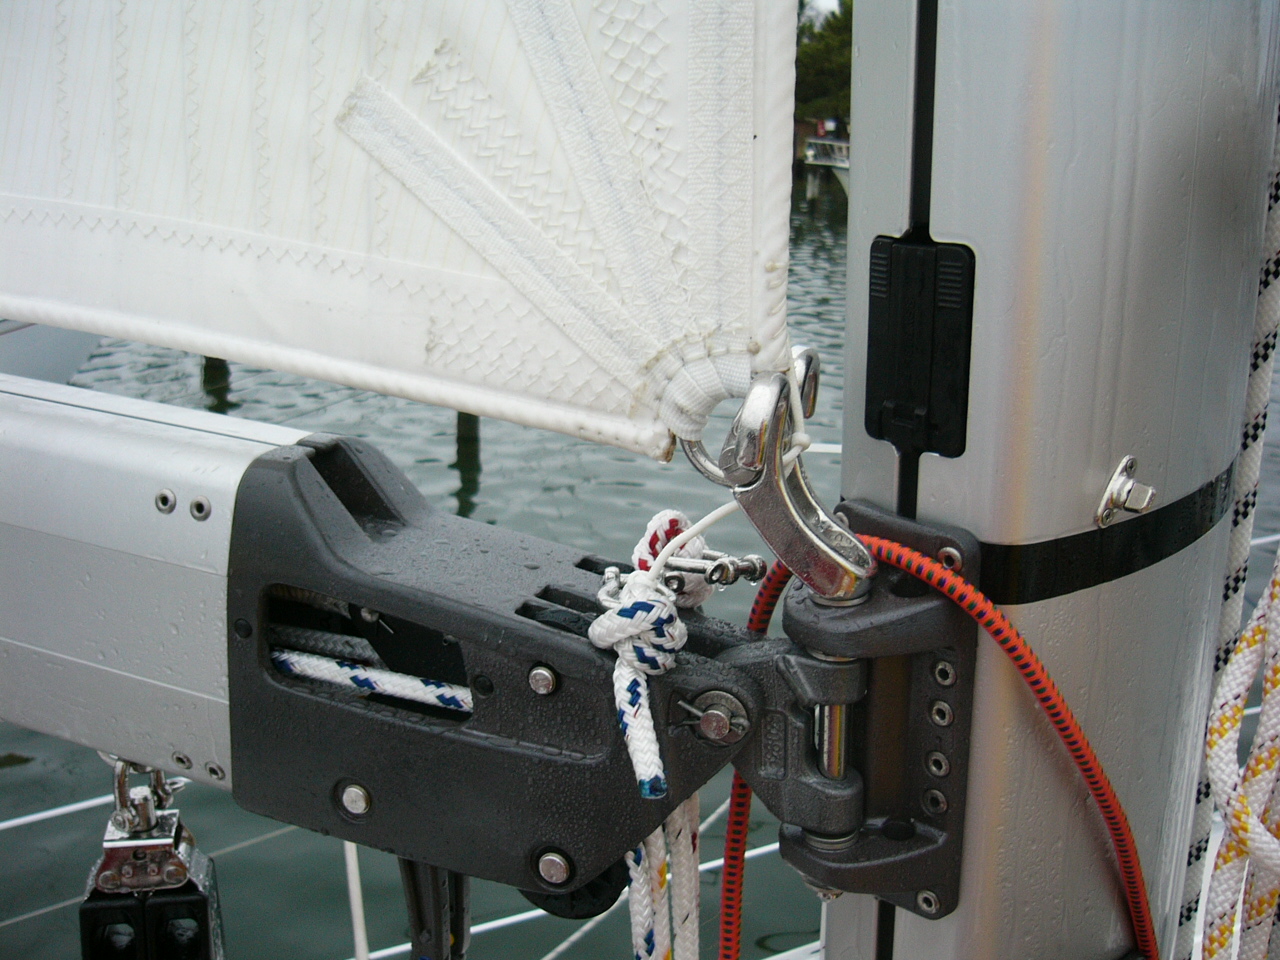


This image does not do justice to the Selden system. On the other hand since you need a new spar tube, it is not the most marketable system. The cars operate INSIDE the spar in a cavity extruded into the spar and are introduced through the black fitting seen here.

This image does not do justice to the Selden system. On the other hand since you need a new spar tube, it is not the most marketable system. The cars operate INSIDE the spar in a cavity extruded into the spar and are introduced through the black fitting seen here.

CARS/SLIDES: WITH ball bearings:

HARKEN: It will be no surprise that most people’s first thoughts turn to Harken, at least in the US, when the phrases “boat gear” and “ball bearings” are used in the same sentence. The brothers Harken have cars and sliders, ball bearing and not, plus the required track for every size of boat from small, like a J-32 to 90 feet and/or 140 sq. meters, about 1500 sq. feet.
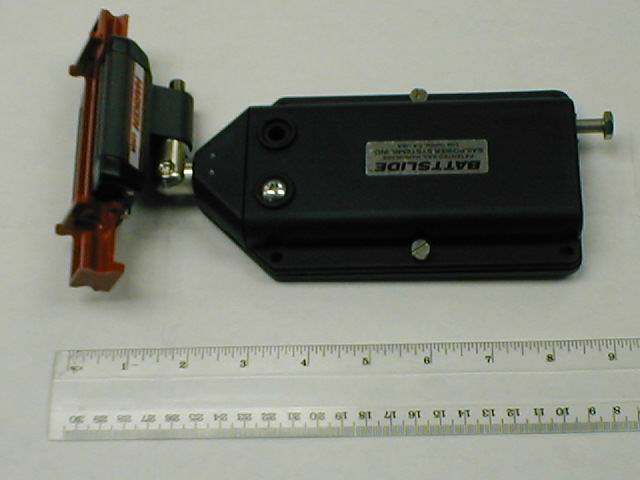
A very typical combination of Harken ball bearing car with a Battslide box.

A very typical combination of Harken ball bearing car with a Battslide box. The Battslide box shown here has been superseded by a later generation with improvements on how to get the batten in and tensioning details. Battslide boxes are manufactured by Schaefer.

RONSTAN: In some quarters, perhaps expats, like me, familiar with Australian sailing equipment, recognize the Ronstan name too. Like Harken, Ronstan has track and car systems for boats as as small as 40 FEET up to 45 METERS.To be fair to Harken, they too offer custom solutions for boats over 90 feet

This is a one combination of the Ronstan equipment

This is a one combination of the Ronstan equipment. The sticker says Frederickson because that was the name of the company before Ronstan purchased them a few years ago.

FACNOR: Followers of French boats would recognize the Facnor name in reference to headsail roller furling and not associate them with roller bearing mainsail luff track hardware. The Facnor equipment is nicely made and revolves around one track size, with the cars getting progressively bigger for larger sail/boat applications. They offer systems suitable for sails up to 130 square meters.or roughly 1,400 square feet.

Facnor track car toggle/Stud with a Sailman box.

Facnor track car toggle/Stud with a Sailman box. The track size stays the same but the cars get progressively bigger for bigger loads.


SELDEN: offers a hybrid in their MDS system. This however requires a new spar tube since the Selden cars run inside a special cavity extruded into the tube, so rather impractical unless you are getting a new mast or boat as in fact this owner was doing-A Saga 43 in this case. Selden also has a track and ball bearing system called RCB in two sizes. Selden calibrates the correct equipment based on the boat’s displacement. This system is interesting because it has a novel way of easily disconnecting the sail from the cars, the latter thus stay on the spar.

These four all use a dedicated track.

TRACK ATTACHMENT: There are four ways to attach the track to the spar. Either fasten the track to the spar with the appropriate sized metal thread fasteners. Use the connection slugs offered by the equipment maker, slide the tack into the mast groove-Tides and Dutchman or glue it on, for Carbon  spar applications

RONSTAN: has a cross over product called a Ballslide that has recirculating ball bearings in the car and a variety of screw-in shapes they call “feet” that will, at least in my experience, fit any mast groove one is likely to find. This is one of the hybrid products.

RUTGERSON: Another hybrid slider with ball bearings, albeit really small ones, is from a long established Swedish sailing hardware firm called Rutgerson. Their products are distributed in the US by Challenge Sail cloth, another supplier of sail making bits and pieces to the trade. The Rutgerson cars/sliders look like a beach or moon buggy and the bearings are in the wheels of the buggy.

DUTCHMAN SYSTEMS: From the folks who brought you The Dutchman flaking system, is their entry in the luff track stakes. The Dutchman has two versions. A dedicated track option and a track-less roller bearing cars option. The later has a similar “Beach Buggy” looking batten slider, see below.

CARS/SLIDES WITHOUT ball bearings:

BAINBRIDGE- ALLSLIP: At the simple end of the spectrum there are “regular” luff slides that can operate in the masts own luff groove and do not need a dedicated track. The most common slides one step up from merely using the slide the sailmaker would use regardless of whether the sail had FLB or not, are called Allslip Slides. They are marketed in the US through Bainbridge, one of the main suppliers to sailmakers of the nuts and bolts of every-day sail making as well sailcloth. Allslip slides are made from a low friction plastic, not nylon as the bulk of the rest of the luff slides are.
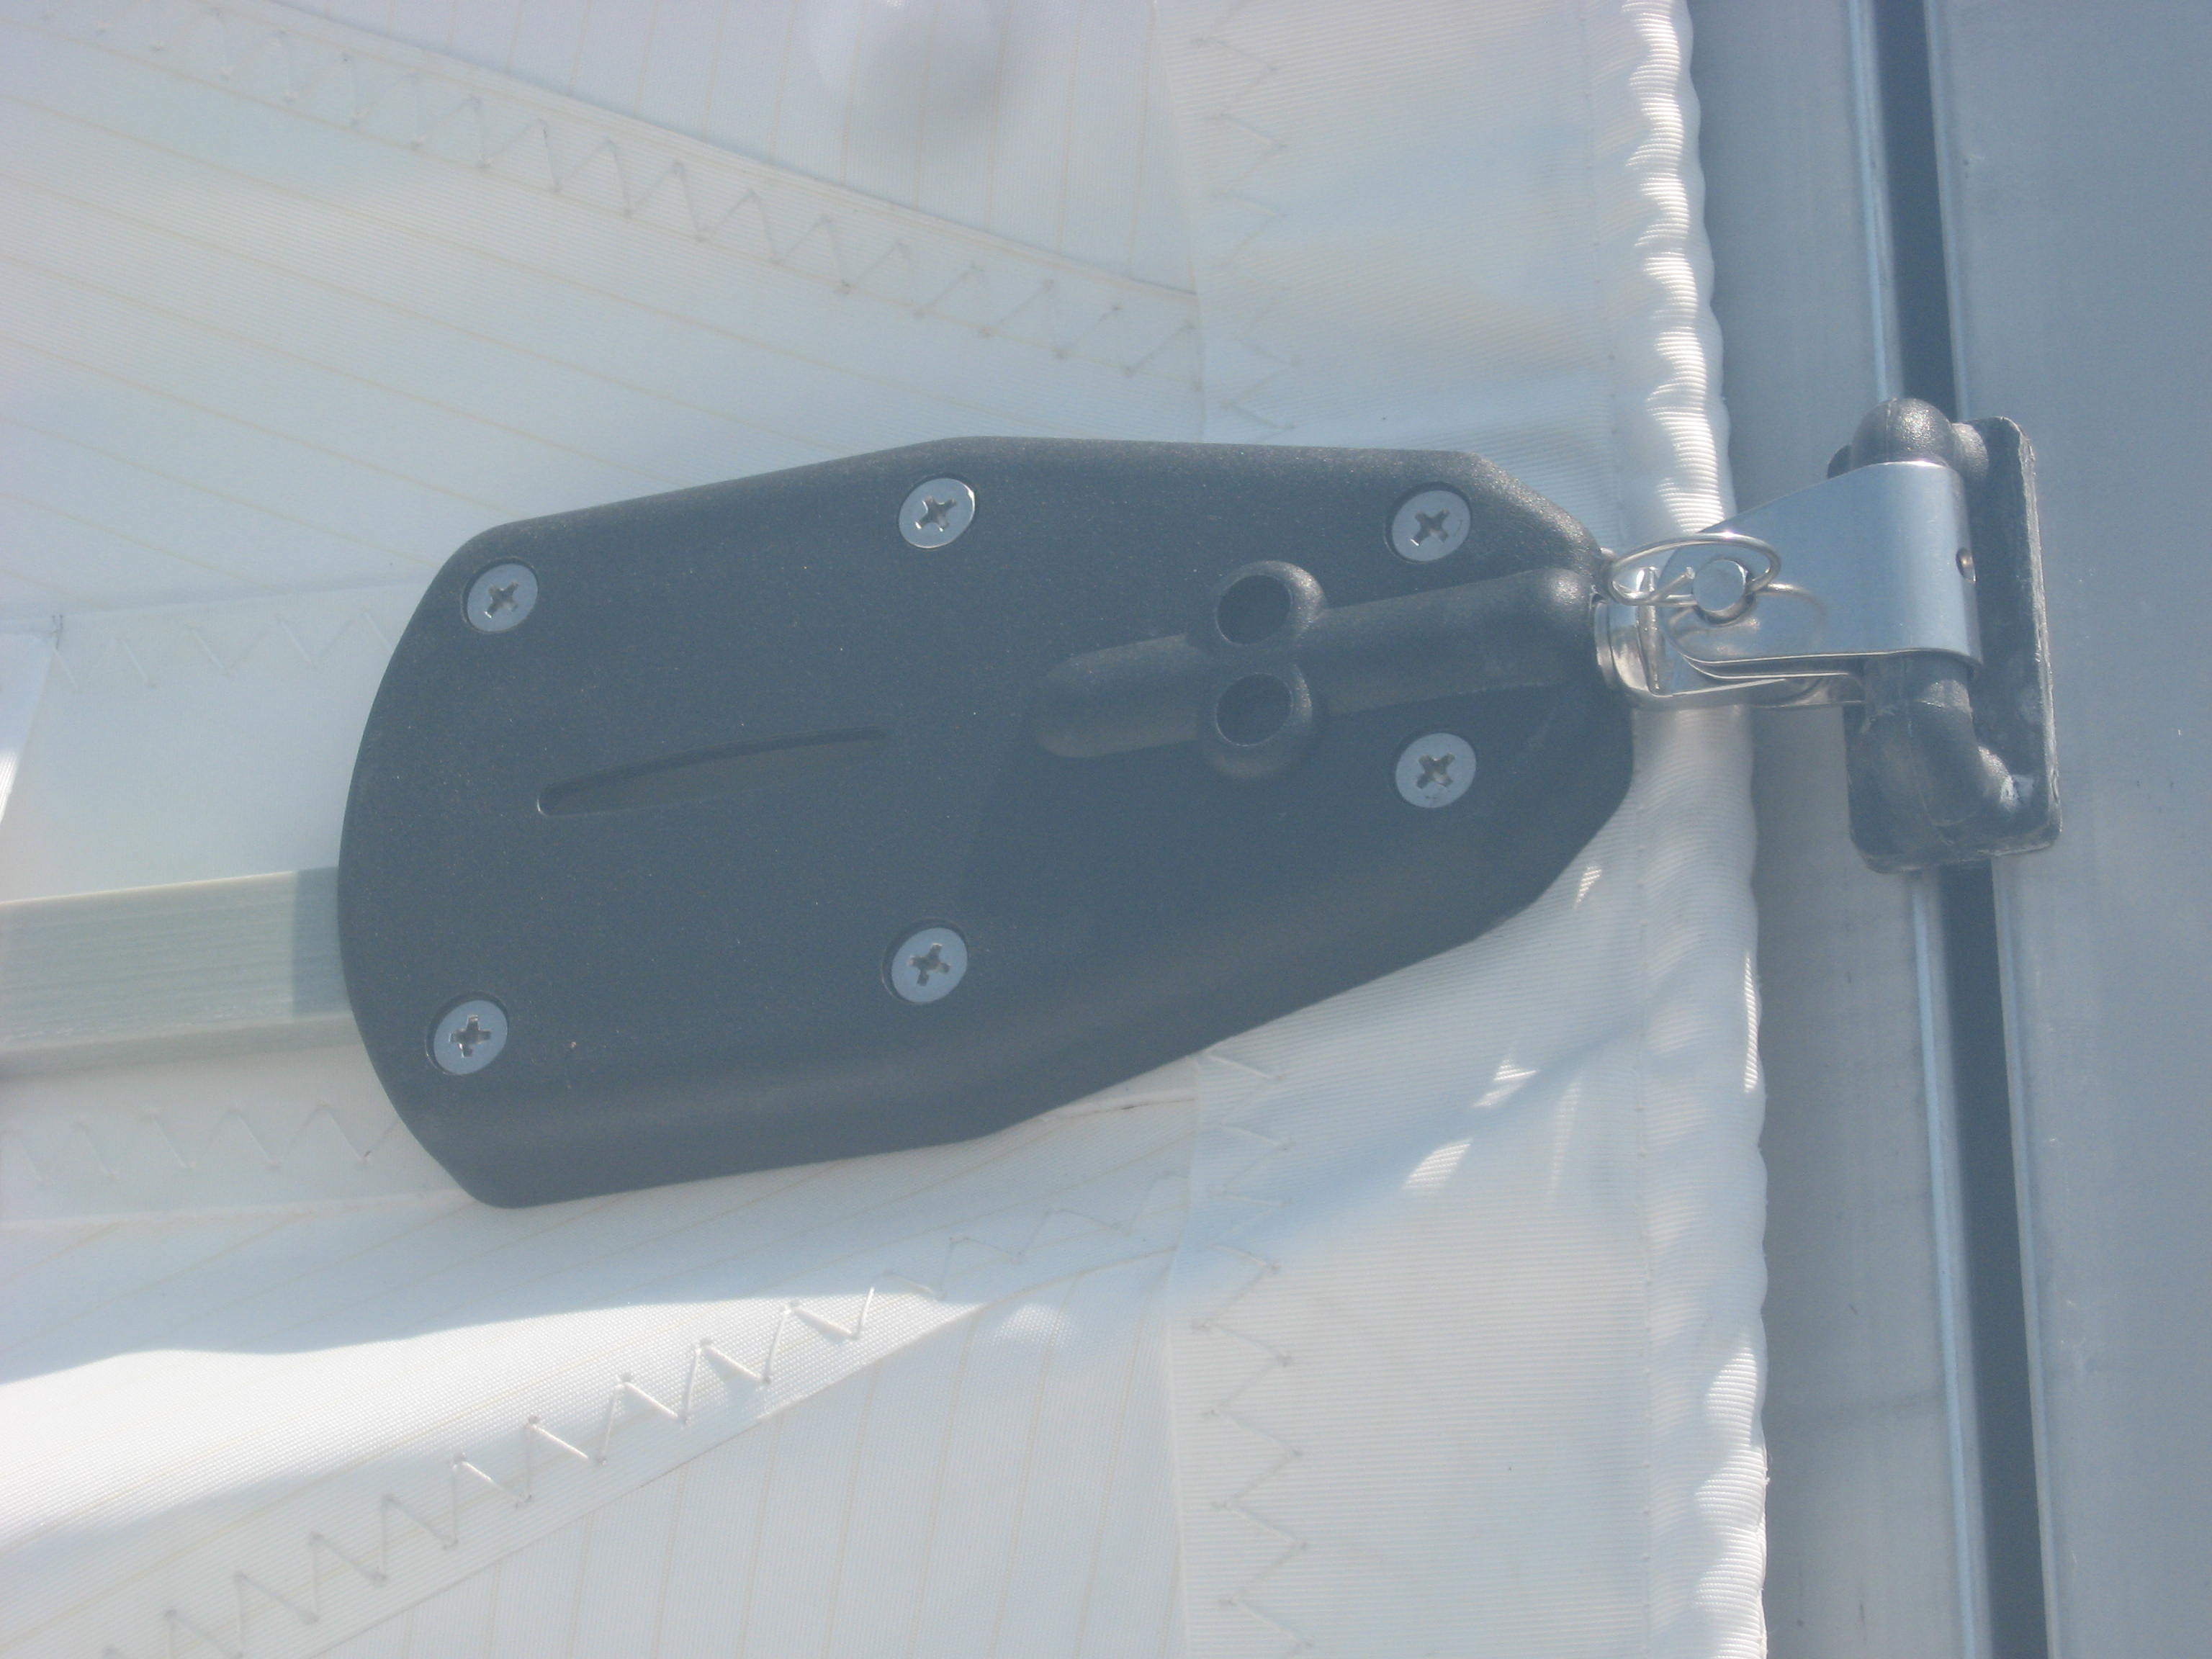
A Bainbridge Allslip slide with a stud to a PNP batten box.

A Bainbridge Allslip slide with a stud to a PNP batten box. When using Allslips, there needs a toggle with a slightly different front end, where it connects to the handle on the slider.Regardless of the connection to the slider the box connection will use an M10 or M12 thread.

Bainbridge also offers their own integrated FB line they call Sailman. Sailman consists of a range of slides, toggles and boxes for three varying sizes of boat or sail area.  The toggles they use in the Sailman can also be used with the Allslip slides. This feature works particularly well with Selden spars whose luff groove profiles are unique to their mast sections.

TIDES TRACK: A company based in Florida called Tides Marine, that is in the slippery plastic business, offers a high value product.  This is an extruded low friction plastic that comes rolled up in a spool, like a garden hose thus minimizing shipping costs. The requisite number and type of slides go to the sail maker. The track mates to your existing mast track, particulars of which are determined by a set of templates they send you or their dealers have. Propriety stainless steel slides that work only in their track (and others slides do not…) are available in three sizes of height: Intermediate, batten or reef slides and head slides. They are roughly 1”, 2” and 3” tall respectively.  Tides offer their own batten “boxes” aka receptacles but these are leech loading only.

DUTCHMAN SYSTEMS: The ever enterprising Martin Van Breems is also in this arena with two products. One is similar to the Ronstan Ball slide and the other is a track system product similar to Tides System using a low friction plastic proprietary extruded track and dedicated sliders. The Ball slide version incorporates small SS balls in wheels that run on the outside of the spar’s groove to accept the compression from the FLB and look largely like the Rutgerson moon buggy design.

The main difference between the Dutchman dedicated track version and Tides product is the Tides slides run INSIDE their track and the Dutchman system runs on the OUTSIDE of their track. The second important difference is the Dutchman track system hardware is unique to Dutchman.Thus no other cars or sliders will fit on the track and they do not have the ability to use third party toggles or batten boxes.

ANTAL: is a prominent Italian manufacturer of all sorts of sailboat hardware hardware. They have a dedicated track with slider system. These sliders have a low friction fiber composite insert. Antal also has roller bearing cars at the upper end of their range. They too come in a variety of sizes suitable for smaller boats up to 100 feet. They offer their own propriety batten boxes. Their batten sliders come with the virtual industry standard 10 mm and 12 mm threaded studs.

SCHAEFER MARINE: also has an offering in this non-ball bearing field. They have a selection of “normal” sliders, toggle connectors and the very widely used original Battslide batten boxes. They also have a dedicated track one can install but I have never seen the advantage of this unless the spars extruded track is damaged in some way. They offer a wide cross section of sliders to fit probably all mast sections built in the US in the past 50 years, With and with out “rigid” toggles, but attached by shackles to the slider. Thus their products is frequently seen on smaller boats where the proportional cost of Full Length battens and related hardware is a bigger percentage than on a larger boat.


Next up: The Battens followed by “all the things you didn”t know, you didn’t know…